


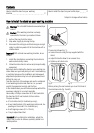


In the stands drawer you will find an envelope with all the
necessary material for a correct assembly. Have ready a
Phillips screwdriver to fit rear brackets to the stand and
an Torx screwdriver to fit rear brackets to the machines
back.
The pack includes:
• 2 grey short rubber feet to be used for the following
tumble dryer models:
• 2 white long rubber feet to be used for the following
tumble dryer models:
• 6 rear metal brackets (4 for washing machine and 2 for
tumble dryer) ;
• 6 self-tapping screws (4.2 x 13 mm);
• 1 key to adjust the stands feet.
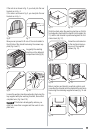
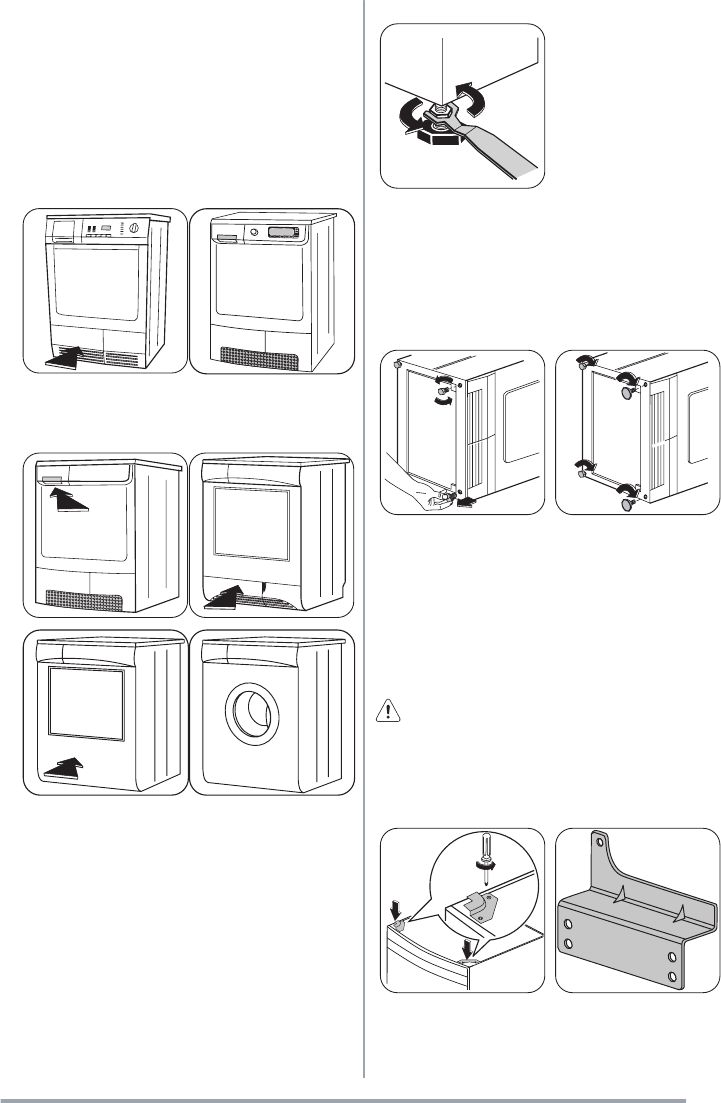
Important! Before starting the installation, adjust the
stand's feet in order to achieve a perfectly stable hori-
zontal position.
fig. 2
Proceed as follows (fig. 2):
• loosen the nuts using the key supplied with the
stand;
• adjust the feet to allow for an uneven floor;
• tighten up all check nuts.
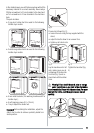
fig. 3 fig. 4
Lay the machine on its left
side, making sure you do
not damage it. Remove the
front feet (fig. 3) and re-
place them with the rubber
ones.
Tighten the back feet (fig.
4).
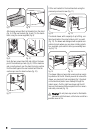
Warning! If you install the stand under an energy
saver model Class A, you must not use the tumble
dryer immediately. Please wait 8 hours at least. For more
detailed information, read the appliance user manual
carefully.
fig. 5
SX
fig. 6
5