


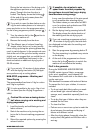
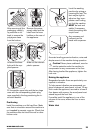


After removing all the
packaging, carefully
lay machine on it's
back to remove the
polystyrene base
from the bottom.
Remove the power
supply cable and the
hose from the hose
holders on the rear of
the appliance.
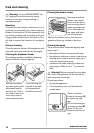
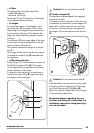
Unscrew the three
bolts with the sup-
plied spanner.
Slide out the relevant
plastic spacers.
Fill the smaller upper hole and the two large
ones with the corresponding plastic plug
caps supplied in the bag containing the in-
struction booklet.
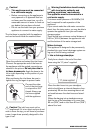
Positioning
Install the machine on a flat hard floor. Make
sure that air circulation around the machine is
not impeded by carpets, rugs etc. Check that
the machine does not touch the wall or other
kitchen units.
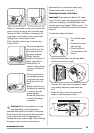
Level the washing
machine by raising or
lowering the feet. The
feet may be tight to
adjust as they incor-
porate a self locking
nut, but the machine
MUST be level and
stable. If necessary,
check the setting with
a spirit level.
Any necessary ad-
justment can be
made with a spanner.
Accurate levelling prevents vibration, noise and
displacement of the machine during operation.
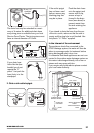
Caution! Never place cardboard, wood or
similar materials under the machine to
compensate for any unevenness in the floor.
After having levelled the appliance, tighten the
lock nuts.
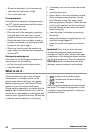
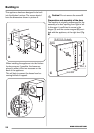
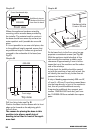
Raising the appliance
Suspended wooden floors are particularly sus-
ceptible to vibration.
To help prevent vibration we recommend you
place a waterproof wood panel, at least 15 mm
thick under the appliance, secured to at least 2
floor beams with screws, the wood panel must
extend beyond the front feet.
If possible install the appliance in one of the
corners of the room, where the floor is more
stable.
Water inlet
25
www.zanussi.com