


15, 30, & 60 cfm Compact Dryers 14
Chapter 3: Installation
3-1 Uncrating the Equipment
Dehumidifying Dryers are shipped mounted on a skid, enclosed in a plastic wrapper, and
contained in a cardboard box.
1. Pry the crating away from the skid.
Note: Remove the nails holding the box to the skid and lift the box
off carefully; avoiding staples in the 1’ x 4’ wood supports.
Cut the steel banding.
2. Use a pry bar to remove the blocks securing the unit to the skid.
3. Lift unit from sides. Use a pry bar if necessary to carefully remove the
skid from the unit.
4. Lower slowly.
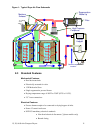
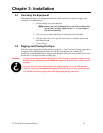
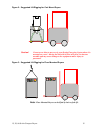
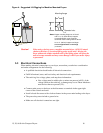
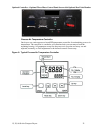
3-2 Rigging and Placing the Dryer
Take care when rigging and placing the dryer. Figures 1, 2 and 3 on the following pages show
a suggested safe rigging diagram. It lets you lift the dryer/hopper unit vertically for
installation on the machine throat. Adjust chain lengths at the center sling bracket before you
lift the unit. Your dryer has built-in lifting lugs.
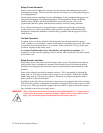
Caution! If you are mounting a machine-mount dryer with a magnet or transition adaptor on the
machine throat, you must provide additional support to hold the dryer securely on the
machine.
Be aware that off-center static and dynamic hopper loading can occur with machine
vibration. Again, provide additional support to hold the dryer securely on the machine.
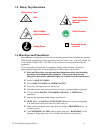
Use caution and observe safety rules when lifting and placing your dryer!