


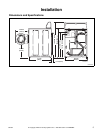


Installation
13
801561
© Copyright, Alliance Laundry Systems LLC – DO NOT COPY or TRANSMIT
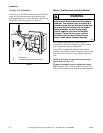
Step 8: Check Installation
Refer to Installer Checklist on the back cover and
make sure that unit is installed correctly.
Moving Unit to a New Location
To prevent damage while moving the unit, the
shipping materials MUST BE reinstalled.
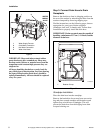
Reinstallation of Shipping Materials
Disconnect washer from electrical supply.
Remove front access panel by removing two screws.
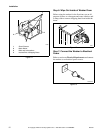
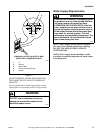
Place the shock sleeves on all four shock absorbers.
Refer to Figure 14.
Insert hooked end of shipping brace into the open slot
of the motor mount. Attach with bolts and lockwashers.
Refer to Figure 14.
Reinstall front access panel.
Figure 14
Refer to step 5 for proper procedures whenever the
unit is moved.
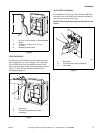
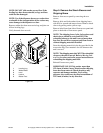
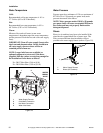
Electrical Requirements
NOTE: The wiring diagram is located behind the
control panel, inside the control hood.
Figure 15
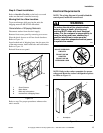
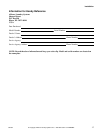
NOTE: Refer to the washer nameplate for proper
voltage and Hertz the washer is designed to operate
on. Refer to Figure 16.
Figure 16
H336I
1 Shock Sleeves
2 Motor Mount
3 Bolts and Lockwashers
4 Hooked End of Shipping Brace
2
1
4
3
D009I
H129P
1 Nameplate
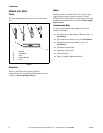
To reduce the risk of fire, electric shock,
serious injury or death, all wiring and
earthing MUST abide with local electrical
codes. It is the customer’s responsibility to
have the wiring and fuses checked by a
qualified electrician to make sure the
laundry room has adequate electrical power
to operate the washer.
W246
WARNING
DO NOT OVERLOAD
CIRCUITS
DO NOT USE AN
ADAPTER
DO NOT USE AN
EXTENSION CORD
1