GB
9
3.7 FITTI NG T HE FURNIT URE DO ORS
Once the washer dry er has been correctly installed and commissioned, the f urniture door can be f itted following
the dimensions on the template and the instruction enclosed in the washer dry er packaging.
Please note that only f urniture doors of a thickness between 16mm and 21mm are compatible with this washer
dry er.
Important – The machine complies with the current safety provisions governing electrical equipment. It
must be installed by a specialised technician in compliance with the current standards in order to prevent
it from becoming a potential danger for the user.
3.7.1 How to fit the furniture door
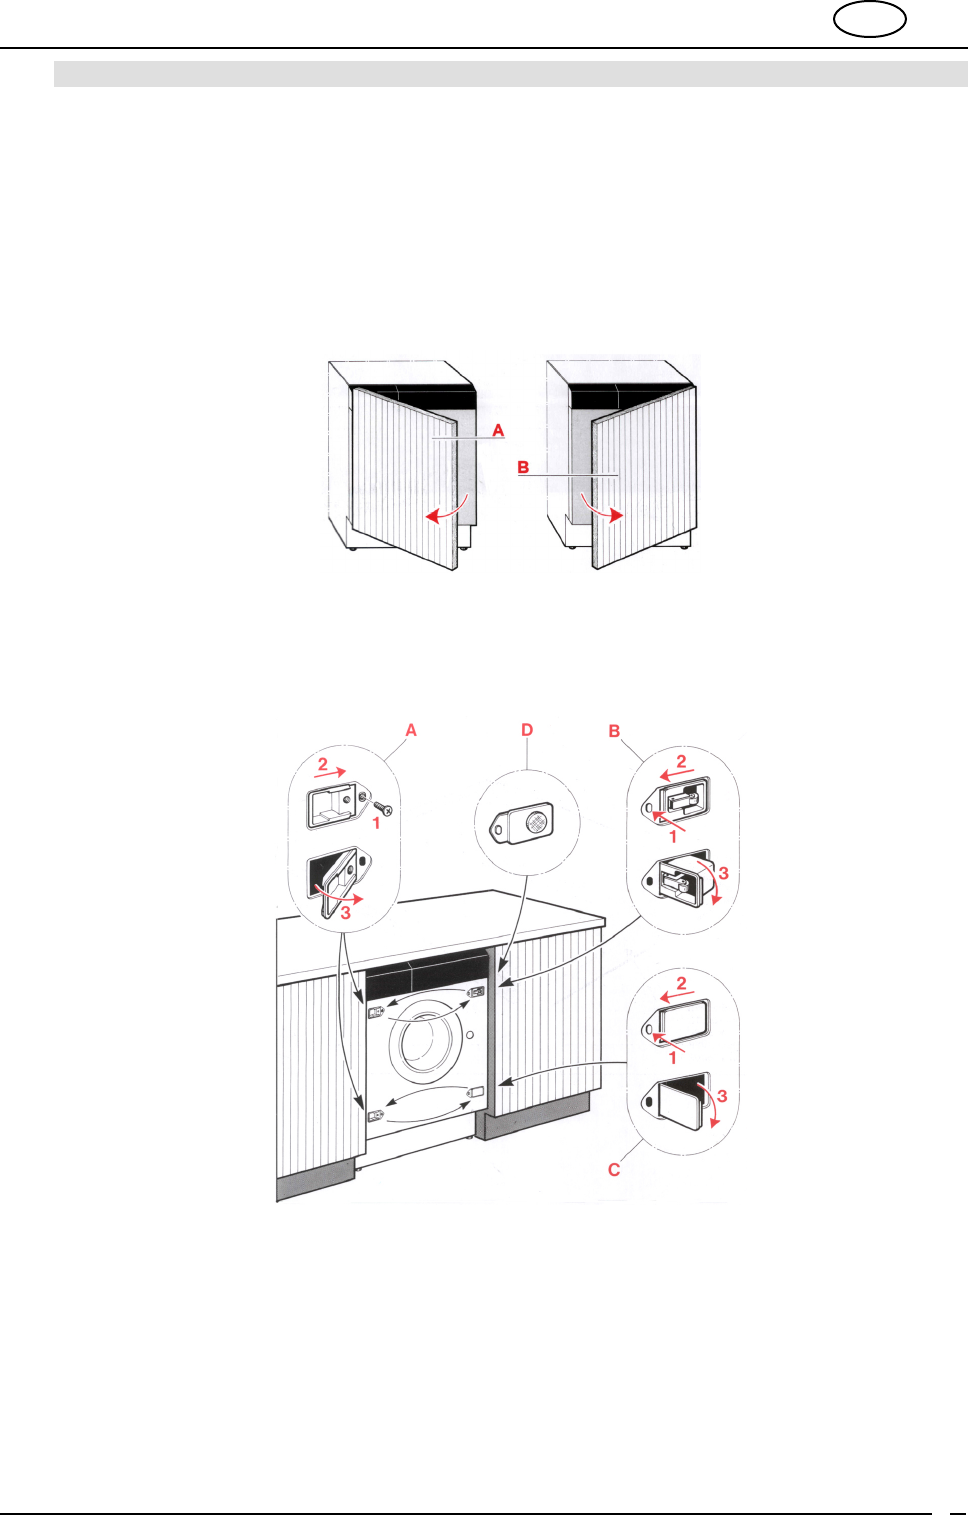
The furniture door that cov ers the front can be hinged on either the left side or right side.
For pratical reasons, it is adv isable to maintain the same opening direction as the glass door (with hinges applied
to the left-hand side).
The appliance has hinge supports on the lef t-hand side, whilst the push-push closing system is mounted on the
upper right-hand part.
If the magnetic closing mechanism is required, remov e the existing component (B) and install the component (D)
as illustrated below.
Important! Ensure that the appliance is disconnected from electricity supply before installing the furniture
door (during which all hinging and closing mechanisms must be removed from the front) on to the washer
dryer).
Warning – To hinge the panel on the right-hand side (opening direction opposite to that of the glass door),
completely remov e the hinge supports (A), the closing hook (B), the lower bearing plug of the rubber plug (C) from
the f ront part of the machine and fit them to the opposite side.
All parts fitted to the front of the washing dryer must be correctly remounted (no hole must be left open). This will
prev ent users f rom touching liv e parts of the appliance.
Our company declines all responsibility for damage caused by failure or negligence in complying with
these safety provisions.


