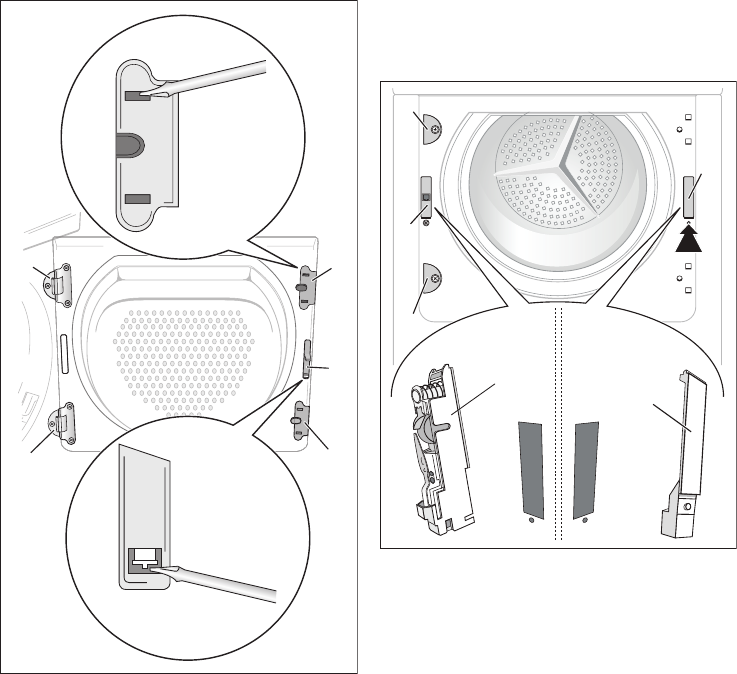
4. Use an appropriate tool and exert
pressure to unfasten locking block C
from the snap-on fixture, take out and
re-insert on the other side having
rotated the block through 180°.
5.
Unscrew hinge A from the loading
door, rotate through 180°, re-insert on
the opposite side and screw down.
6.
Re-insert cover plates Bon the opposite
site having first rotated them through
180°.
A
C
A
B
B
7.
Unscrew cover plates D from the front
of the machine, rotate through 180°,
screw on the opposite side.
8.
Unscrew door lock E, push down
slightly and remove from the front of
the machine.
9.
Press snap-in button F in and down,
press cover down slightly and remove
from front of the machine.
10.
Change door lock E over to the
opposite side, screw down the door
interlock.
11.
On the other side, insert cover F and
allow snap-in button to lock into place.
12. Insert loading door and hinges into
recesses on the front of the machine
and screw down.
D
D
E
E
F
F
Note regarding contact protection:
The machine is only secure for operations
again once all plastic parts have been
inserted.
26


