


>10mm
About less than 2mm after twisting
Figure 3
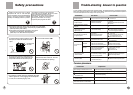
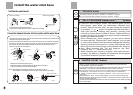
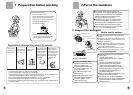
Connection between the water inlet hose jointer and the water faucet
Bushing
About 4mm before twisting
2. Loosen the screw till the water faucet can be accessed. Put the jointer of the water inlet hose on the faucet.
See to Figure 2. (If the faucet is too large and the jointer can not be set on the water faucet, please loosen
the four screws and take out the bushing in the jointer. The front end of the faucet must be smooth,
otherwise it may leak water. See to Figure 3.)
1.Press the lower end of the lock lever and push down the slider. Take off the water inlet hose jointer from the
water inlet hose component. See to Figure 1.
Water faucet,not suitable
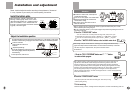
Install the water inlet hose
Screw
It is required that the front end shall be longer than 10mm.
The exit end face of the faucet shall be flat and smooth. If not please file it to avoid leakage.
remark: Before installation, the threading is 4mmabove the upper surface of the nut.
After installation, the threading is 2mm above the upper surface of the nut. See to figure 6.
Figure 6
Sign plate
4 Take off the nameplate. Twist the fastening nut as per the indication of the figure
to seal up the exit end face of the faucet. See to Figure 5.
Figure 2
Screw nut
Screw knife
3.Fasten the four screws evenly. See to Figure 4.
water inlet hose jointer
Figure 5
Outlet end surface
Slider
Figure 1
Water faucet,suitable
water inlet hose
Figure 4
Lock level
Confirm the water faucet
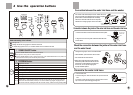
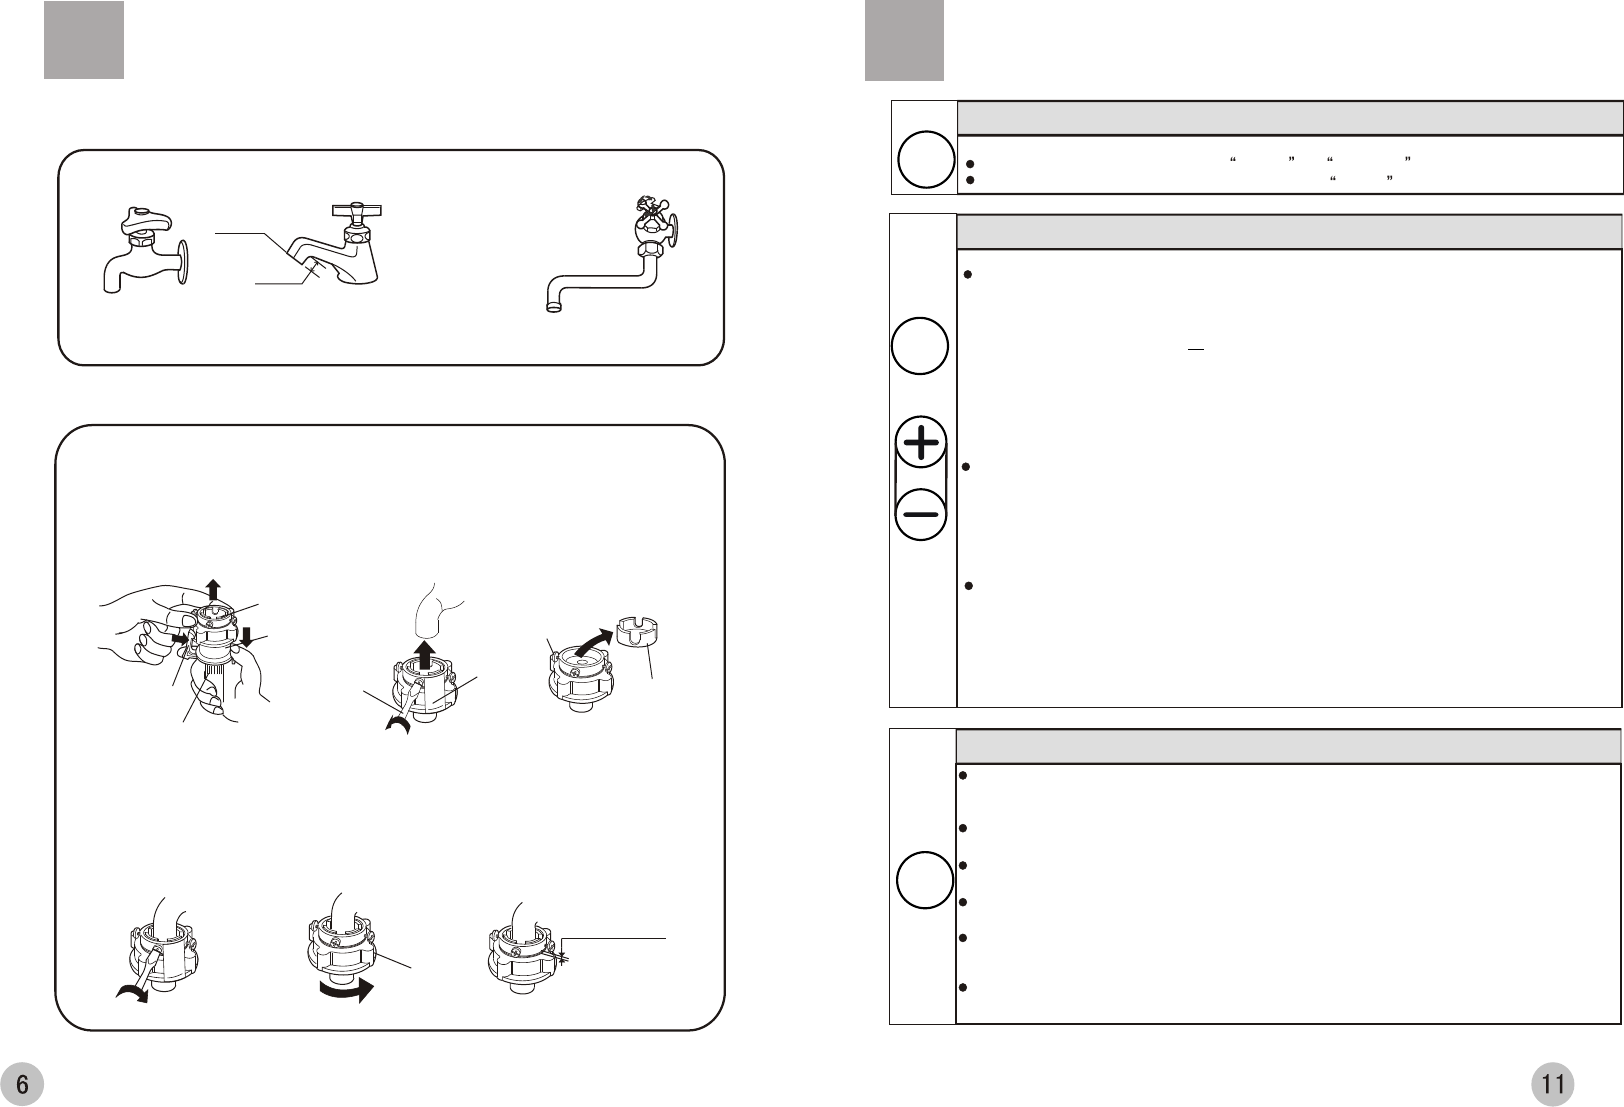
3 "PROCESS"button
You can choose one or more process among soak, wash, rinse, spin.
The button is invaid if you choose QUICK or TUB DRY program.
You can not choose soak process if you choose WOOL program.
During operation of wash , rinse and soak program, you can push down the water level
button to add water. When you release the button, or it reaches the overflow water level, the
machine will stop adding water.
The water level decided may be different from actual value because of the different moisture
level of the laundries.
During standard programs, the washing machine can detect the laundries automatically. After
detection, it will set the water level to suitable valve automatically among the water level
LOW , MEDIUM , HIGH and
.
" " " " " " "MAXIMUM".
You can also set water level by yourself. After the machine is started, it will not set water level
automatically. You shall push the START/PAUSE button to make new setting.""
If there's water inside the tub, the machine can not detect the laundries and will display water
level "MEDIUM" .If wet aundries are put in, it may display water level "MAXIMUM" .
If "QUICK" program is selected, it will display water level "LOW". The water level can not
be adjusted.
5 WATER LEVEL button""
4 button and + button"SELF-PROGRAM" " " " -"
PROCESS
WATER
LEVEL
Press the "Self-Program" button, the machine goes into the
self-program state when the associated indicated light
flickers. About 3 seconds later, you can change the program
by pressing "+" or " " button, to adjust reserved time (hour),
soak time (minute), washing time (minute), spinning time
(minute) or rinsing times (number of times) . When the time or
number of times is 0, it means you cancel all the functions the
flicker lights associated with.
When choosing the "quick" program, you can add or reduce
the reserved time. Choosing the "wool" program, you can add
or reduce the reserved time but cannot change the washing,
spinning time and rinsing times, it means the washing time,
spinning time and rinsing times are defaulted time, times or
zero. When choosing the "Tub dry" program, the "Self-
Program" and "+" "-" button are invalid.
When choosing the "memory" program, after using the self-
program, the washing machine will remember the programs
you set this time when you use it next time.
SELF-PROGRAM