


DE
EN
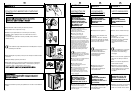
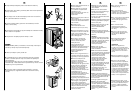
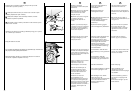
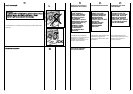
Ausrichten der Maschine
über die vorderen
Verstellfüße
a) Kontermuttern im
Uhrzeigersinn lösen.
b) Standfuß einregulieren,bis
das Gerät genau
ausgerichtet ist (möglichst
mit der Wasserwaage
justieren!).
c) Kontermuttern (gegen
den Uhrzeigersinn) festziehen.
Wichtig: Sollte das Gerät auf
einen Sockel aufgestellt
werden,ist es durch eine
Sockelbefestigung zu sichern.
Erkundigen Sie sich bitte
hierfür im Fachhandel.
Der Hersteller haftet nicht für
unsachgemäße Aufstellung
und Installation.
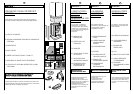
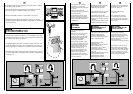
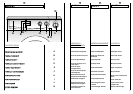
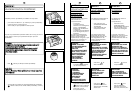
Sicherstellen,daß die Start-
Stop-Taste (C) nicht gedrückt
ist.
Sicherstellen,daß alle
Schalter auf “0”stehen,und
das Bullauge geschlossen ist.
Stecker einstecken.
Nach der Installation muß der
Anschluß zugänglich sein.
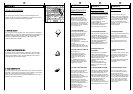
Bei Betätigen der “START”
Taste leuchtet die
Leuchtanzeige auf.Sollte dies
nicht der Fall sein,bitte im
Kapitel “Fehlersuche”
nachsehen.
Use front feet to level the
machine with the floor.
a) Turn the nut clockwise to
release the screw adjuster of
the foot.
b) Rotate foot to raise or
lower it until it stands firmly on
the ground.
c) Lock the foot in position
by turning the nut anti-
clockwise until it comes up
against the bottom of the
machine.
Ensure that the Off/On
button (C) is not pressed.
Ensure that all the knobs are
on the “0”position and that
the door is closed.
Insert the plug.
After installation,the
appliance must be
positioned so that the plug is
accessible.
Press the START (C) button.
The power on (N) light will
light up.
If this does not light up see
faults search.
21
PT
Nivele a máquina
regulando a altura dois pés
dianteiros.
a) Rode a porca no sentido
dos ponteiros do relógio
para soltar a rosca de
fixação do pé.
b) Rode a pé para o erguer
ou baixar até estar
firmemente assente no
chão.
c) Fixe o pé nessa posição
rodando a porca no sentido
contrário co dos ponteiros
do relógio até embater no
fundo da máquina.
Assegure-se de que a tecla
de ligar/desligar (C) não
esteja premida.
Assegure-se de que todos os
botões da máquina estejam
colocados na posição “0”e
de que a porta da máquina
esteja fechada.
Ligue a máquina à corrente,
inserindo a ficha do
respectivo cabo de
alimentação na tomada.
Depois da instalação,os
acessórios devem estar
posicionados,pelo que a
tomada deve estar num
local acessível.
Pressione a tecla de
ligar/desligar (C).O
indicador luminoso de que
a máquina está ligada (N)
iluminar-se-á.Se,porém,este
indicador luminoso não se
acender deverá consultar o
capítulo “Eliminação de
Avarias”.
20
A
B
C
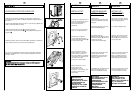
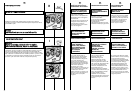
Praöka má 2 pohyblivé noïiöky, kterÿmi lze vyrovnat
vodorodnou polohu praöky.
aa))
Otáöejte maticí äroubu po smëru hod. ruöiöek a pak
måïete püizpåsobit vÿäku noïiöky.
bb))
Otáöením sniïujte nebo zdvihejte noïiöku, dokud
perfektnë nepüilne k podlaze.
cc))
Upevnëte polohu noïiöky otoöením matice äroubu proti
smëru hod. ruöiöek.
Ujistëte se, ïe väechny knoflíky (ovládací prvky) jsou v pozici
”0” a dvíüka jsou zavüená.
Zapojte záströku do sítë.
Po instalaci spotfiebiãe se ujistûte, Ïe spotfiebiã je umístûn tak,
aby byla snadno pfiístupná zásuvka.
Stisknëte tlaöítko START (C). Rozsvítí se dioda N. Pokud se
nerozsvítí, najdëte si kapitolu Poruchy.
CZ