


5
5. Turn the Temperature Dial in
clockwise direction to maximum
position; pilot light glows.
6. Pilot light goes off when the
required temperature is reached.
7. Move the Steam Control/Self-
Cleaning Knob to position; steam
starts coming out from the holes in
the sole plate.
8. Begin first time ironing with an old
towel.
9. When the water tank is empty and
there is no more steam produced;
the preparation work is completed.
The iron is now ready for proper use.
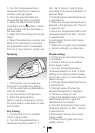
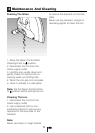
Spraying
1. This function can be used any
time and is not affect any setting.
2. Fill the water tank as described in
How To Fill Water.
3. Aim the nozzle to the garment.
4. Press the Spray Button.
Note: It may be necessary to press
the spray button a few times to start
this function.
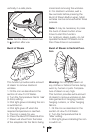
Dry Ironing
1. Connect the iron to a suitable
mains supply outlet.
2. Turn the Temperature Dial in
clockwise direction; select ‘•’ (1
dot), ‘••’ (2 dots) or ‘•••’ (3 dots)
according to the recommendation of
garment label.
3. Pilot light glows indicating the iron
is switched on.
4. When the required temperature is
reached; pilot light goes off. The iron
is ready for use.
5. Move the Temperature Dial in anti-
clockwise direction to ‘Min’; the iron
is switched off.
6. Disconnect the iron from mains
supply outlet.
7. When the iron gets cool complete-
ly, store it vertically in a safe place
Steam ironing
1. Fill the iron as described in How
To Fill Water.
2. Connect the iron to a suitable
mains supply outlet.
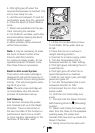
3. Turn the Temperature Dial in
clockwise direction to ‘•••’ (3 dots)
setting. (For optimum steam quality,
do not use 1 dot or 2 dots setting for
steam ironing)
4. Pilot light glows indicating the iron
is switched on.
5. Pilot light goes off when the
required temperature is reached.
6. The iron is ready for use.
7. Move the Variable Steam Control/
Self-Cleaning Knob to give the
desired amount of steam.
8. Turn the Temperature Dial in anti-
clockwise direction to ‘Min’; the iron
is switched off.
9. Disconnect the iron from mains
supply outlet.
10. When the iron gets cool com-
pletely, store it