


Page 5
ENGLISH
ENGLISH
ELECTRICAL CONNECTIONSELECTRICAL CONNECTIONS
The machine is delivered ready-fitted with a plug and is
intended for connection to an ASKO Dryer, which is
equipped with a matching receptacle. The plug supplied
with the washer can only be used with an ASKO Dryer.
If the washer is used separately or with another dryer, it
must be on a separate 220 V single-phase circuit.
If the machine is to be used in a wet area, the supply
must be protected by a residual current device.
As supplied: 230 V, 60 Hz
2000 W heating element
15 A fuse required
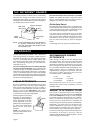
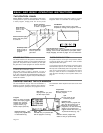
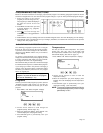
DRAIN OUTLET CONNECTIONDRAIN OUTLET CONNECTION
The machine is supplied with the outlet hose already
attached. The hose should be extended over a suitable
sink edge or drain pipe at a height of 24” to 36” (610
mm to 914 mm) above the bottom of the unit. (The lower
height is preferable.) Make sure that the hose is not
kinked.
NOTE: If the hose is extended, the internal diameter
of the coupling must not be less than 1/2”.
WARNING!
Do not extend the drain hose higher
than 36” (914 mm) from the bottom of
the unit.
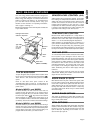
FREESTFREESTANDING INSTANDING INSTALLAALLATIONTION
The washer can be placed next to the dryer. It is
essential that the machine is leveled and the locknuts
tight to prevent excessive vibration during the spin
cycles. Also be sure to leave a minimum of 1/2”
(12 mm) of space between the washer and the dryer.
The height adjustment for the washer is 33-1/2” to
34-1/2” (850 mm to 876 mm). Do not raise it higher
than 34-1/2”.
STSTAACKED INSTCKED INSTALLAALLATIONTION
ASKO washers should never be stacked on a counter
or a dryer. You can, however, stack an ASKO dryer on an
ASKO washer. Refer to your Dryer Use and Care Guide
for instructions on how to do this.
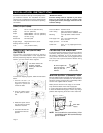
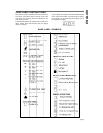
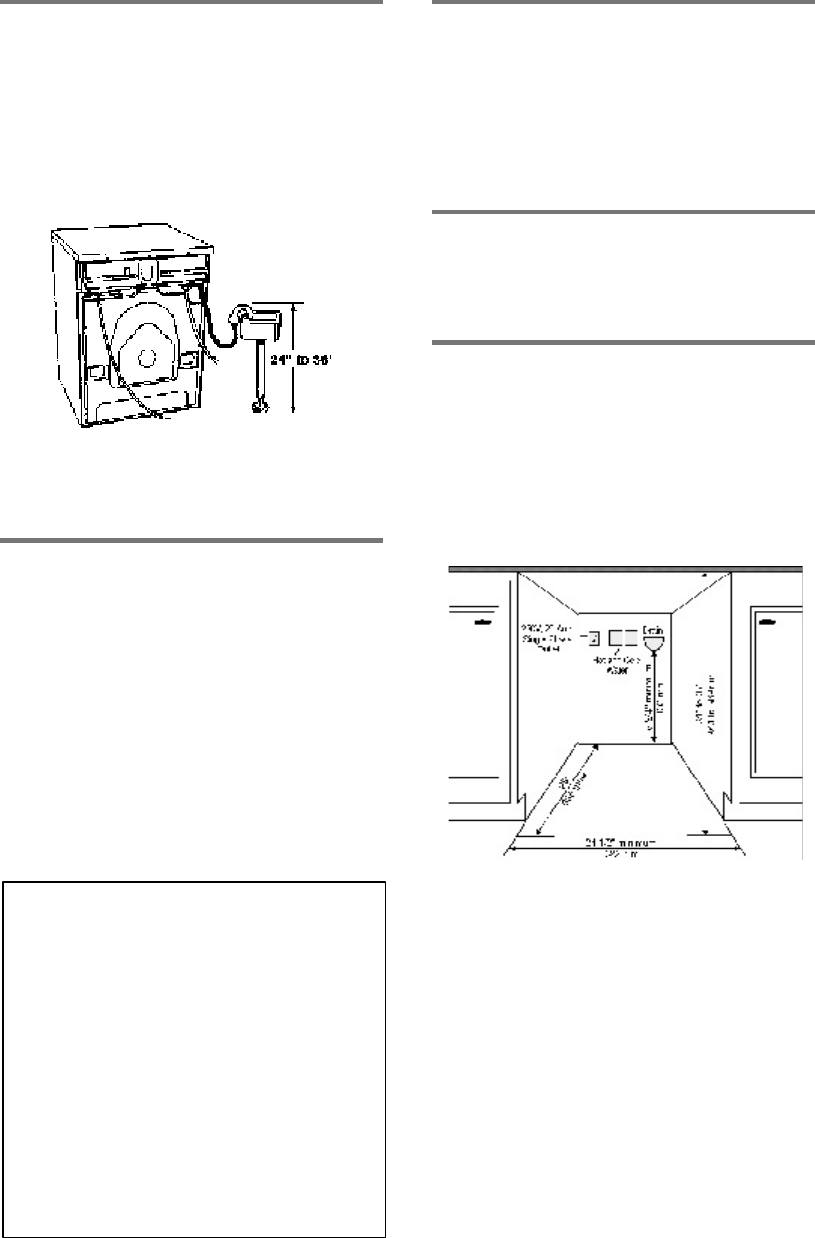
BBUILUILTT-IN INST-IN INSTALLAALLATIONTION
ASKO washers can be installed beneath a cabinet or
worktop with a height of 34-1/2” ( 876 mm). There must
be a gap of about 1/2” (12 mm) all around the machine,
including between the rear edge of the machine top
panel and the back wall. The opening width must be at
least 24-1/2” (622 mm).
Space must also be available for the inlet and drain
hoses. See the diagram below for measurements and
positions.
If the drain outlet is higher than 24”, the connections
will need to be recessed.
WARNING!
Connection to a permanently wired
supply point must be made only by a
qualified electrician.
GROUNDING INSTRUCTIONS
This appliance must be grounded. In the event of
malfunction or breakdown, grounding will reduce the
risk of electric shock by providing a path of least resistance
for electric current. This appliance is equipped with a
cord having an equipment-grounding conductor and a
grounding plug. The plug must be plugged into an
appropriate outlet that is properly installed and grounded
in accordance with all local codes and ordinances.
WARNING! Improper connection of the
equipment-grounding conductor can result in a
risk of electric shock. Check with a qualified
electrician or serviceman if you are in doubt as to
whether the appliance is properly grounded.
Do not modify the plug provided with the appliance.
If it will not fit the outlet, have a proper outlet
installed by a qualified electrician.