


8
NA
www.aristonappliances.us
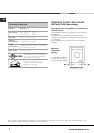
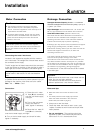
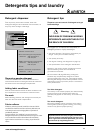
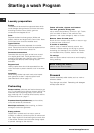
Floor Standpipe Drain
Top of standpipe must
be at least 25 inches (62
cm) high and no higher
than 34 inches (86 cm)
from the bottom of the
washer (A).
Wall Standpipe Drain
Top of standpipe must
be at least 25 inches
(62 cm) min.; 34 inches
(86 cm) max from end of
drain hose to bottom of
washer (B) (See figures
aside and below).
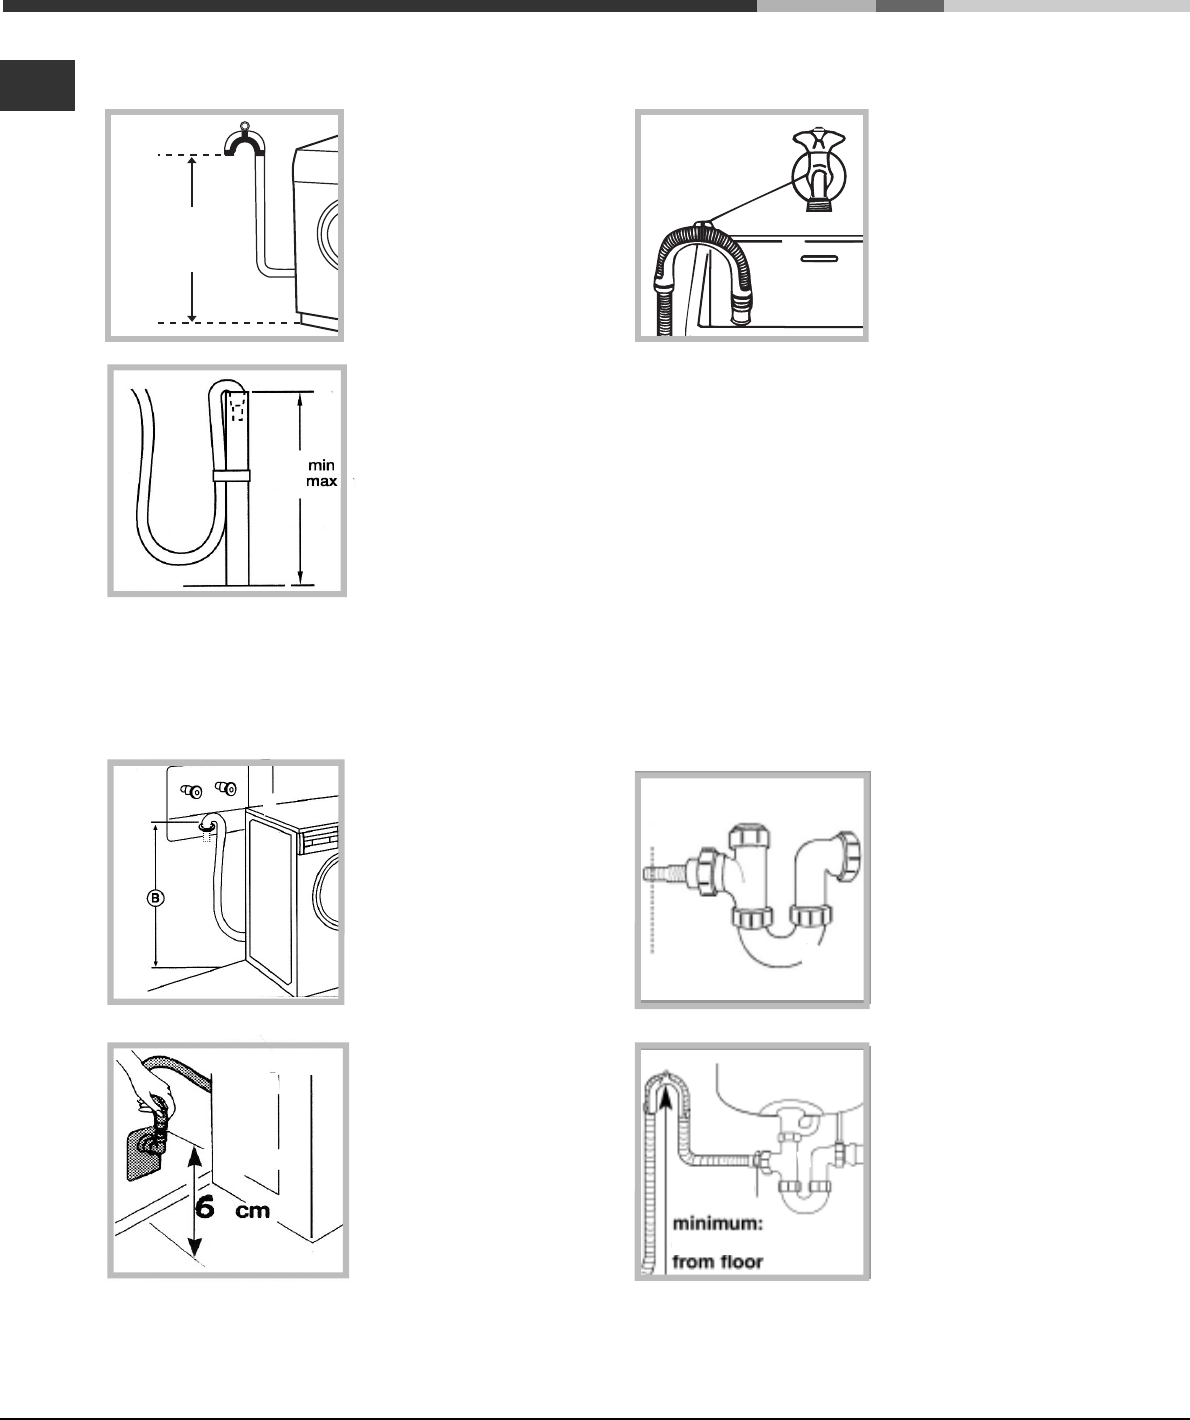
Installation
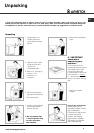
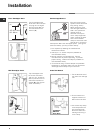
Sink Drainpipe Method
Entry into the sink drain
system must be above the
trap (see fig. aside ).
When routing the drain
hose through cabinets or
walls use aprotective
material such as
electrical duct tape to
cover sharp edges that
could damage the drain
hose. Use a suitable
clamp to secure the drain
hose to the Y branch or
the disposer. With a sink drainpipe system (see figures
aside and below), you may connect directly:
1) to a disposer by following the manufacturers
attachement method.
2) directly to a Y branch tail piece (Available at
most hardware stores).
3) through the floor to a separate trap. The trap
must be vented to prevent siphoning. To provide
proper venting , install an Air Gap Kit (available at
most hardware stores).
4) To the faucet using a Faucet Adapter Kit (available
separately). It will supply water from your faucet and
discharge water directly into your sink drain.
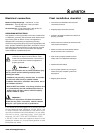
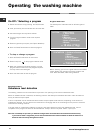
Under Sink Method
1. Cut the blocked end of
the under sink drainage
unit.
2. Fix the hooked end
supporta minimum of
620 mm from the floor.
3. Use a hose clip clamp
to securely attach the
grey drainage hose
end to the under sink
drainage unit using a
hose. clamp
#^
620 mm
Hose
clamp
62 - 86
cm
25"-34"
inches
(A)
25”
34”