


10
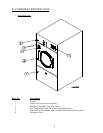
B. UNPACKING AND SETTING UP
Remove protective shipping material (i.e., plastic wrap and optional shipping box) from dryer.
IMPORTANT: Dryer must be transported and handled in an upright position at all time.
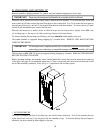
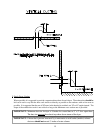
The dryer can be moved to its final location with or without the skid attached. To un-skid the dryer, locate and
remove the four (4) bolts securing the base of the dryer to the wooden skid. Two (2) are at the rear base (remove
the back panel for access), and two (2) are located in the bottom of the lint chamber. To remove the two (2) bolts
located in the lint chamber area, remove the lint door.
With the skid removed, to make it easier to slide the dryer into its final position, slightly lower ALL four
(4) leveling legs, so the dryer will slide on the legs instead of the base frame.
To increase bearing life and improve efficiency, the dryer should be titled slightly to the rear.
The basket (tumbler) is supported during shipping by a wooded block. REMOVE THIS BLOCK BEFORE
STARTING THE DRYER.
IMPORTANT: For microprocessor (computer) models, this wooden block must be removed before
connecting power to the dryer or irreparable damage to the basket (tumbler) will result.
The lint coops of ALL MW-79 dryers are supported during shipping by a bracket. REMOVE THIS BRACKET
BEFORE STARTING THE DRYER.
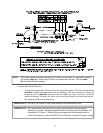
Before operating machine, the humidity sensor located behind the control door must be placed on the outer top
of the dryer (see page 47 for installation intructions). Check to ensure the relay box cover has been put on and
the air filter assembly connected. Forty (40) p.s.i. is required for the air filter system.
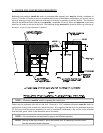
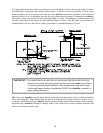
1. LEVELING DRYER
The dryer is equipped with four (4) leveling legs, one at each corner of the base. Two (2) are located at the rear
of the dryer base, and two (2) are located in the lint chamber (coop). To increase bearing life and improve
efficiency, the dryer should be tilted slightly to the rear.