ELECTRIC FRYERS - REMOVAL AND REPLACEMENT OF PARTS
5
REMOVAL AND REPLACEMENT OF PARTS
CONTROL PANELS
WARNING:
DISCONNECT THE ELECTRICAL
POWER TO THE MACHINE AT THE MAIN
CIRCUIT BOX. THERE MAY BE TWO SEPARATE
CIRCUITS. BE SURE BOTH ARE
DISCONNECTED. PLACE A TAG ON THE
CIRCUIT BOX INDICATING THE CIRCUIT IS
BEING SERVICED.
WARNING:
HOT OIL AND PARTS CAN CAUSE
BURNS. USE CARE WHEN SERVICING THE
FRYER.
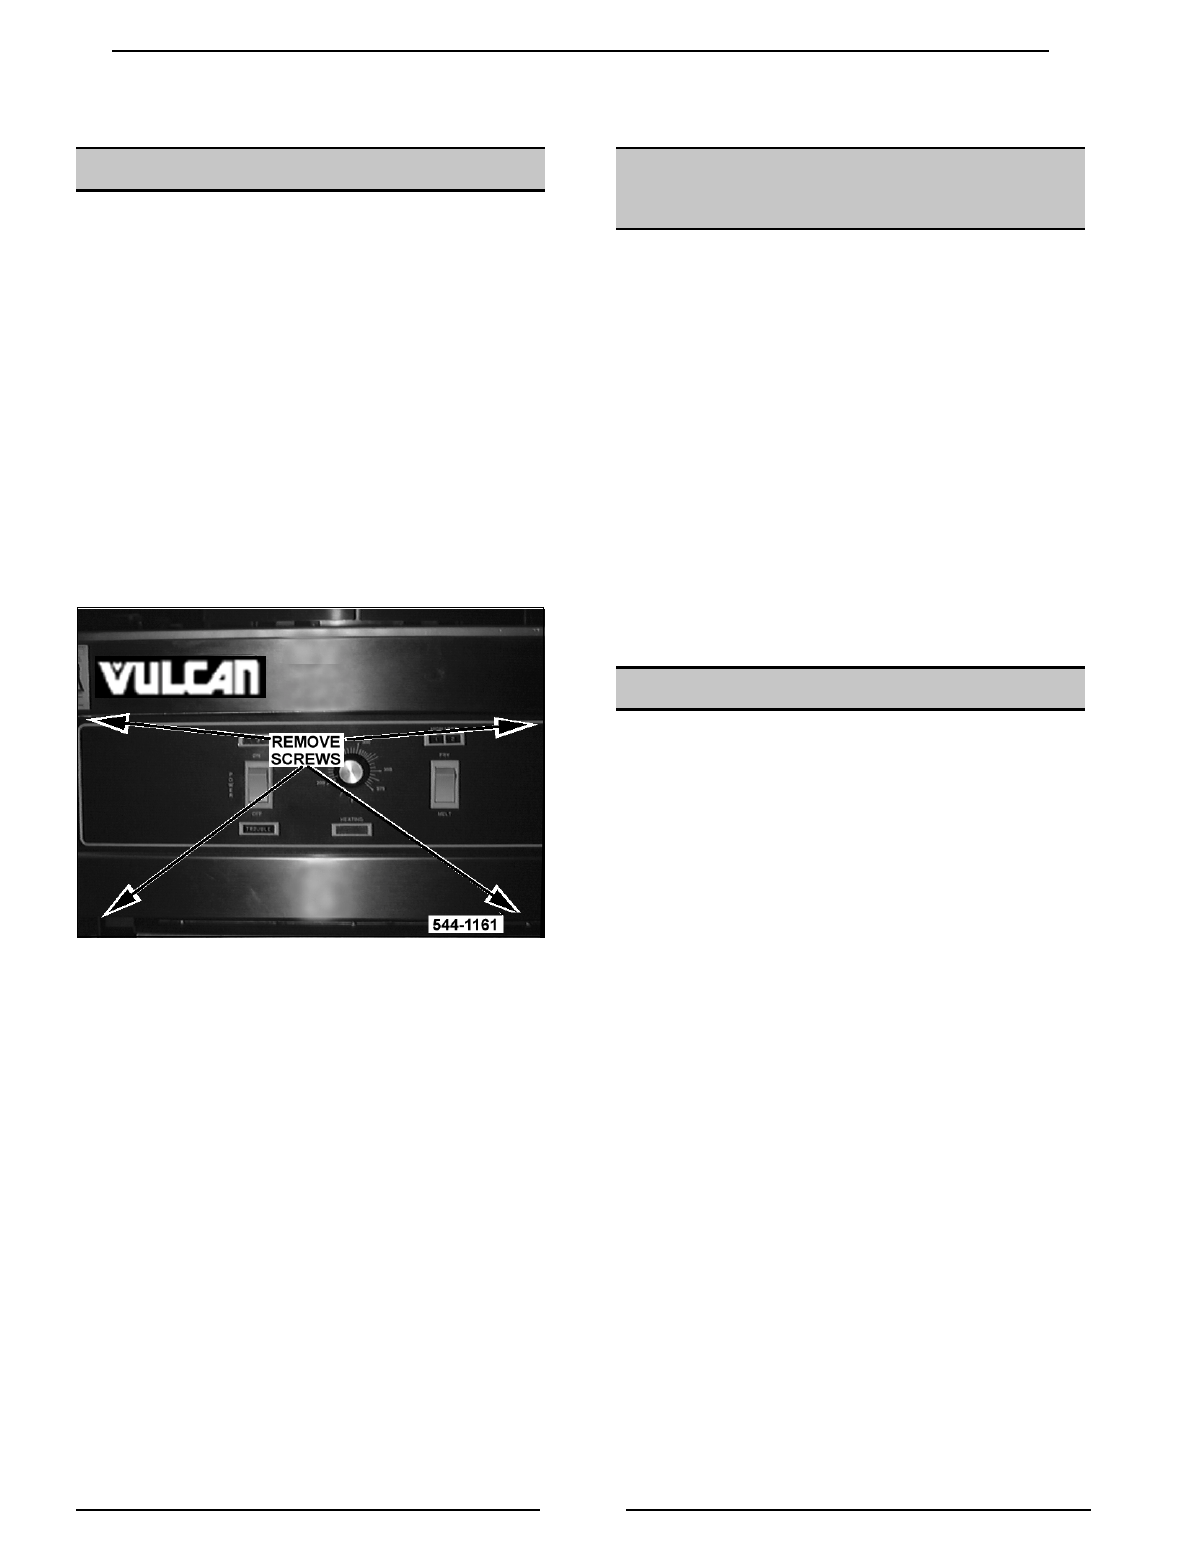
1. Remove the two screws from the upper corners
of the control panel and two screws in bottom
lip.
Solid State Controls shown
2. Lift out to access the back of the control panel.
3. Disconnect the lead wires to the control panel
components to remove it from the fryer.
4. Reverse procedure to install.
POTENTIOMETER (SOLID
STATE MODELS)
WARNING:
DISCONNECT THE ELECTRICAL
POWER TO THE MACHINE AT THE MAIN
CIRCUIT BOX. THERE MAY BE TWO SEPARATE
CIRCUITS. BE SURE BOTH ARE
DISCONNECTED. PLACE A TAG ON THE
CIRCUIT BOX INDICATING THE CIRCUIT IS
BEING SERVICED.
1. Remove the control panel as outlined under
"CONTROL PANELS".
2. Unplug the lead wire connection.
4. Loosen the set screw and remove the knob.
5. Remove the nut from the shaft and remove the
potentiometer.
6. Reverse procedure to install.
COMPUTER CONTROL
WARNING:
DISCONNECT THE ELECTRICAL
POWER TO THE MACHINE AT THE MAIN
CIRCUIT BOX. THERE MAY BE TWO SEPARATE
CIRCUITS. BE SURE BOTH ARE
DISCONNECTED. PLACE A TAG ON THE
CIRCUIT BOX INDICATING THE CIRCUIT IS
BEING SERVICED.
CAUTION:
CERTAIN COMPONENTS IN THIS
SYSTEM ARE SUBJECT TO DAMAGE BY
ELECTROSTATIC DISCHARGE DURING FIELD
REPAIRS. A FIELD SERVICE GROUND KIT IS
AVAILABLE TO PREVENT DAMAGE. THE FIELD
SERVICE GROUNDING KIT MUST BE USED
ANYTIME THE CONTROL BOARD IS HANDLED.
1. Remove the control panel as outlined under
"CONTROL PANELS".
2. Unplug the lead wire connections.
3. Remove computer control.
4. Reverse procedure to install.
NOTE:
There are no setup procedures for installing
new computer control board because wiring harness
tells board what kind of fryer it is installed in.
5. Using the “INSTRUCTIONS” manual, program
the controller with the customer’s settings and
products.


