To
change
another
digital
dis-
play, press
the left or
right
ar-
row
key.
The label in the next
digital display
box
changes
as
you pressthe
arrow
key. Again,
press
the
up
or down arrow
key
to
change
the
display.
The
digital displays
available
for use are:
BRG
Bearing
SOG
DTG
DEST WPT
POSITION
Altitude
Route Name
Waypoint
Name
Time To Go
Cross Track Error
Time at
your
location
Course Over Ground
When
you
have the
display arranged
as
desired,
press
the CLEAR
key.
This "locks" the
display. Every
time
you
switch to this
display,
itwill
appear
as
you designed it,
unless
you preset
the unit
PLOTFER
The
plotter
lets
you
see
yourcourse
and direction of travel on the screen.
If
you've
recalled a
waypoint,
the
plotter
shows
your starting
location,
present position,
and destination.
However,
you
do not have to recall a
waypoint
to use the
plotter.
The
plotter
also can show
grid
lines on the
display.
These
grid
lines
show
latitude and
longitude
lines that can
help you
visulize
your position
or the
location of other
objects.
To use the
plotter, simply press
the PLOT
key.
A screen
similar to the one
at the
top
of the next
page appears.
The
flashing
cross is
your present position.
The solid line is
your track,
or
path you
have
just
traveled. The
large square
is a
compass
rose marked
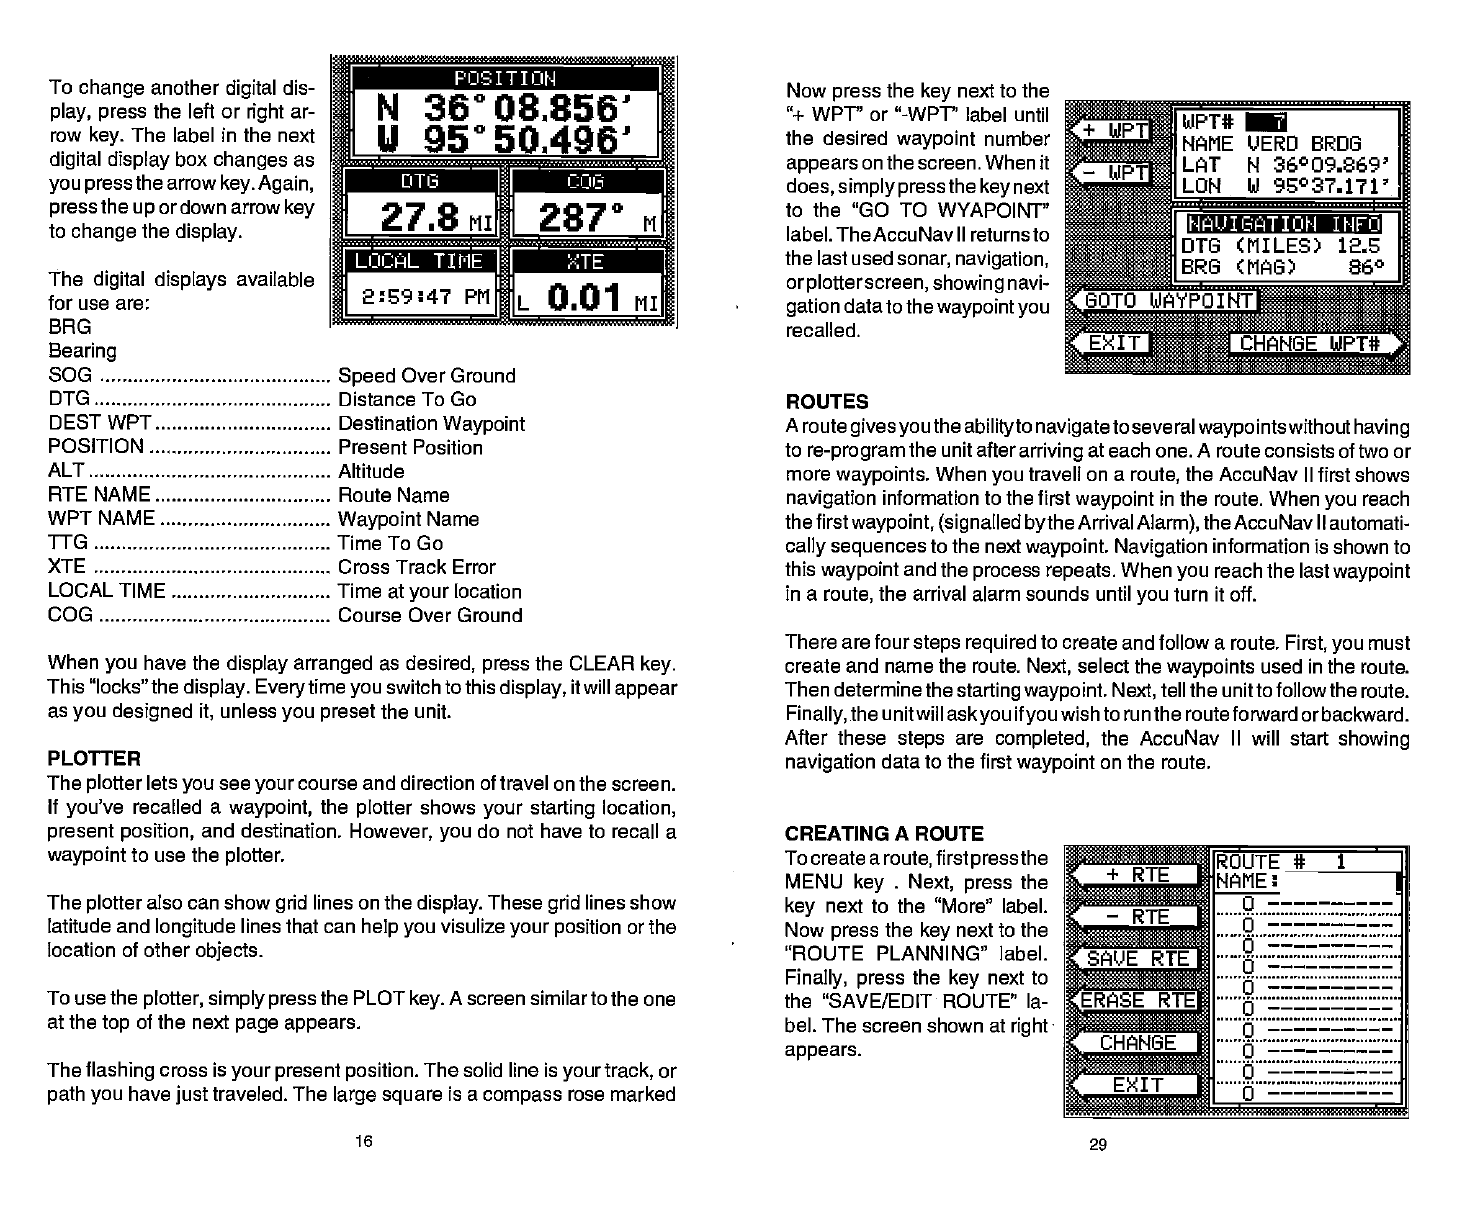
Now
press
the
key
next to the
"÷ WPT" or "-WPT" label until
the desired
waypoint
number
appears
on the screen. When it
does, simply pressthe
key
next
to the "GO TO
WYAPOINT"
label. TheAccuNav II returnsto
the last used
sonar,
navigation,
orplotterscreen, showing
navi-
gation
data to the
waypoint you
recalled.
*WPT
1NAME
LJERO BROS
H 36009.869'
8IL0H
hi 95037fl'
I....
jOT8
(MILES) 12S
BRO (MAO) 86°
TUflT
I8EWPT#
ROUTES
A route
gives you
the
abilityto
navigateto
several
waypointswithout having
to
re-program
the unit after
arriving
at each one. A route consists of two or
more
waypoints.
When
you
travell on a
route,
the AccuNav II first shows
navigation
information
to the first
waypoint
in the route. When
you
reach
thefirstwaypoint, (signalled bythe
Arrival
Alarm),
theAccuNav II automati-
cally sequences
to the next
waypoint. Navigation
information is shown to
this
waypoint
and the
process repeats.
When
you
reach the last
waypoint
in a
route,
the arrival alarm sounds until
you
turn it off.
There are four
steps required
to create and follow a route.
First,
you
must
create and name the route.
Next,
select the
waypoints
used in the
route.
Then determine the
starting waypoint. Next,
tell the
unit to
follow
the route.
Finally,
the unitwill
askyou
if
you
wishto run the routeforward orbackward.
After these
steps
are
completed,
the AccuNav II will start
showing
navigation
data to the first
waypoint
on the route.
CREATING A ROUTE
To create a
route,
first
pressthe
MENU
key
.
Next,
press
the
key
next to the "More" label.
Now
press
the
key
next to the
"ROUTE PLANNING" label.
Finally, press
the
key
next to
the "SAVE/EDIT ROUTE" la-
bel. The screen shown at
rightS
appears.
IQUTE# 1
—RTE
TE
TE
HG
NAME:
..
uc::::E:E
::::::g:::EEEFE-:SE:
::::::g:::E:E:E:EEEEE::
.....9...................
=l——— •i a
N 36° 08856'
U 95°
50.496'
.
27.8
MIIH
287° M
PMHIL
0.01 MI
Speed
Over Ground
Distance To Go
Destination
Waypoint
Present Position
MAUI BAT I OH I h1FO
ALT
RTE NAME
WPTNAME
110
XTE
LOCAL TIME
COG
16
29
PDF compression, OCR, web-optimization with CVISION's PdfCompressor


