8
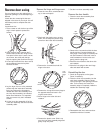
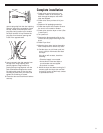
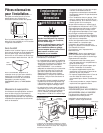
Remove the hinge and hinge cover
1. Place the inner door, screwhead side
up, on the work space.
2. Gently pull the plastic cover out and
down.This unsnaps the plastic hinge
cover from the inside door assembly.
3. Remove the 4 screws that hold the
hinge to the door.
4. Reverse the 2 large hole screw plugs to
the opposite side and insert in the
original screw holes.
5. Move hinge to the other side and
reattach.
6. Reverse the plastic cover. Slide it up
over the inner door assembly edge and
gently snap into place.
7. Set the inner door assembly aside.
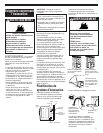
Reverse the door handle
1. Place the outer door assembly face
down on work space.
2. Remove the 2 screws that hold the door
handle and the 2 screws holding the
hole plugs. If hole plugs do not easily fall
out after screws are removed, insert a
small screwdriver into the holes and
gently push the plugs out.
3. Move the door handle to the other side
and reattach.
4. Move the hole plugs to the new hinge
side and attach with screws.
Reinstalling the door
1. Check for fingerprints on the glass.
Clean if necessary.
2. Place the inner door assembly into the
outer door assembly. Align the hinge
cover and hinge in the openings on each
side.To fit correctly, the inside door
assembly edge is completely inside the
outside door assembly edge.
3. Reassemble the inner and outer door
assemblies with the 6 screws.
hinge
screws
hole
screw
plugs
hole
plugs
door
handle
Reverse door swing
You can change your door swing from a
right-side opening to a left-side opening, if
desired.
Locate the door reversing kit that was
shipped in the drum of your dryer.You will
need these parts to complete the door
reversal.
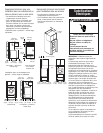
Loosen door trim
1. Place a towel or soft cloth on top of the
dryer or work space to protect the
surface.
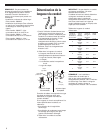
2. Open the dryer door. Remove the 5
screws that hold the door hinge on the
front panel of the dryer. Loosen, but do
not remove, the screw with the top
keyhole opening last (2nd from the top).
3. Lift and pull forward on the door so that
the screwhead clears the keyhole.
Remove the door.
4. Lay the dryer door on a flat, protected
surface with the inside door assembly
facing up. Remove the 6 screws to
release the outer door assembly from
the inner door assembly, as indicated
below. See illustration. It is important
that you remove only the 6 indicated
screws.
5. Lift the inner door assembly off of the
outer door assembly. Set the outer door
assembly aside.


