


13
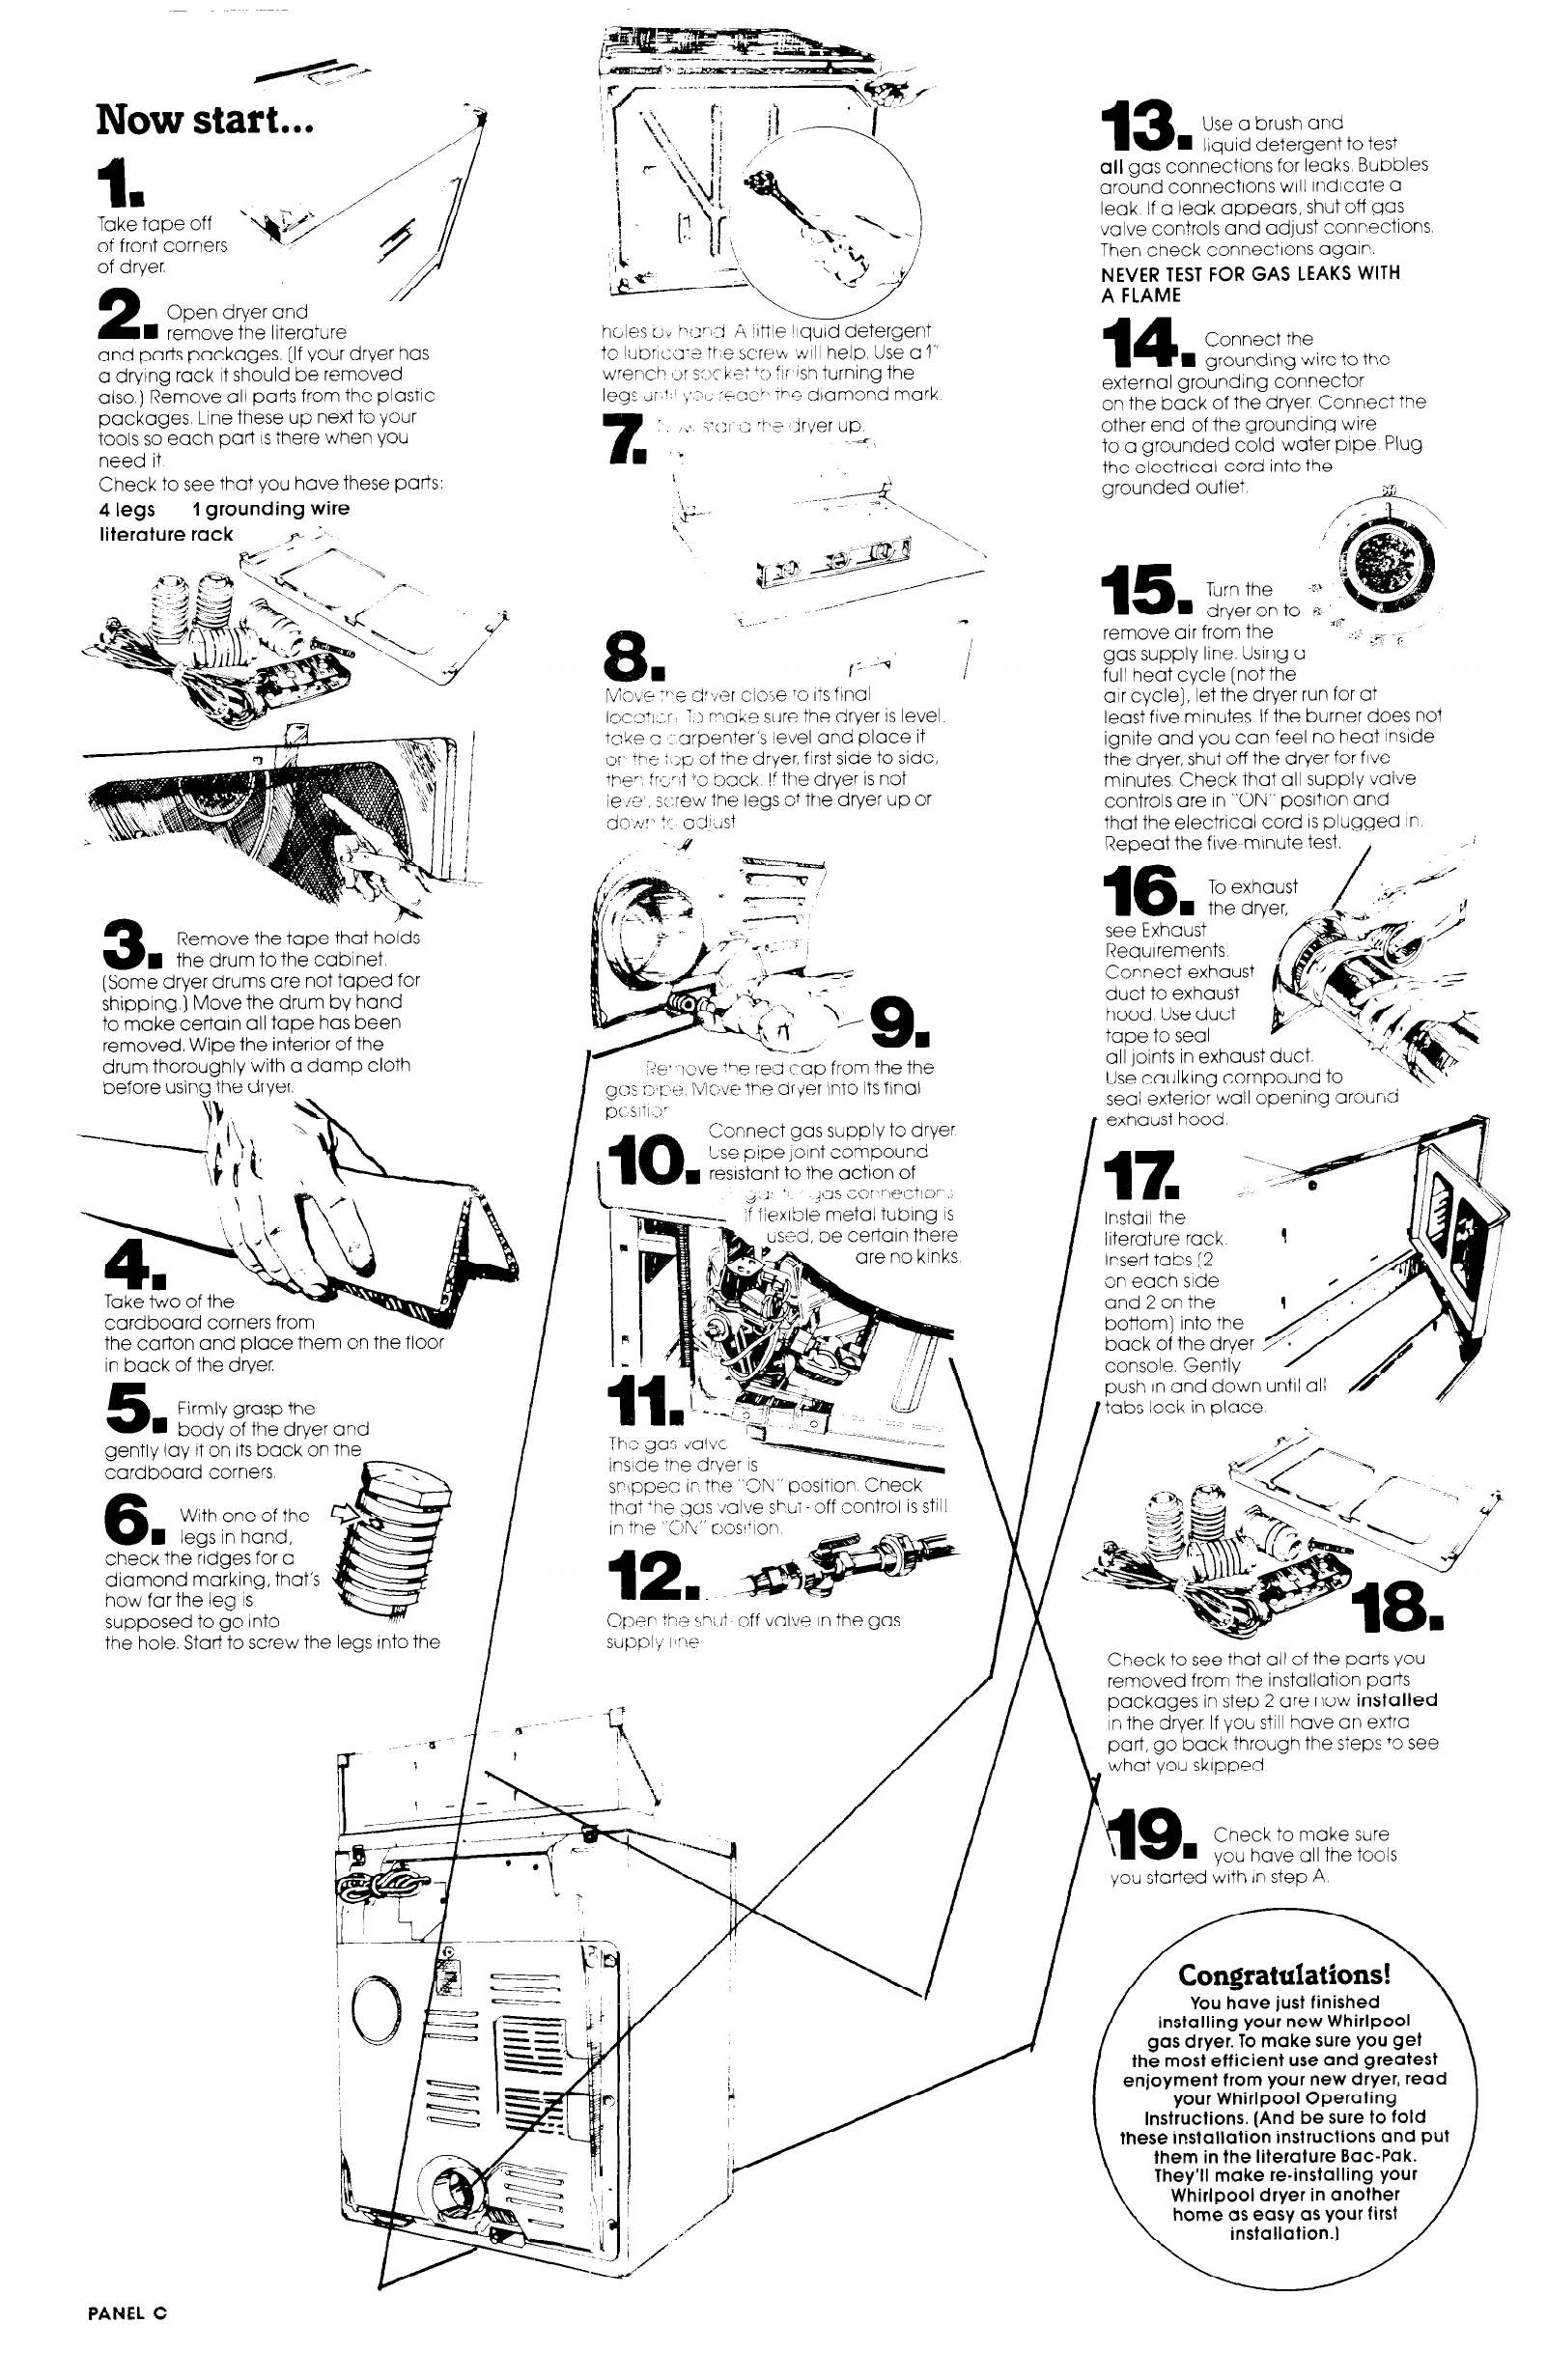
Use a brush and
n
llauid deteraent to test
Now start...
1
n
Take tape off
of front corners
of dryer.
all
gas connectlons for leaks Bubbles
around connectlons will indicate a
leak If a leak appears, shut off
gas
valve
controls and adjust connections
Then check connectlons
again.
NEVER TEST FOR GAS LEAKS WITH
A FLAME
2
Open dryer and
I remove the literature
14
Connect the
n
grounding wire to the
and parts packages.
(If your dryer has
a drying rack it should be removed
also,) Remove all parts from the plastic
packages Line these up next to your
tools so each part IS there when you
need it
Check to see that you have these parts:
4 legs
1 grounding wire
literature rack
,P- I~
external
grounding connector
on the back of the dryer Connect the
other end of the grounding wire
to a grounded cold water pipe Plug
the electrlcul cord into the
grounded outlet
15
Turn the
-‘c-’
n
dfver on to fl-
remove air frorr! the
SF
:
.’
. &ST c
gas supply line. Using a
full heat cycle (not the
air cycle), let the dryer run for at
least five minutes If the burner does not
ignite and you can feel no heat inside
the dryer, shut off the dryer for five
minutes Check that all supply vuive
controls
are
in “ON” position and
that the
electrical
cord IS plugged In
Repeat the five minute test.
/
,i
IL -9’
i
i
n
rv
iot$ic- *i-xc arver
ciO:.e
‘0 Its final
ioca+:,r 7.2 r-)aKe sure the dryer is level
take c :.arpenter’s level and place it
ori +pe
:~p of the dryer, first side to side,
+~IF’, frsrit +c back. !f the dryer is not
ie PII
s::rew the legs of the dryer up or
do .mr- t: a-J+?
.,’
. -u
hood Useduct
all joints in exhaust duct.
Use caulklncl cornpound to
3
Remove the tape that hoids
I the drum to the cabinet,
(Some dryer drums are not taped for
shipping,) Move the drum by hand
to make certain all tape has been
removed, Wipe the interior of the
drum thoroughly with a damp cloth
before using the dryer.
see Exhaust
Requirements
Connect exhaust
duct to exhaust
seal exterior wall opening aroL,nd
exhaust hood
10
Connect gas supply to dryer
i
Lse p!De joint compound
n
reslstant to the
action
of
Instail the
literature rack
!
Ir.sert tabs 12
on each side
and 2 on the
bottom] into the
back of the dryer
console Gently
Dush In and dowr
the carton and place them on the floor
in back of the dryer.
5
n
Firmly grasp
the
bodv of the dryer and
tabs
I I’
lock in place
P/
gently lay it on its back or
cardboard corners
1 the
6
With one of the
I legs in hand,
that *he &IS Jalve sSl;i off control is stiil
In ?‘le “Clh” K~os~+ion
\I I
12
R. _
check the ndges for a
diamond marking, that’s
how
fur
the leg
IS
supposed to go into
Oper ihe G%t off
valve
in the
gas
s(Jppl:; p’-y
IA /
\
Check
to see that all
of the parts you
the hole. Star-to screw the legs Into the
\
removed from the installation parts
packages in step
2
are now
installed
in the dryer If you still
have an extru
part, go back through the steps +o see
b
what you skipped
Check to make sure
n
you have all the tools
I
you started with in step A
You have just finished
installing your new Whirlpool
gas dryer. To make sure you get
the most efficient use and greatest
enjoyment from your new dryer, read
your Whirlpool Operating
Instructions. (And be sure to fold
these installation instructions and put
them in the literature Bat-Pak.
They’ll make re-installing your
Whirlpool dryer in another
home as easy as your first
PANEL C