


Open the shutoff valve in the gas
supply line.
Frre Hazard
Do Not use on open flame lo
IeSl
for leaks from gas connections.
Checking for leaks wrth a flame
may result in 0 fire or explosion.
13
Use CI brush and liqurd
. detergent to test all gas
connections for leaks. Bubbles around
connections will indrcate a leak. If a
leak appears, shut off gas valve
controls and adjust connections.
Then check connecttons ogorn
A,
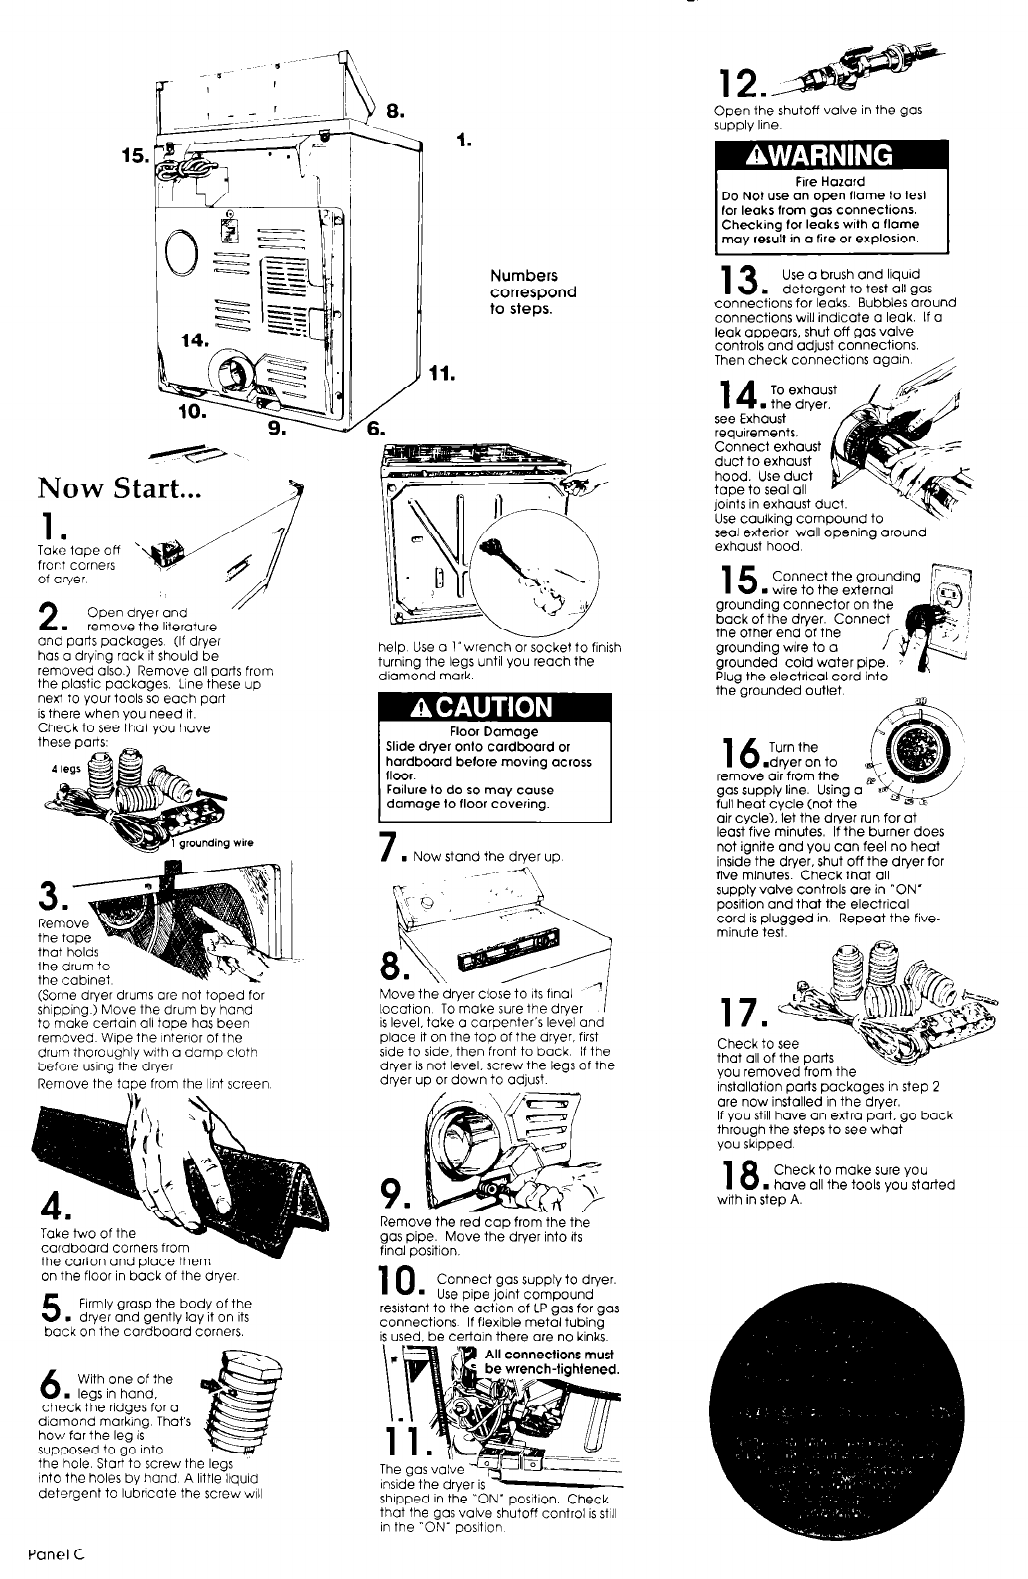
Numbers
correspond
to steps.
11.
14
To exhaust
. the dryer.
see Exhaust
requirements.
Connect exhaust
duct to exhaust
&
,
hood. Use duct
tape to seal all
Now Start...
joi&s in exhaust duct.
1
Tokitapeoff
fr0rt corners
of oryer
Use caulking compound to
Y
seal exterior wall opening around
exhaust hood
15
Connect the grounding
n
wire to the external
2
Open dryer and
.
remove the literature
and parts packages (If dryer
has o drying rack rt should be
removed also.) Remove all parts from
the plastic packages. Line these up
next to your tools so each part
is there when you need it.
Check to see that YOU have
grounding connector on the
back of the dryer. Connect
the other end of the
grounding wtre to o
grounded cold water pipe.
Plug the electrtcal cord into
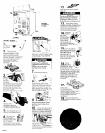
help Use a l’wrench or socket to finish
turning the legs until you reach the
diamond mark
7
. Now stand the dryer up
__ -e-c\
\
16
Turn the
.dryer on to
remove air from the
gas supply line. Using 0
full heat cycle (not the
air cycle). let the dryer run for at
least five minutes. If the burner does
not ignite and you can feel no heat
inside the dryer. shut off the dryer for
five minutes. Check that all
supply valve controls ore in “ON’
position and that the electrical
cord is plugged in. Repeat the five-
minute test.
ihe drum to
the cabinet
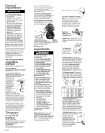
Move the dryer close to its final
‘a
locotron To make sure the drver
i
is level, take o carpenter’s level and
place it on the top of the dryer, first
side to side, then front to back
If the
drver is not level. screw the leas of the
dr+er up or down to adjust.
-
(Some dryer drums ore not toped for
shIpping 1 Move the drum by hand
to make certain all tape has been
removed Wipe the lnterlor of the
drum thoroughly v&h CI damp cloth
before usrng the dryer
Remove the tape from the IInt screen
17 .
Check to see
that all of the parts
you removed from the
installatron parts packages in step 2
are now installed rn the dryer.
If you still have an extra part. go back
through the steps to see what
you skipped.
18
Check to make sure you
. have all the tools YOU started
wdh in step A.
9 .
Remove the red cop from the the
gas pipe. Move the dryer into Its
final position.
10
Connect gas supply to dryer.
. Use pipe joint compound
resrstant to the action of LP gas for gas
connections If flexible metal tubina
is used. be certoln there crre no kinks
Take two of the
cardboard corners from
the carton and place them
on the floor in bbck of the dryer
5
Firmly grasp the body of the
n
dryer ond gently lay it on Its
back on the cardboard corners.
6
With one of the
. legs in hand,
check the ridges for o
diamond marklng That’s
how for the leg is
supoosed to ao Into
the hole. Stortlto screw the legs
into the holes by hand A little ltqurd
detergent to lubrlcale the screw ~111
Inside the dryer is’4-
shopped In the “ON’ posItron. Check
that the gas valve shutoff control is still
in the “ON’ posItIon
Panel
C