


LOCATION
Locate the steam generator
horizontally on the iron rest
plate of your ironing board
(if large enough) or on a
heat resistant stand at the
same height as your ironing
board or below it. Always
ensure the generator is on
a firm surface when ironing.
WARNING: Do not use the
product on a surface
which could be damaged
by heat or steam such as
a worktop or a polished
wood surface.
If in doubt, contact
Morphy Richards.
BEFORE USE
Remove any protective
sticker from the soleplate
and the base unit, if any.
Unwind and straighten the
power cord · and supply
cord fi.
Slide out the water tank ‡
and fill (see filling
instructions).
Textiles and clothes are
supposed to carry ironing
instructions. If they don’t,
you should follow the
temperature guide on page
3, but be sure to test the
temperature by ironing the
hem of the garment or
similar discreet area first.
If you turn the control dial
down from a hot setting to
a cooler setting, wait until
the iron temperature has
stabilised before you
continue ironing.
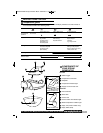
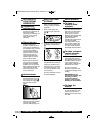
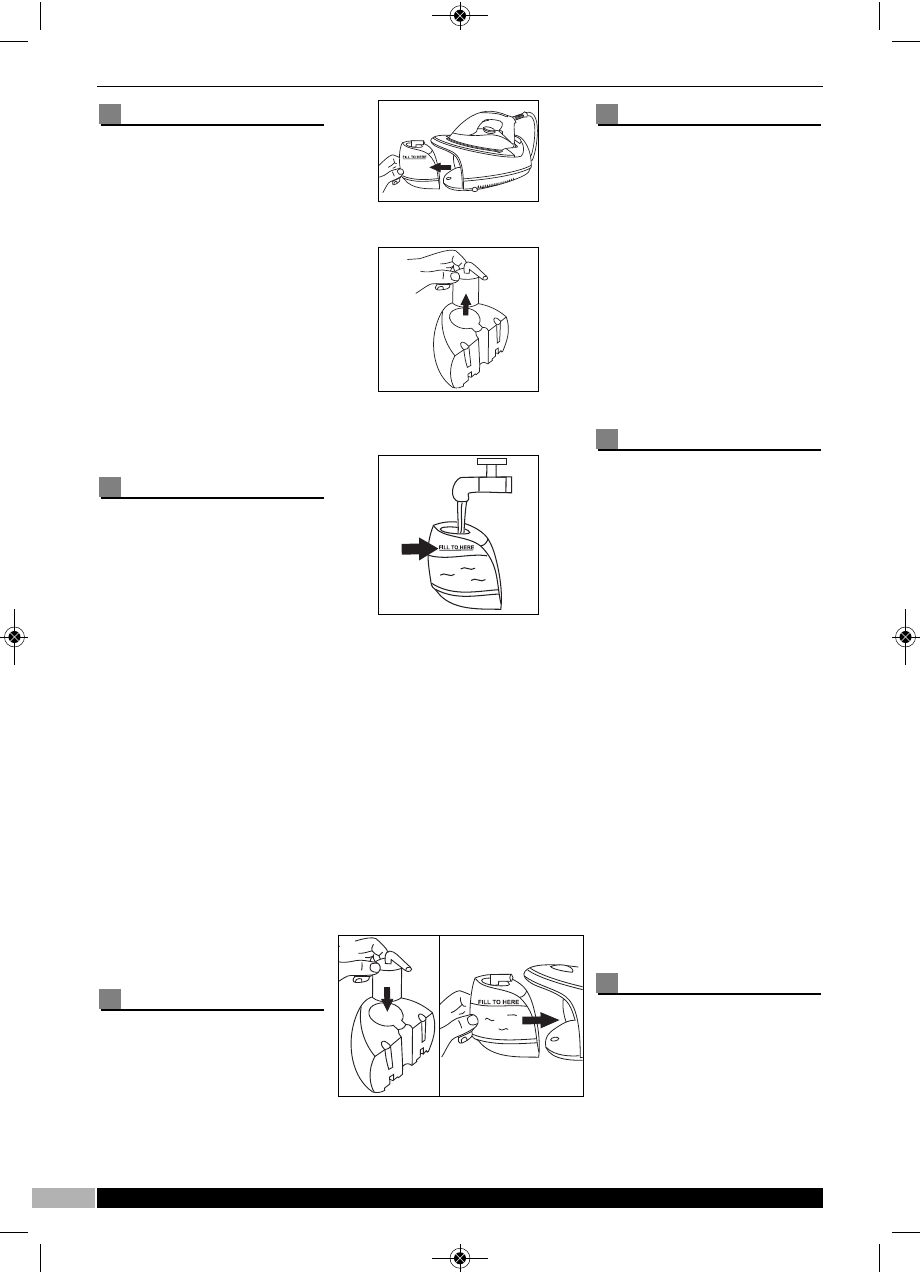
FILLING
1 Place the steam generator
on a stable ironing board or
table, with the iron resting
on its stand.
2 Release the detachable
water tank by sliding
outwards A.
3 Remove the anti-scale filter
by pulling upwards B.
4 Fill the tank to the ‘fill to
here’ line with clean tap
water C.
IN HARD WATER AREAS,
THE USE OF DISTILLED
OR DEMINERALISED
WATER IS
RECOMMENDED.
Never use battery topping
up fluid or water
containing any substances
like starch, sugar, fragrant
additives or defrosted
water from a refrigerator.
5 Re-install the anti-scale
filter and re-position the
water tank on the base unit
and push securely into
place. Please make sure
the tank is secure D.
6 Always pour out any
remaining water after use
(see ‘Emptying and Storing’
on page 6).
Re-filling ‘in use’
1 When the water level
becomes low, the pump
begins to emit a loud noise.
This is due to air being
pumped instead of water
and is quite normal.
Refilling can be done whilst
the appliance is in
operation. It is not
necessary to wait for the
appliance to cool down.
2 Slide out the water tank
and fill (see filling
instructions).
DRY IRONING
1 Connect the appliance to a
suitable mains outlet, and
switch on the socket.
2 Turn the temperature dial
on the iron in a clockwise
direction, select dot-1, dot-
2, or dot-3 according to the
recommendation of the
garment label.
3 The temperature indicator
light glows on the iron,
indicating that it is switched
on.
4 When the required
temperature is reached, the
temperature indicator light
on the iron goes off. The
iron is ready to use.
It is always a good idea to
begin with ‘cool’ fabrics
and work up to higher
settings.
An iron heats up quicker
than it cools down so you’ll
save time and electricity.
STEAM IRONING
1 Unwind and straighten the
power cord · and supply
cord fi.
2 Slide out the water tank
and fill (see filling
instructions).
4
UK Helpline 0844 871 0960 Replacement Parts 0844 873 0726 Ireland Helpline 1800 409 119
A
C
D
B
RN42271MUK Rev8_Instruction Book 23/04/2013 13:42 Page 4