


9
Additional Features
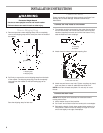
For warm rinse where applicable:
■ Remove screws from each end of the console bottom.
■ Pull the console bottom forward; lift and tilt back.
■ Connect J1 to J2
To save water where applicable:
■ Locate water level switch on back of washer.
■ Turn shaft 45° counterclockwise.
Checklist for washer operation:
Check the following if the washer is not operating properly:
1. Power supply cord is plugged in.
2. Circuit breaker is not tripped or fuse is not blown.
3. Timer has been advanced to start of a cycle.
4. Water faucets are turned on.
5. Inlet and drain hoses are not kinked.
6. Washer lid is closed.
7. Inlet valve is not frozen if not protected from the weather.
8. Suds level. Excess suds will slow the spin and cause poor
rinsing. Operate the washer through a complete cycle with no
detergent. Use less detergent or a controlled suds type
detergent in future loads.
If you need assistance:
The Maytag Consumer Interaction Center will answer any
questions about operating or maintaining your washer not
covered in the Installation Instructions. The Maytag Consumer
Interaction Center is open 24 hours a day, 7 days a week. Just
dial 1-800 NO BELTS (1-800-662-3587) - the call is free.
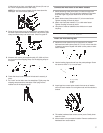
When you call, you will need the washer model number and serial
number. Both numbers can be found on the serial-rating plate
located on your appliance.
WARNING
Electrical Shock Hazard
Disconnect power before servicing.
Replace all parts and panels before operating.
Failure to do so can result in death or electrical shock.
It is recommended that fiberglass items not be washed in coin-
operated washers. If these items are washed in the washer, run
the washer through a complete cycle to rinse any residue away
that might be left in the washer.
WARNING
Fire Hazard
Never place items in the washer that are dampened
with gasoline or other flammable fluids.
No washer can completely remove oil.
Do not dry anything that has ever had any type of oil on
it (including cooking oils).
Doing so can result in death, explosion, or fire.
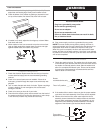
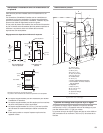
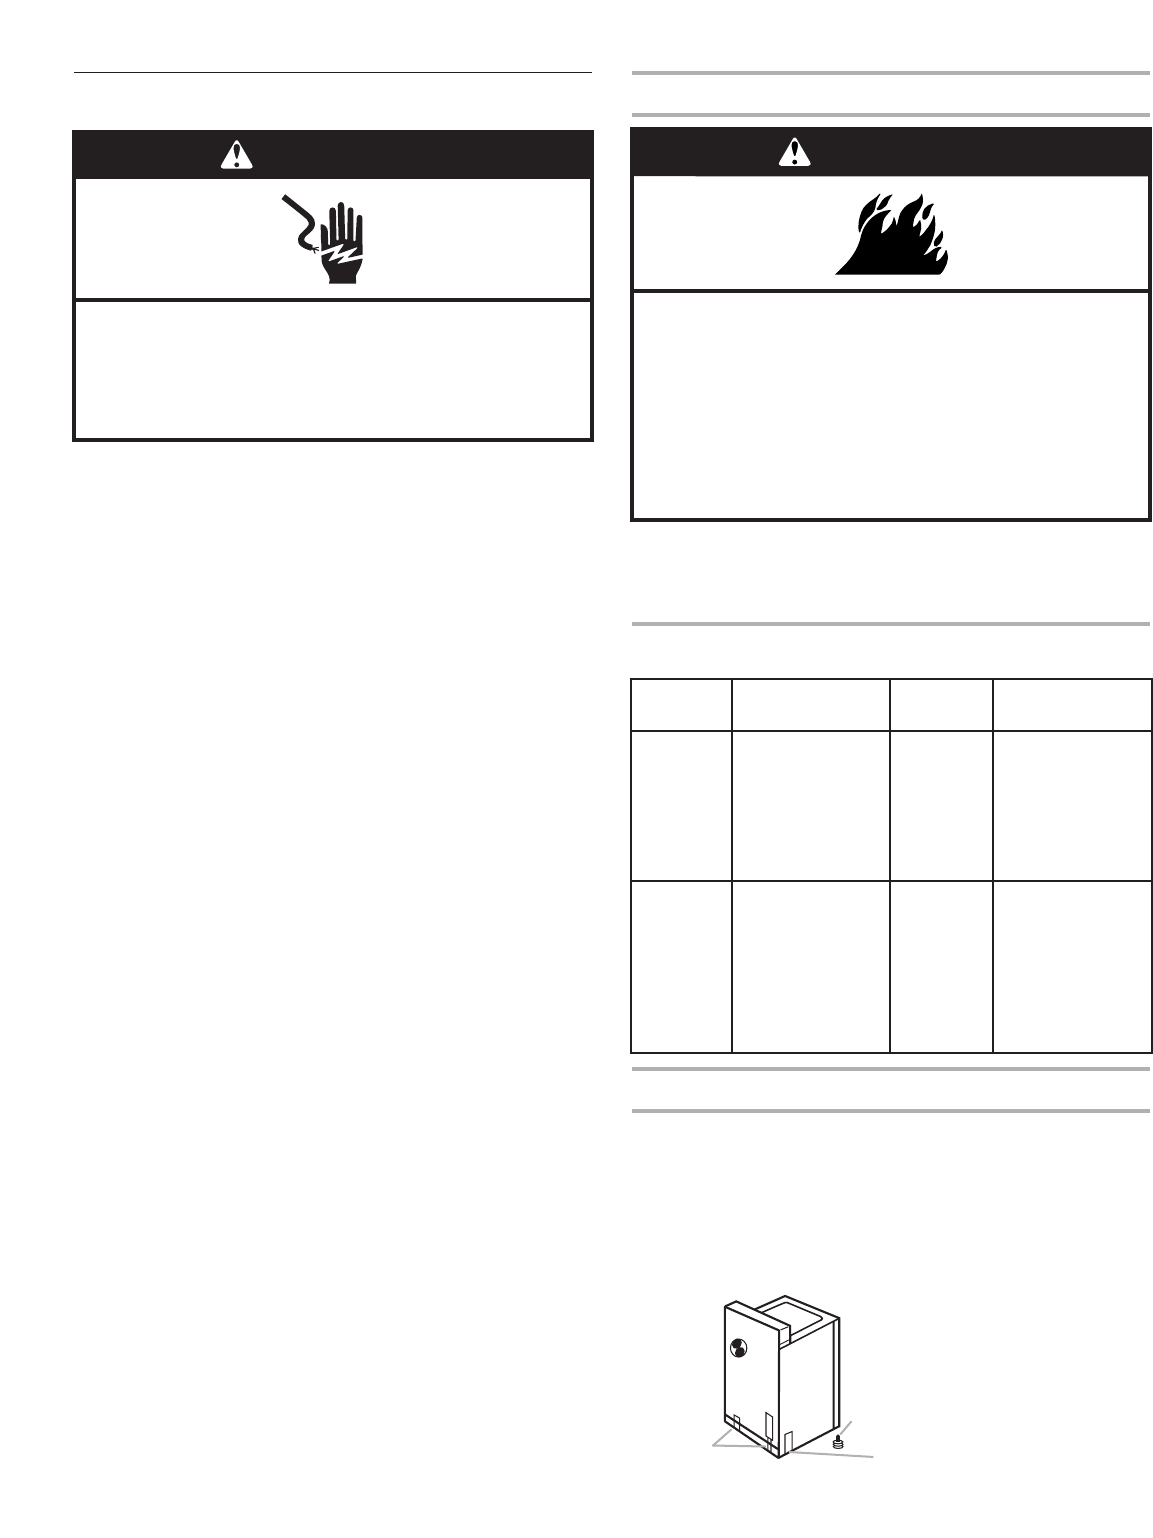
■ Remove the front legs from the base of the washer.
■ Place both rear leveling legs in the upper position and tape
securely.
■ Apply tape to the side and bottom of the cabinet near the
rear.
■ Open washer lid, wedge a blanket between the tub ring and
the cabinet top restricting the tub movement.
■ Handle washer gently. Do not drop washer while using hand
truck.
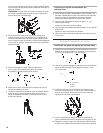
Load Type Loading
Suggestion
Load Type Loading
Suggestion
Mixed Load 3 double sheets
4 pillowcases
6 pair shorts
8 T-shirts
2 shirts
2 blouses
8 handkerchiefs
Heavy Work
Clothes
3 pair pants
3 shirts
1 coverall
4 pair jeans
1 overall
Permanent
Press
2 double or
1 king size sheet
1 tablecloth
1 dress
1 blouse
2 slacks
3 shirts
2 pillowcases
Knits 3 blouses
4 slacks
6 shirts
4 tops
4 dresses
Operating Tips
Moving the Washer to a New Location
Typical Full Load Sizes
Rear
legs
Tape 2 sides
Front legs