CLEANING THE WASHER
C A R E A N D C L E A N I N G
wWARNING:
• Unplug the washer before cleaning to avoid the risk of electric shock. Failure to follow this warning
can cause serious injury, fire, electrical shock, or death.
• Never use harsh chemicals, abrasive cleaners, or solvents to clean the washer.
They will damage the finish.
Cleaning the Dispenser
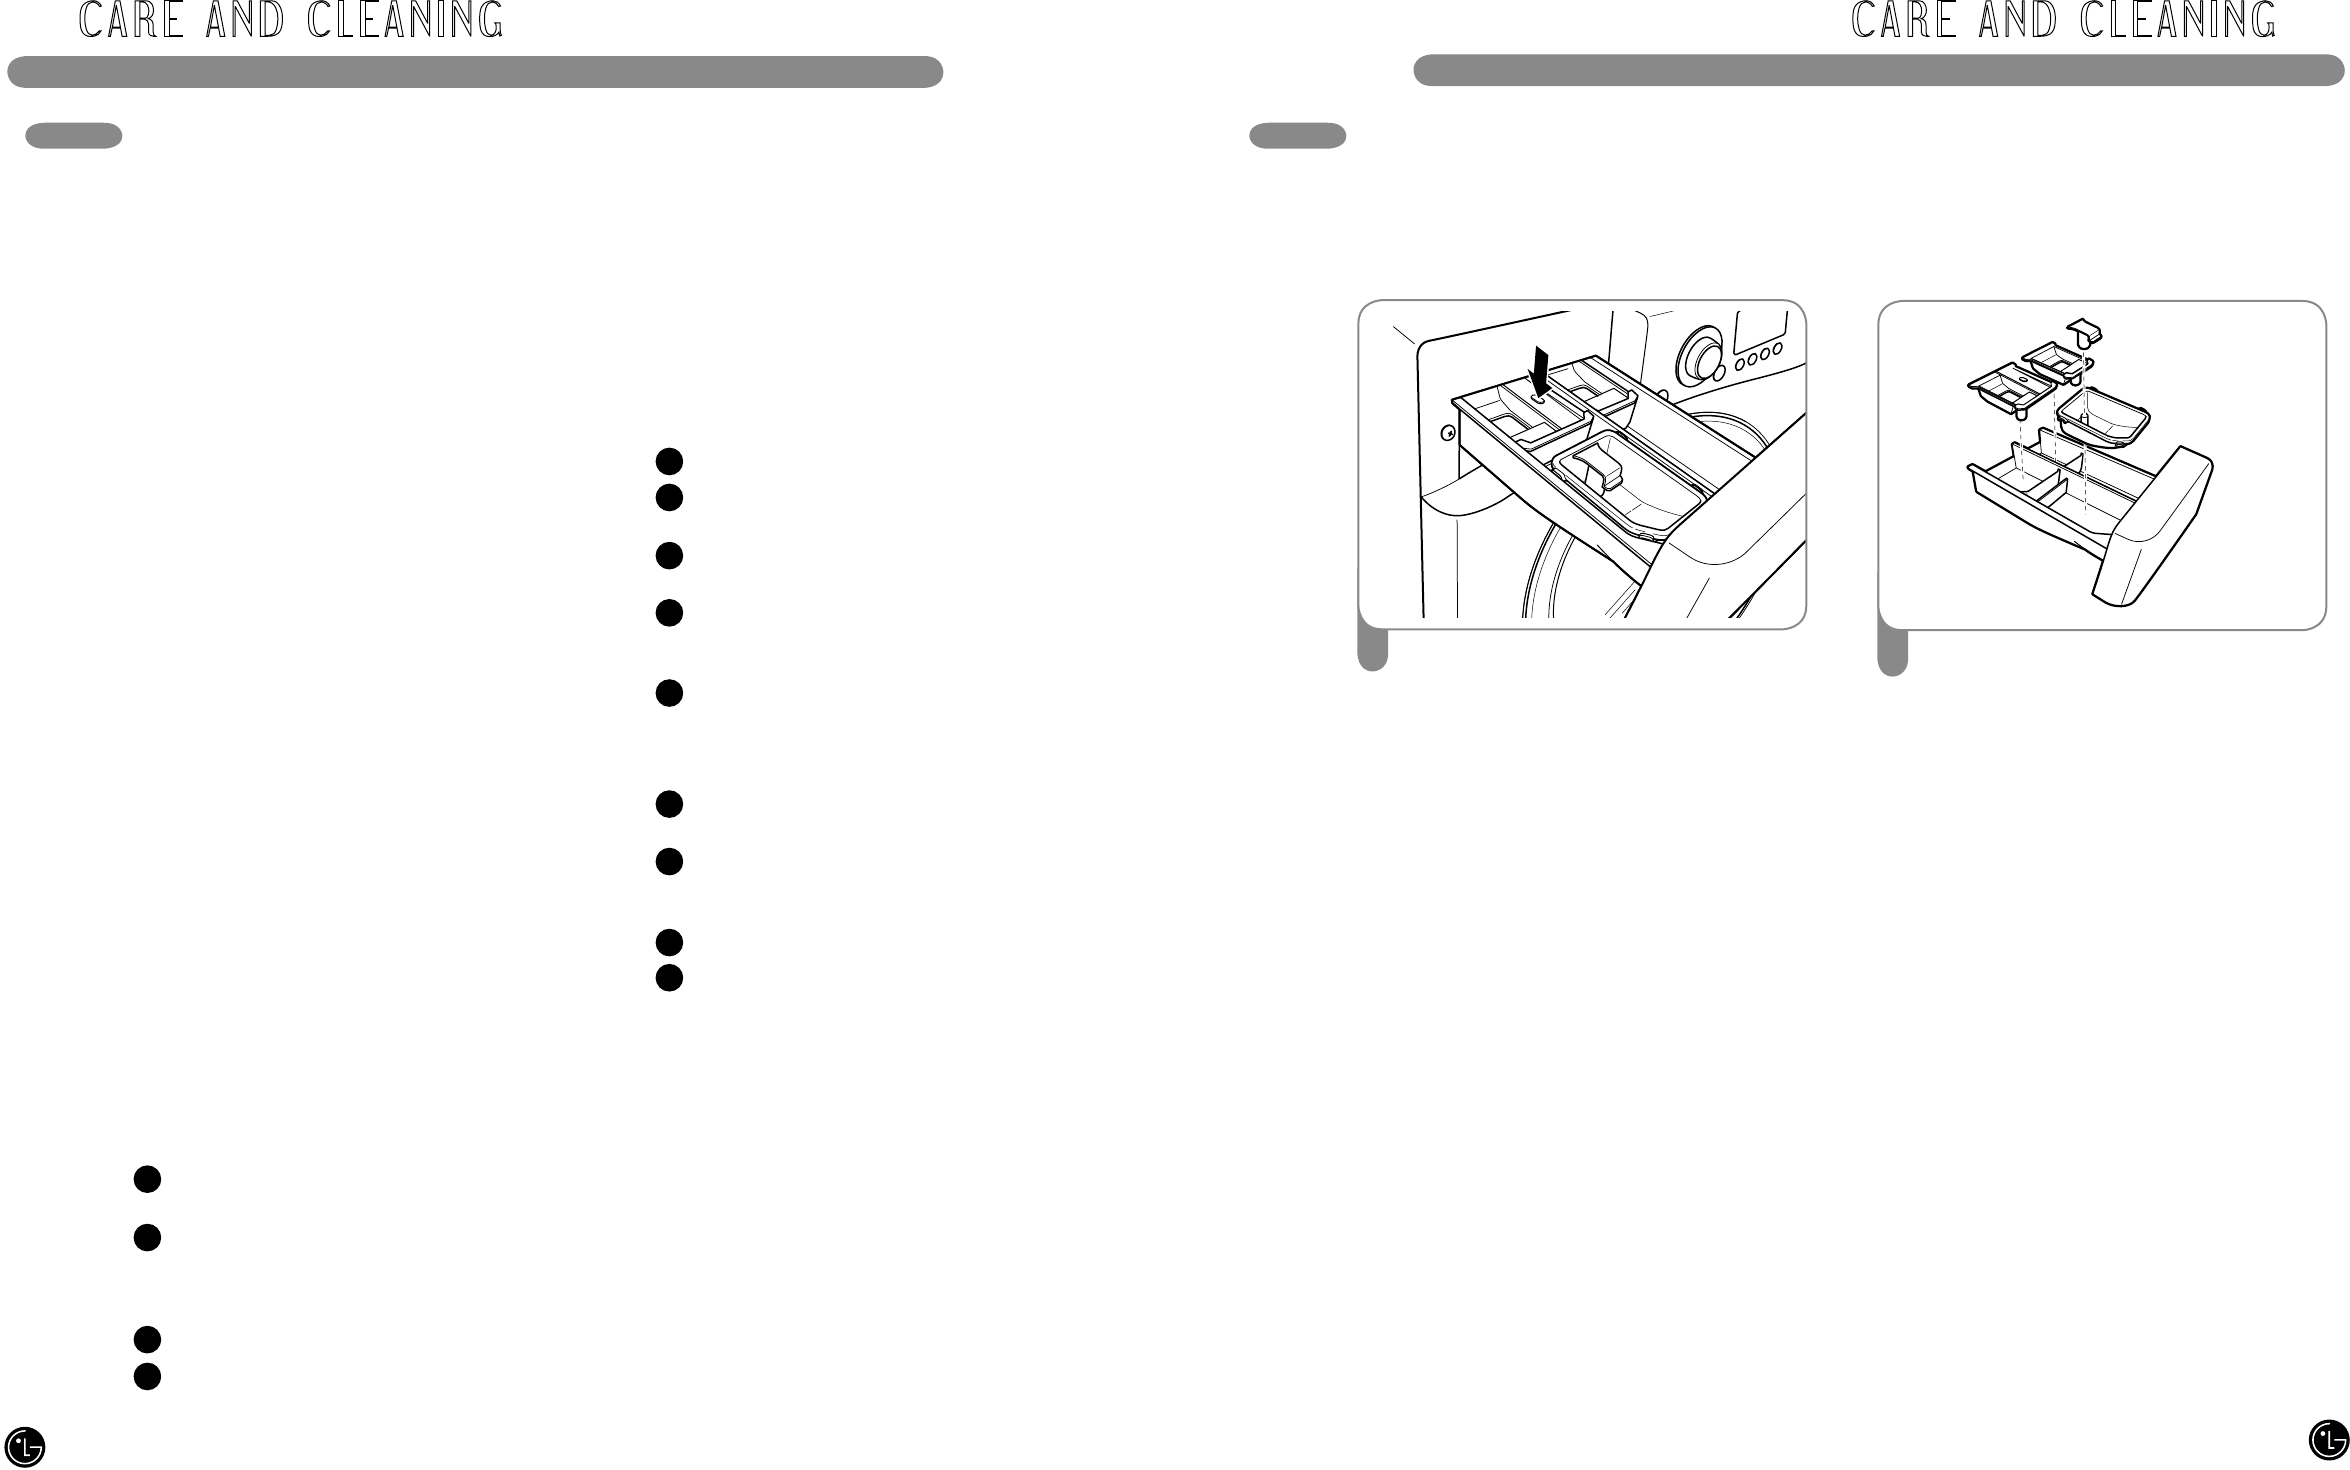
The dispenser should be cleaned periodically
to remove buildup from detergent and other
laundry products.
Pull out the dispenser drawer until it stops.
Press the button in the center of the drawer
and pull to remove the drawer.
1
Remove the inserts from the drawer, and
clean them with warm water and a soft cloth
or brush to remove any residue or buildup.
Wipe out the inside of the drawer opening
with a damp cloth. Reassemble the drawer
and reinstall in the drawer opening.
NOTE: Do not use anything other than water
to clean the drawer, inserts, and drawer
opening. If any sort of household cleaner
drains into the interior of the washer, run a
RINSE
+
SPIN cycle before washing clothes.
2
C A R E A N D C L E A N I N G
Cleaning the Exterior
Proper care of your washer can extend its life. The
outside of the machine can be cleaned with warm
water and a mild, nonabrasive household detergent.
Immediately wipe off any spills with a soft, damp cloth.
IMPORTANT: Do not use methylated spirits, solvents,
or similar products.
Never use steel wool or abrasive cleansers; they can
damage the surface.
REGULAR CLEANING
Care and Cleaning of the Interior
Use a towel or soft cloth to wipe around the
washer door opening, door seal, and door glass.
These areas should be kept clean to ensure a
watertight seal. Be sure to wipe under the inside
rubber seal to remove any moisture or soil.
Always remove items from the washer as soon
as the cycle is completed. Leaving damp items
in the washer can cause wrinkling, color transfer,
and odor.
Run the TUB CLEAN cycle regularly to remove
detergent buildup and other residue.
Removing Lime Buildup
If you live in an area with hard water, lime scale
can form on internal components of the washer.
Use of a water softener is recommended in areas
with hard water. If a descaler is used, make sure
that it is suitable for use in a washer, and run the
TUB CLEAN cycle before washing clothing.
Lime scale and other spots may be removed
from the stainless steel drum using a stainless
steel cleaner. Do NOT use steel wool or abrasive
cleansers; they can damage the surface.
Storing the Washer
If the washer will not be used for an extended
period of time and is in an area that could be
exposed to freezing temperatures:
Turn off water supply tap.
Disconnect hoses from water supply and
drain water from hoses.
Plug the power cord into a properly grounded
electrical outlet.
Add 1 gallon of nontoxic recreational vehicle
(RV) antifreeze to the empty wash drum.
Close door.
Select the spin cycle and let washer spin
for 1 minute to drain out all the water.
NOTE: Not all of the RV antifreeze will be
expelled.
Unplug the power cord, dry the drum interior
with a soft cloth, and close the door.
Remove the inserts from the dispenser. Drain
any water in compartments and dry the
compartments.
Store the washer in an upright position.
To remove the antifreeze from the washer
after storage, run washer through a complete
cycle using detergent. Do not add laundry!
1
2
3
4
5
6
7
8
9
Cleaning the Steam and Water
Circulation Nozzles
Use a cotton swab to remove lime or detergent
buildup from the inside of the steam and water
circulation nozzles. NEVER use a sharp or
pointed object; you could damage the nozzles.
Removing the Stain in Door Seal
NOTE: Wear rubber gloves and eye protection while
performing the following procedure:
Dilute 3/4 cup (177 ml) liquid chlorine bleach with 1
gallon (3.8 L) of warm/hot water.
Use this solution to wipe down all surfaces of the
gasket to remove the deposits that are causing any
odor. (Be sure to fold back the lip of the gasket to get
under the edge where residue can build up.)
Wipe the gasket with a dry cloth.
Leave the door open to allow the gasket to dry completely.
Do not use undiluted bleach as this will damage the gasket.
Follow the manufacturer’s instructions for proper use of bleach.
If the gasket cannot be cleaned properly, it should be replaced.
1
2
3
4
26
27


