


7
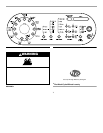
INSTALLATIONINSTRUCTIONS
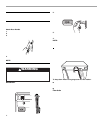
Remove DecorativeMat
Remove the optional decorative mat (included) from the top of
the washer and set aside.
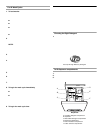
Attach Door Handle
Remove parts package from washer drum. Check that all parts
were included.
Attach Door Handle
1. Insert the 2 screws through the holes in the door.
2. Place the plastic washers onto the screws.
3. Attach the handle by hand tightening the screws, first the top
then the bottom.
4. Push the handle against the door. Using a Phillips
screwdriver, tighten the screws.
NOTE: Do not overtighten.
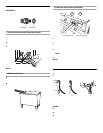
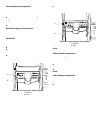
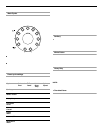
Remove Transport System
IMPORTANT: Position the washer so that the rear of the washer
is within approximately 3 ft (90 cm) of its final location.
There are 4 bolts in the rear panel of the washer that support the
suspension system during transportation. These bolts also retain
the power cord inside the washer until the bolts are removed.
1. Using a 13 mm wrench, loosen each of the bolts.
2. Once the bolt is loose, move it to the center of the hole and
completely pull out the bolt, including the plastic spacer
covering the bolt. The power cord will be attached to all
4 bolts inside the washer.
3. Once all 4 bolts are removed, discard the bolts and spacers.
Then pull the power cord through the opening of the rear
panel and close the hole with the attached cap.
4. Close the bolt holes with the 4 transport bolt hole plugs.
NOTE: If the washer is to be transported at a later date, call your
local service center. To avoid suspension and structural damage,
your machine must be properly prepared (transport system
installed) for relocation, by a certified technician.
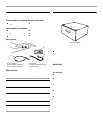
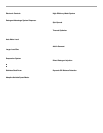
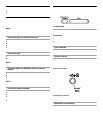
Routethe Drain Hose
Proper routing of the drain hose helps avoid floor damage due to
water leakage. Read and follow these instructions.
The drain hose is connected to your washer. Gently pull the
corrugated drain hose from the shipping clips.
To keep drain water from going back into the washer:
■ Do not straighten the drain hose, and do not force excess
drain hose into standpipe. Hose should be secure, but loose
enough to provide a gap for air.
■ Do not lay excess hose on the bottom of the laundry tub.
Floor drain
You may need additional parts. See Floor drain under “Tools and
Parts.”
WARNING
Excessive Weight Hazard
Use two or more people to move and install washer.
Failure to do so can result in back or other injury.