


16
LAUNDRY TIPS
Preparing clothes for washing
Follow these recommendations to help you prolong the life of
your garments.
■
Close zippers, snaps, and hooks to avoid snagging other
items. Remove pins, buckles, and other hard objects to avoid
scratching the washer interior. Remove non-washable trim
and ornaments.
■
Empty pockets and turn them inside-out.
■
Turn down cuffs; brush away lint and dirt.
■
Turn synthetic knits inside-out to avoid pilling.
■
Tie strings and sashes so they will not tangle.
■
Mend tears, loose hems, and seams.
■
Treat spots and stains.
■
Stained or wet garments should be washed promptly for best
results.
Sorting
■
Separate heavily soiled items from lightly soiled ones, even if
they would normally be washed together. Separate lint-givers
(towels, chenille) from lint-takers (corduroy, synthetics,
permanent press). When possible, turn lint-givers inside-out.
■
Separate dark colors from light colors, colorfast items from
noncolorfast items.
■
Sort by fabric and construction (sturdy cottons, knits, delicate
items).
Unloading
■
Remove clothes from washer after the cycle is completed.
Metal objects such as zippers, snaps, and buckles may rust if
left in the washer basket for a long time.
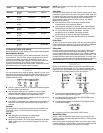
Loading
WASHER CARE
Cleaning Your Washer
Cleaning the exterior
Use a soft damp cloth or sponge to wipe up any spills.
Occasionally wipe the outside of your washer to keep it looking
new. Use mild soap and water. Do not use abrasive products.
Cleaning the interior
Use a soft damp cloth or sponge to occasionally wipe the inner
door to remove any detergent residue. Use mild soap and water.
Do not use abrasive products.
Cleaning the door seal
Use a soft damp cloth or sponge when necessary. Check the fold
of the seal periodically for any foreign objects.
Cleaning the dispenser drawer
The dispenser drawer is removable for easy cleaning.
1.
Unlock the dispenser drawer by pressing the Release Lever in
the Prewash compartment. See “Using the Dispenser.”
Remove the drawer.
2.
Remove the inserts (the siphon from the softener and bleach
compartments and the separator).
3.
Wash the parts under running water.
4.
Replace the inserts and return the dispenser to the drawer.
Water Inlet Hoses
Replace inlet hoses after five years of use to reduce the risk of
hose failure. Periodically inspect and replace inlet hoses if
bulges, kinks, cuts, wear or leaks are found.
When replacing your inlet hoses, record the date of replacement.
Vacation, Storage, and Moving Care
Install and store your washer where it will not freeze. Because
some water may stay in the hoses, freezing can damage your
washer. If storing or moving your washer during freezing weather,
winterize it.
Non-use or vacation care:
Operate your washer only when you are at home. If you will be on
vacation or not using your washer for an extended period of time,
you should:
■
Unplug the power cord.
■
Turn off the water supply to the washer. This helps avoid
accidental flooding (due to a water pressure surge) while you
are away.
■
Slightly open door to provide ventilation.
To winterize washer:
1.
Put 1 qt (1 L) of R.V.-type antifreeze in the drum.
2.
Run washer on a DRAIN/SPIN cycle.
3.
Unplug washer or disconnect power.
4.
Shut off both water faucets.
5.
Disconnect water inlet hoses from faucets and drain.
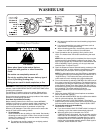
Loading suggestions (maximum size loads).
Heavy Work Clothes
4 jeans
4 workpants
4 workshirts
2 sweatpants
2 sweatshirts
Towels
10 bath towels
10 hand towels
14 washcloths
Mixed Load
3 sheets (1 king, 2 twin)
4 pillowcases
3 shirts
3 blouses
9 T-shirts
9 shorts
10 handkerchiefs