


7
GB
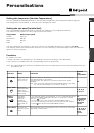
Cycle phase under way:
During the wash cycle, the LEDs gradually illumi-
nate on to indicate the cycle phase under way:
Prewash
Wash
Rinse
Spin
Note: during draining, the LED corresponding to
the Spin cycle phase will be turned on.
Function buttons
The FUNCTION BUTTONS also act like LEDS.
When a function is selected, the corresponding
button is illuminated.
If the function selected is incompatible with the
programme set, the button will flash and the
function will not be enabled.
If you set a function that is incompatible with
another function you selected previously, only the
last one selected will be enabled.
Leds
The LEDS provide important information.
This is what they can tell you:
Delay set:
If the Time Delay start function has been enabled
(see page. 9), once you have started the
programme, the LED corresponding to the delay
set will begin to flash:
As time passes, the remaining delay will be
displayed, and the corresponding LED will flash:
Once the set delay is complete, the flashing LED
will turn off and the programme set will start.
Prewash
Wash
Rinse
Spin
2hr
4hr
6hr
9hr
Prewash
Wash
Rinse
Spin
2hr
4hr
6hr
9hr
ServiceTroubleshootingPrecautions CareProgrammes DetergentsInstallation Description
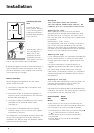
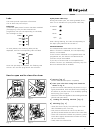
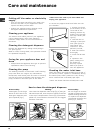
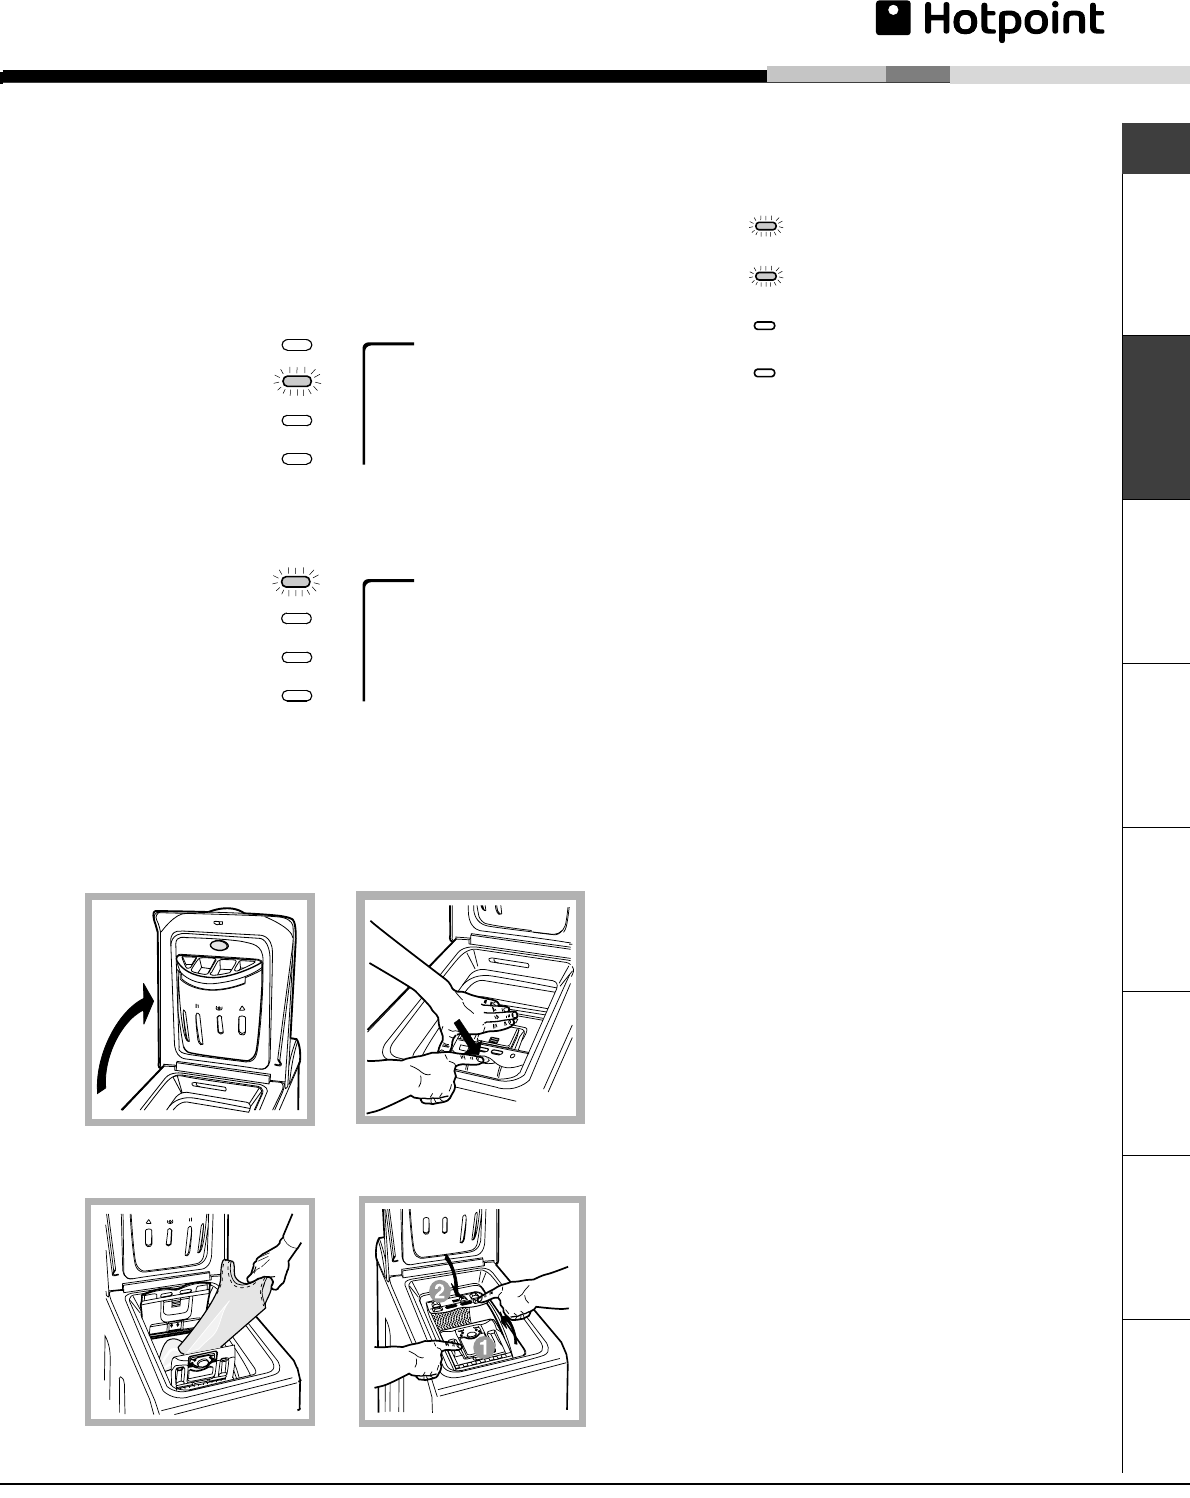
A) Opening (Fig. 1).
Lift the external lid and open it completely.
B) Then open the drum using both hands as
shown in Fig. 2:
- press the button indicated by the arrow in Fig. 2
lightly downwards, with one hand firmly resting on
the doors to prevent them from suddenly opening
and hurting your fingers;
- therefore follow the appliance doors along as these
unhook and open easily.
C) Loading the washing machine. (Fig. 3).
D) Shutting (Fig. 4).
- close the drum fully by first shutting the front
door followed by the rear one;
- then ensure the hooks on the front door are
perfectly housed within the seat of the rear door;
- after the hooks have clicked into position, press
both doors lightly downwards to make sure they
do not come loose;
- finally shut the external lid.
How to open and to close the drum
Fig. 1 Fig. 2
Fig. 3
Fig. 4