


CONNECTING TO PLUMBING FACILITIES
CAUTION: Be sure water supply lines have
been thoroughly flushed to remove particles that
might clog the washer filter screens.
Check inlet hoses to ensure the rubber washers
are installed in each end. (If your laundry center
has the hoses attached to the water valve,
proceed to Step 13A.) Carefully connect the inlet
hoses to the water valve (on the left side of the
washer cabinet), tighten by hand, and then
tighten another 2/3 turn with pliers.
CAUTION: DO NOT CROSS-THREAD OR
OVERTIGHTEN THESE CONNECTIONS.
Determine which water faucet is the HOT water
faucet, carefully connect the bottom inlet hose
to the HOT water faucet, tighten by hand,
and then tighten another 2/3 turn with pliers.
Carefully connect the top inlet hose to the
COLD water faucet, tighten by hand, and then
tighten another 2/3 turn with pliers.
CAUTION: DO NOT CROSS-THREAD OR
OVERTIGHTEN THESE CONNECTIONS.
Turn the water on and check for leaks at both
connections.
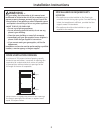
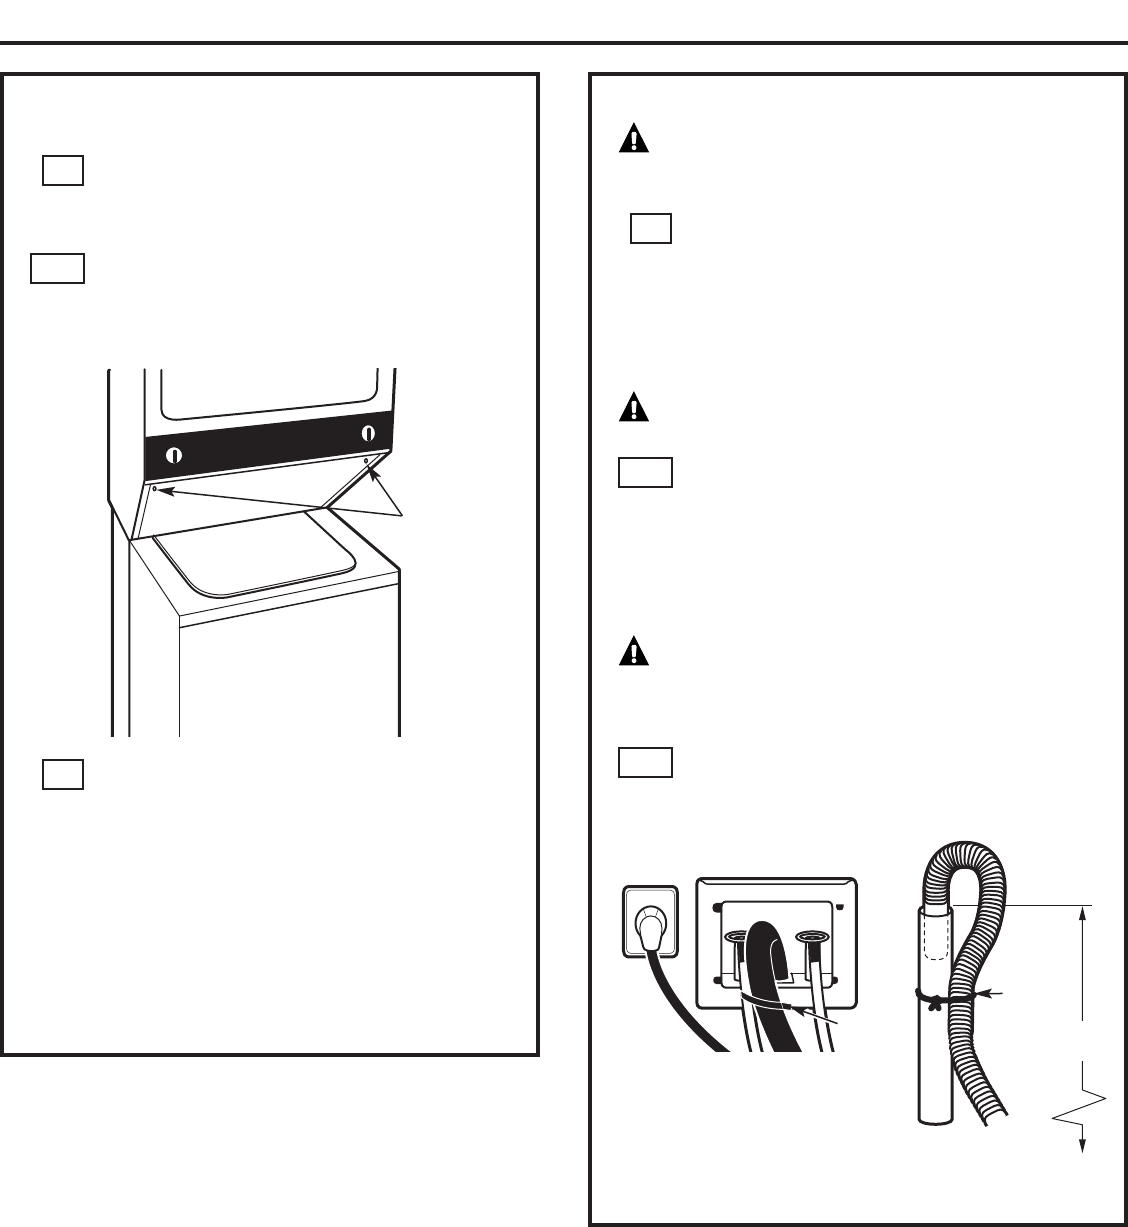
Place formed end of drain hose in drain facility
and secure with cable tie (provided in literature
package).
NOTE:
Drain hose MUST be secured to drain facility in
all cases.
13B
13
13A
MOVING SPACEMAKER
™
TO OPERATING
LOCATION
Remove the 2 screws securing the access panel
to the dryer cabinet. Lift the front access panel
until the tabs can be disengaged from the dryer
cabinet, and remove the panel.
Route the inlet hoses, drain hose and power cord
through the rear access area for temporary
holding when moving the appliance to the
operating location.
To ensure the Laundry Center is level and solid
on all four legs, tilt the Laundry Center forward
so the rear legs are off the floor. Gently set the
Laundry Center back down to allow the rear legs
to self-adjust. Place a level on top of the washer.
Check it side to side, then front to back. Screw
the front leveling legs up or down to ensure the
Laundry Center is resting solidly on all four legs
(no rocking of the Laundry Center should occur).
NOTE:
Keep the leg extension at a minimum to prevent
excessive vibration.
12
11
11A
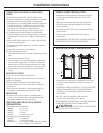
3
Access panel
screws
Installation Instructions
Cord length
4 ft.
Cable tie
Cable tie
33″ Min./
96″ Max.