


15
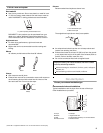
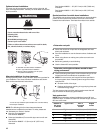
2. Place laundry in dryer and shut door.
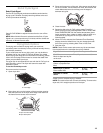
3. Press the POWER button. Then rotate the dial or press a
Timed Cycles button to select the desired Automatic or
Timed Cycle. The indicator light for the selected Automatic or
Timed cycle will glow green. The preset modifiers for the
selected cycle will glow green. Selectable options will glow
amber. If an option or modifier is unavailable with the selected
cycle, the light will not illuminate. The estimated or actual
cycle time
(in minutes) will show in the display.
To use an Automatic Cycle
NOTE: A ligh
t next to each feature will glow green when the
feature is selected or will glow amber when the feature is
selectable. The light will not glow when the selection is
unavailable with the cycle or option combinations selected.
■ Select an Automatic Cycle.
■ Select DRYNESS LEVEL to adjust how dry you want the
load. As the cycle runs, the control senses the dryness of
the load and adjusts the time automatically for the
selected dryness level.
NOTE: Most loads may be
dried using Normal dryness
level, which is shown in bold letters on your control panel.
Normal is the energy preferred dryness level and will use
the least energy.
■ Select the desired Options.
To make changes during an Automatic Cycle:
■ Press STOP once.
■ Adjust Dryness Level.
NOTE:
Dryness Level selections can be made only while
using Automatic Cycles. You can select a different
dryness level, depending on your load, by pressing
Dryness Level and choosing More Dry, Normal, or Less
Dry. Selecting More Dry, Normal, or Less Dry
automatically adjusts the sensed time needed.
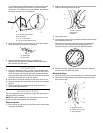
How Automatic Cycles work
The AccelerCare function improves d
rying performance with Auto
Moisture Sensing Plus, which advances the cycle as moisture is
extracted from clothing. A thermistor (electronic temperature
sensor) and moisture sensing strips in the dryer drum help
measure the amount of moisture in the clothes as they tumble.
An electronic control determines the load type to help save time,
avoid overdrying, and increase the accuracy of the end dryness
level. After the first 5 minutes of an automatic cycle, the
estimated time display will adjust based on the approximate load
size, cycle, dryness level selected, and amount of moisture left in
the clothes. When the clothes have reached approximately 80%
of the dryness level selected, the estimated time display will
adjust again, showing the final drying time. Auto Moisture
Sensing Plus takes the guesswork out of drying time and
enhances fabric care.
To use a Timed Cycle
NOTE: A ligh
t next to each feature will glow green when the
feature is selected or will glow amber when the feature is
selectable. The light will not glow when the selection is
unavailable with the cycle or option combinations selected.
■ Press a Timed Cycles button or, to select Air Fluff, rotate
the control knob to the desired cycle.
■ Press MORE TIME or LESS TIME until the desired drying
time is displayed. Tap MORE TIME or LESS TIME, and the
time will change by 1-minute intervals. Press and hold
MORE TIME or LESS TIME, and the time will change by
5-minute intervals.
NOTE:
The More Time and Less Time buttons can be
used only with Timed Cycles.
■ Press TEMPERATURE until the desired temperature
glows.
NOTE: During a Timed Cycle, you can change the settings for
Time, Temperature, Wrinkle Prevent, and End of Cycle Signal.
Press STOP twice to stop the dryer and clear the settings.
Select another cycle or option.
4. (OPTIONAL STEP) If desired, select OPTIONS. For more
details, see “Options.”
5. (OPTI
ONAL STEP) If desired, set the
End of Cycle Signal
.
Select LOUD or SOFT by pressing the Cycle Signal button
to alert you when a cycle ends.
6. Pr
ess and hold START for approximately 3 seconds until
dryer starts. Be sure the door is closed.
■ If you do not press Start within 5 minutes of selecting the
cycle, the dryer automatically shuts off.
■ If you wish to end your drying cycle after pressing Start,
press Stop twice.
Stopping Your Dryer
To stop your dryer at any time
Press STOP twice or open the door.
Pausing or Restarting
To pause the dryer at any time
Open the door or press STOP once.
To restart the dryer
Close the door. Press and hold START until dryer starts.
NOTE:
Drying will continue from where the cycle was interrupted
if you close the door and press START within 5 minutes. If the
cycle is interrupted for more than 5 minutes, the dryer will shut
off. Select new cycle settings before restarting the dryer.
Control Locked
This feature allows you to lock your settings to avoid unintended
use of the dryer. You can also use the Control Locked feature to
avoid unintended cycle or option changes during dryer operation.
To enable t
he Control Locked feature:
Press and hold CYCLE SIGNAL for 3 seconds. The Control
L
ocked indicator light glows, and a single beep tone is heard.
To unlock, press and hold CYCLE SIGNAL for 3 seconds.
The indicator light turns off.
Drying and Cycle Tips
Select the correct cycle and dryness level or temperature for your
load. If an Automatic Cycle is running, the display shows the
estimated cycle time, which is determined by your dryer
automatically sensing the dryness level of your load. If a Timed
Cycle is running, the display shows the exact number of minutes
remaining in the cycle.