


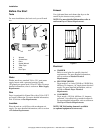


Installation
801504
16
© Copyright, Alliance Laundry Systems LLC – DO NOT COPY or TRANSMIT
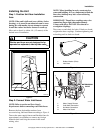
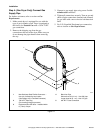
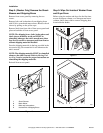
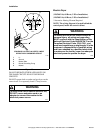
Step 8: (Washer Only) Remove the Shock
Sleeves and Shipping Brace
Remove front access panel by removing the two
screws.
Remove bolts and lockwashers from shipping brace
with 9/16 in. wrench and remove brace. Remove shock
sleeves by pulling on the yellow rope.
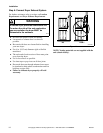
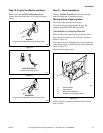
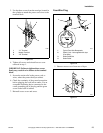
Remove label from front side of front access panel and
place on backside of front access panel.
NOTE: The shipping brace, bolts, lockwashers and
shock sleeves should be saved and MUST be
reinstalled whenever the unit is moved more than
four feet. Do not lift or transport unit from front or
without shipping materials installed.
Store the shipping materials in the bag provided in the
accessories bag. Save materials for use whenever the
unit is moved.
NOTE: The shipping materials MUST be reinstalled
whenever the unit is moved. Refer to Moving Unit
to a New Location section for proper instructions on
reinstalling the shipping materials.
Reinstall front access panel.
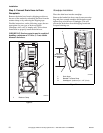
Figure 16
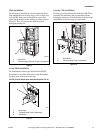
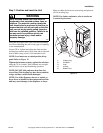
Step 9: Wipe Out Inside of Washer Drum
and Dryer Drum
Before using the washer and dryer for the first time,
use an all-purpose cleaner, or a detergent and water
solution, and a damp cloth to remove shipping dust
from inside the drums.
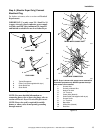
Figure 17
Figure 18
H336I
1 Shock Sleeves
2 Motor Mount
3 Bolts and Lockwashers
4 Hooked End of Shipping Brace
2
1
4
3
SWD602N
SWD603N
SWD602N