STEP 2: CONNECT THE SCANNER 11
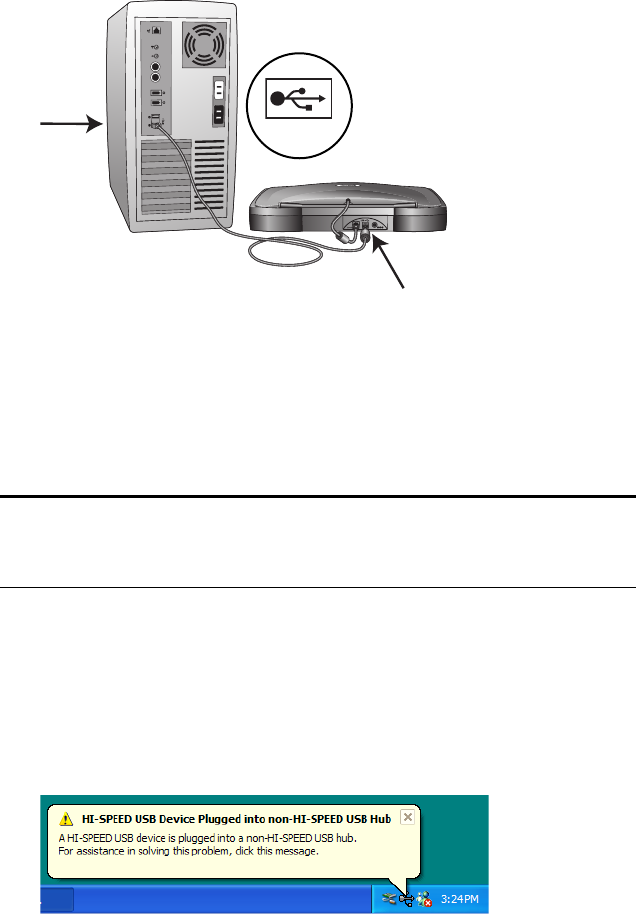
3. Plug one end of the USB cable into an available USB 1.1 or USB
2.0 port on the computer.
4. Plug the other end of the USB cable into the scanner’s USB port.
If the plug does not attach easily, make sure that you are plugging it
in correctly. Do not force the plug into the connection.
You can also connect the scanner to a USB port on the computer’s
keyboard if it has one, or to a USB hub. If you use a USB hub, it
must have its own power supply already plugged into an electrical
outlet.
If you are using Windows XP and have plugged the USB cable into
a USB 1.1 port, an information bubble may open explaining that
“A HI-SPEED USB device is plugged into a non-HI-SPEED USB
hub”. Plug the USB cable into a USB 2.0 port (if available) or just
disregard the message. If you leave it plugged into the USB 1.1
port, your scanner may scan a bit slower than with a USB 2.0 port.
Note: If you have not installed the software, unplug the USB cable
from the computer and install the software now. When the software
installation is complete, a message tells you to connect the scanner.
USB


