7
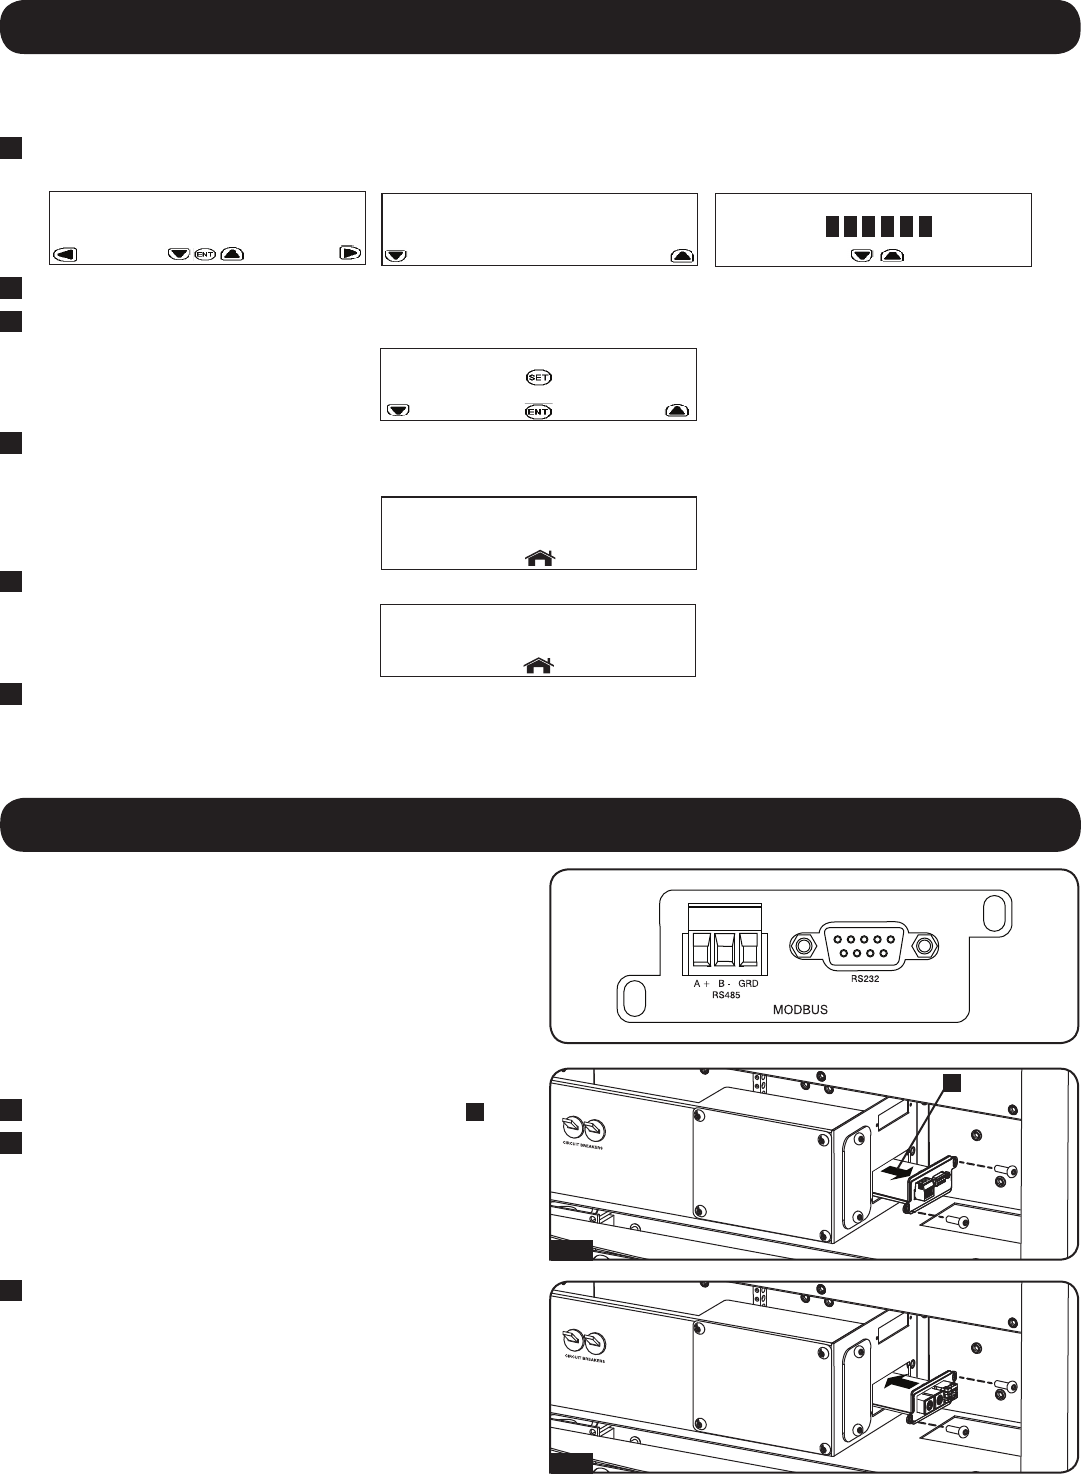
8. Network Card Connections
The SRCOOL33K/SRXCOOL33K can be remotely monitored and
controlled via SNMP, Web, telnet or Modbus. The unit comes with a
Modbus card pre-installed. The card has RS485 and RS232 ports
that can be used to connect to the unit.
Remote monitoring and control via SNMP, Web or telnet requires
a network card such as Tripp Lite’s SNMPWEBCARD. In order to
install a user-supplied network card, the Modbus card must first be
removed.
To install a user-supplied network card, please use the following
procedure.
1
Remove the front panel and locate the Modbus card slot
A
.
2
Remove the screws holding the card in place and gently slide the
card out of the slot.
7. Electrical Connections
4
Press ENT to access the TECHNICIAN MENU.
Note: An informational screen will be displayed first.
5
Press SET to continue.
3
Align and insert the user-supplied network card into the slot and
fasten with included screws.
Note: Please review and follow all of your network card’s installation
and configuration documents before installing into the SRCOOL33K/
SRXCOOL33K.
2
Press the HOME button.
3
Scroll right to the SETUP screen and scroll down to the following menu:
WARNING! This conguration is for hardwire installations only/ Do not change this setting when using the supplied L6-30P
input cord.
1
From the HOME screen, scroll right to the SETUP screen and unlock the SETUP menus. To unlock SETUP menus, press ENT > Open
Password > enter your password > SET. The default password is 000000.
6
Press SET to continue to highlight the current limit. Using the up, down, left and right arrows, set the current to 30.0 Amps. Press ENT
when done. Press HOME button to exit.
WARNING! Do not place setting at any value other than 24.0 Amps (with input Cord) or 30.0 Amps (Hardwire).
WARNING! The SRXCOOL33K is pre-congured at 30 amps. DO NOT change this setting.
1-2
3
A


