4
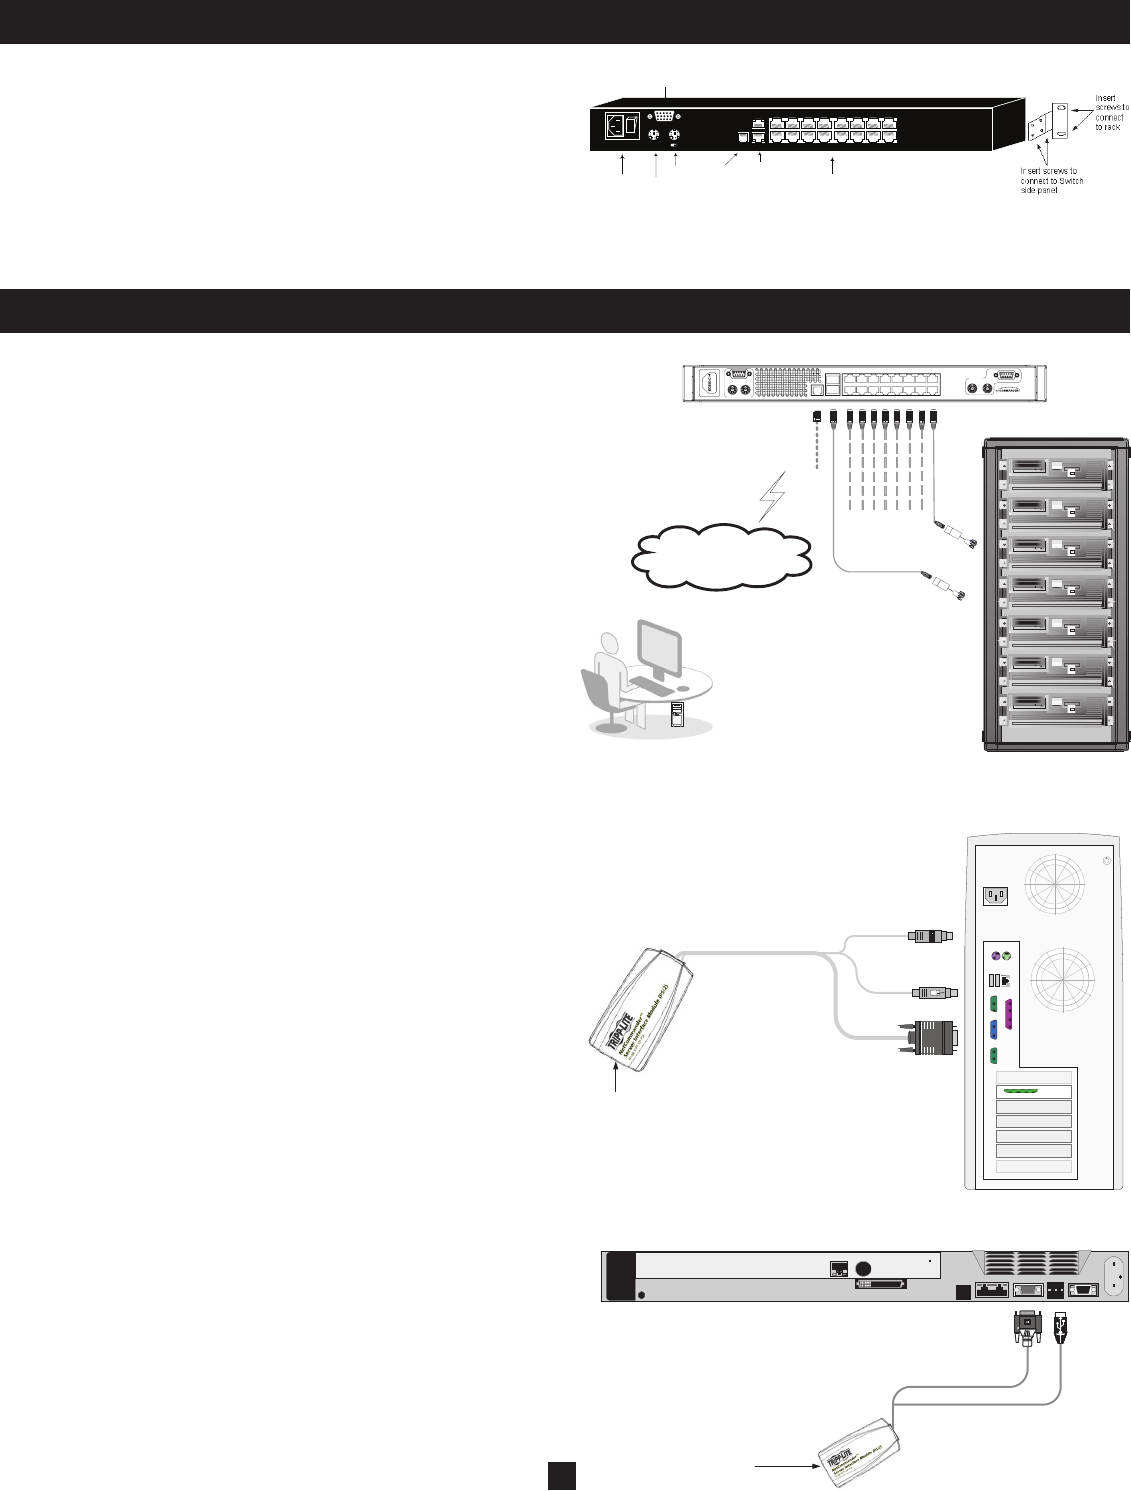
6. Rackmount Installation
Follow all instructions in the Safety section before rackmounting. Make sure
to write down the MAC Address and Device Number listed on the bottom of
the KVM switch before rackmounting. They will be useful when fi nding the
IP Address from a DHCP Server.
Use the L-shaped brackets and screws provided to mount the KVM switch in
a server rack as illustrated below.
Power
connector
POWER
100-240 VAC 50/60 Hz
Server ports
I
12345678
10 11 12 13 14 15 169
Keyboard
Mouse
Monitor
CONSOLE
LAN (Ethernet)
connector
FLASH
LAN
SERIAL
Flash
(download)
connector
7. Connection (Single KVM Switch)
Connecting Computers to the KVM Switch
Connect each computer to the KVM switch using a Tripp Lite B078-001-
PS2* or B078-001-USB* Server Interface Unit (SIU), and a Cat5e Patch
Cable. (For best results, use a Tripp Lite N001-, N002-, N201- or N105-
series cable.*)
*Available Separately from Tripp Lite.
Connecting a Keyboard, Monitor and Mouse to the KVM Switch
To operate the system locally, connect a keyboard, monitor and mouse to
the KVM Switch. Shut down all PS/2 computers before connecting the
keyboard, monitor and mouse to ensure they will be recognized by the
computer.
1. Connect the keyboard’s connector to the KVM switch’s keyboard port.
2. Connect the monitor connector to the KVM switch’s monitor port.
3. Connect the mouse’s connector to the KVM switch’s mouse port.
Connecting Server Interface Units (SIUs) to the KVM Switch
Server Interface Units (SIU) draw their power from the connected computer. In
the case of the PS/2 Server Interface Unit (model # B078-001-PS2), the power
is drawn from the keyboard port. In the case of the USB Server Interface Unit
(model # B078-001-USB), the power is drawn from the USB port.
Connecting a PS/2 Server Interface Unit (SIU)
(Model # B078-001-PS/2)
1. Shut down the computer being connected to the SIU.
2. Connect the SIU’s VGA connector to the computer’s VGA port.
3. Connect the SIU’s PS/2 keyboard connector to the computer’s PS/2
keyboard port.
4. Connect the SIU’s PS/2 mouse connector to the computer’s PS/2 mouse port.
5. Connect one end of a Cat5e patch cable to the SIU’s RJ45 port and the
other end to the KVM switch’s RJ45 port. (Note: the Cat5e cable should
be no longer than 33 ft. (10 m).
6. Repeat steps 1 through 5 for each additional PS/2 computer/server you are
connecting to the KVM switch.
Connecting a USB Server Interface Unit (SIU) (Model # B078-001-USB)
1. Connect the SIU’s VGA connector to the computer’s VGA port.
2. Connect the SIU’s USB connector to the computer’s USB port.
3. Connect one end of a Cat5e patch cable to the SIU’s RJ45 port and the
other end to the KVM switch’s RJ45 port. (Note: the Cat5e cable should
be no longer than 33 ft. (10 m).
4. Repeat steps 1 through 3 for each additional USB computer/server you are
connecting to the KVM switch.
User over IP
Internet / VPN / LAN
To servers
M
I
N
I
C
O
M
M
I
N
I
C
O
M
hp workstation b2600
hp workstation b2600
hp workstation b2600
hp workstation b2600
hp workstation b2600
hp workstation b2600
hp workstation b2600
To LAN port
PS/2 or USB SIU
INTEGRATED
CONSOLE PORTS
KVM CONSOLE PORTS
100-240VAC, 50/60 Hz
UPGRADE LAN 1 2 3 4 5 6 7 8
9 10 11 12 13 14 15 16SERIAL
16-PORT CONSOLE KVM SWITCH
MODEL: B070-016-19-IP
To computer’s
keyboard port
CAT5 cable to
B072-016-1-IP
Server port
To computer’s
mouse port
To computer’s
Video port
NetCommander
PS/2
Keybd
Mouse
100T
VideoSerial A
Parallel
PCI 33Mx32b
PCI 33Mx32b
PCI 33Mx32b
PCI 33Mx32b
Serial B
SCSI
To USB Port
To Video port
CAT5 cable to B072-016-1-IP
Server port
NetCommander USB


