Toshiba
–14–
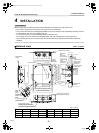
4-way Air Discharge Cassette Type
Installation Manual
EN
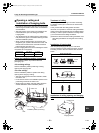
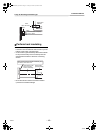
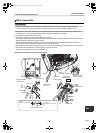
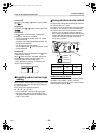
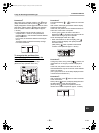
Connecting drain pipe
• Connect a hard socket (procured locally) to the hard
socket of the attached supplied flexible hose.
• Connect a drain pipe (procured locally) to the
connected hard socket.
REQUIREMENT
• Connect hard vinyl chloride pipes securely using an
adhesive for vinyl chloride to avoid water leakage.
• It takes some time until the adhesive is dried and
hardened (refer to the manual of the adhesive). Do
not apply stress to the joint with the drain pipe
during this time period.
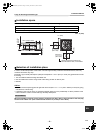
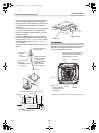
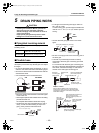
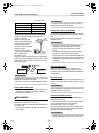
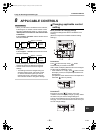
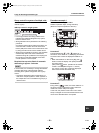
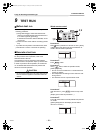
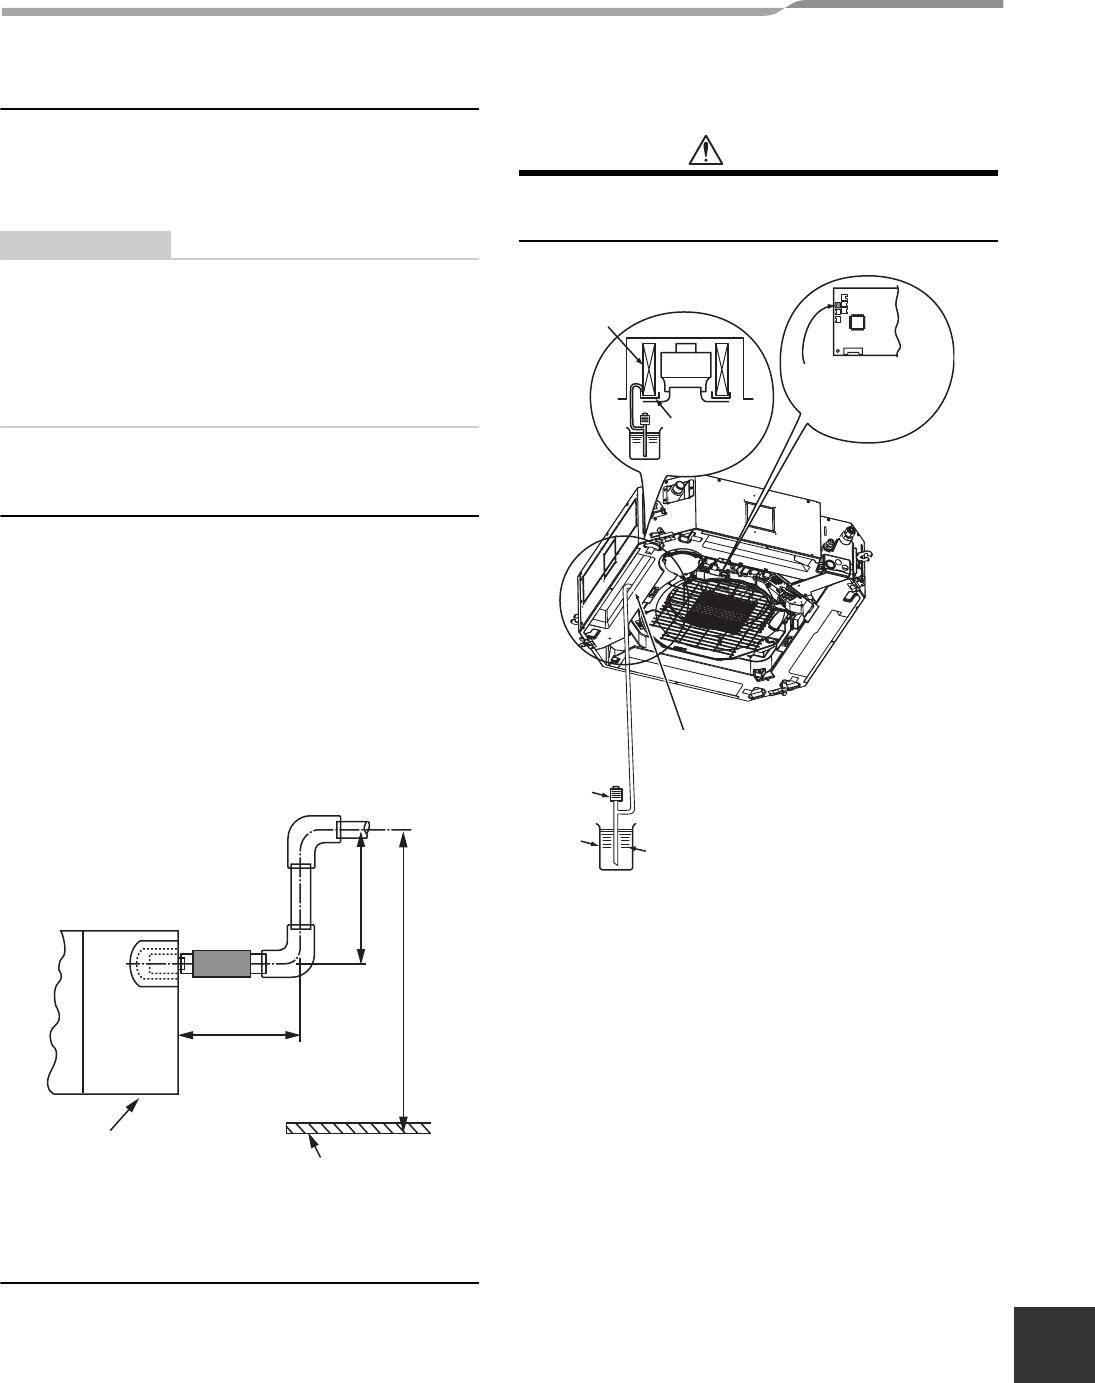
Drain up
When a down-gradient cannot be secured for the
drainpipe, drain-up piping is possible.
• The height of the drain pipe must be 33.5" (850 mm)
or less from the bottom of the ceiling.
• Take the drain pipe out of the drain pipe joint with the
indoor unit in 11.8" (300 mm) or less, and bend up
the pipe vertically.
• Immediately after the pipe is bent up vertically, lay
the pipe making a down-gradient.
• Set downward grading immediately after raising up
vertically.
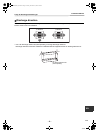
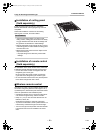
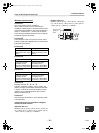
Check the draining
In the test run, check that water drain is properly
performed and water does not leak from the connecting
part of the pipes.
Be sure to check draining also when installed in
heating period.
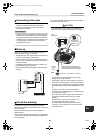
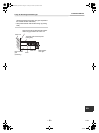
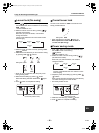
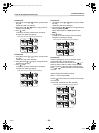
Using a pitcher or hose, pour water (0.4 - 0.5 gal (1500
- 2000 cc)) into the discharge port before installation of
the ceiling panel.
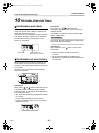
Pour water gradually so that water does not spread on
the motor of the drain pump.
CAUTION
Pour water gently so that it does not spread around
inside the indoor unit, which may cause a malfunction.
• After the electric work has finished, pour water
during COOL mode operation.
• If the electric work has not yet finished, pull out the
float switch connector (CN34 : Red) from the electric
parts box, and check draining by plugging the single
phase 208/230 V power to the terminal blocks L
1 and
L
2.
If doing so, the drain pump motor operates.
• Test water drain while checking the operation sound
of the drain pump motor.
(If the operation sound changes from continuous
sound to intermittent sound, water is normally
drained.)
After the check, the drain pump motor runs,
connecting the float switch connector.
(In case of check by pulling out the float switch
connector, be sure to return the connector to the
original position.)
Rising up 26.0”
(661 mm) or less
Underside of ceiling
Indoor unit
11.8” (300 mm)
or less
Rising up 33.5” (850 mm) or less
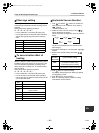
Heat
exchanger
Drain pan
Float switch
connector (3P)
(CN34: red)
Insert the hose end between the
heat exchanger and the drain pan,
and then bend the hose downward.
Tool for
pouring
water
Bottle
Water (0.4 - 0.5 gal (1500 - 2000 cc))
14-EN
+00EH99864701_00Ta.book Page 14 Tuesday, November 24, 2009 4:54 PM