Toshiba
–11–
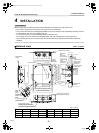
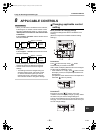
4-way Air Discharge Cassette Type
Installation Manual
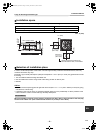
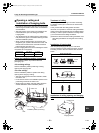
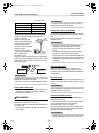
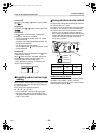
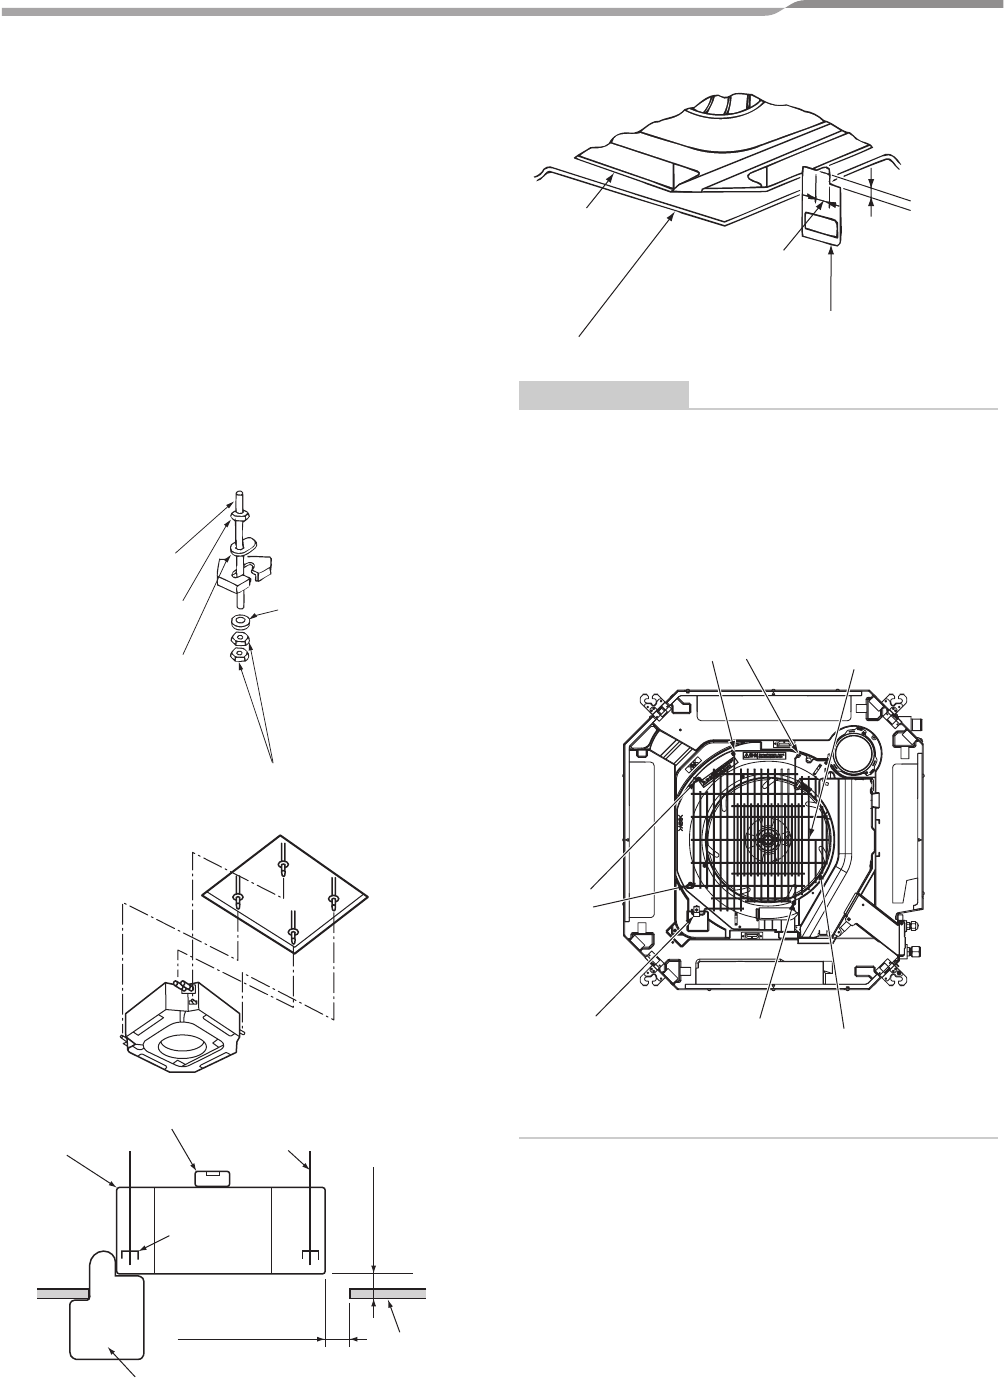
• Attach a nut (3/8" (M10): not supplied) and the Ø1.3"
(34 mm) washer (supplied) to each hanging bolt.
• Insert a washer on both sides of the T groove of the
hanging bracket of the indoor unit, and hang the
indoor unit.
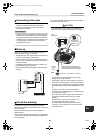
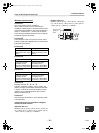
• Check that the four sides of the indoor unit are level
using a level vial (levelness: 0.2" (5 mm) or less).
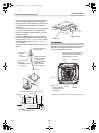
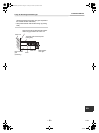
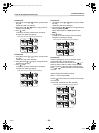
• Detach the installation gauge (accessory) from the
installation pattern.
• Using the installation gauge, check and adjust the
positional relation between the indoor unit and the
ceiling opening (1) (0.4” - 1.4” (10 - 35 mm): 4 sides)
and the hanging-up height (2) (0.5” - 0.7” (12 - 17
mm): 4 corners).
(How to use the installation gauge is printed on the
gauge.)
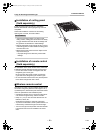
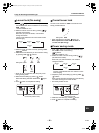
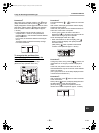
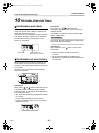
REQUIREMENT
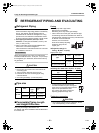
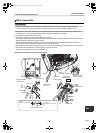
Before installation of the indoor unit, be sure to remove
the cushion for transportation between the fan and the
bell mouth. Running the unit without removing the
cushion may damage the fan motor.
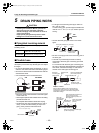
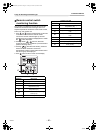
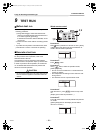
Washer (Accessory)
To prevent the bolt
from falling off (for
safety), be sure to set
it just under the
hanging bracket as
shown in the figure.
Eccentric washer
(Accessory)
Nut
3/8” (M10)
Hanging bolt
3/8” (M10)
Nut
3/8” (M10)
* Procure hanging bolts
and nuts locally.
* Install with the marking
“UP” facing up.
Indoor unit
Level vial (levelness: 0.2” (5 mm) or less)
Hanging bolt
Hanging
bracket
Installation gauge
(1) 0.4” - 1.4”
(10 - 35 mm)
Ceiling
board
(2) 0.5” - 0.7”
(12 - 17mm)
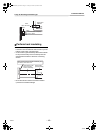
Indoor unit
Installation gauge
(1) 0.4” - 1.4”
(10 - 35 mm)
(2) 0.5” - 0.7”
(12 - 17 mm)
Ceiling board
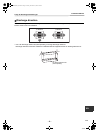
Remove the 5 screws and detach the
wire guard. Remove the cushion
placed between fan and bell mouth.
Attach back the wire guard.
Wire guard
Screw
Screw
Screw
Cushion
Clamp
* Do not remove the
clamp fixing screw on
the indoor unit.
11-EN
+00EH99864701_00Ta.book Page 11 Tuesday, November 24, 2009 4:54 PM