48
7
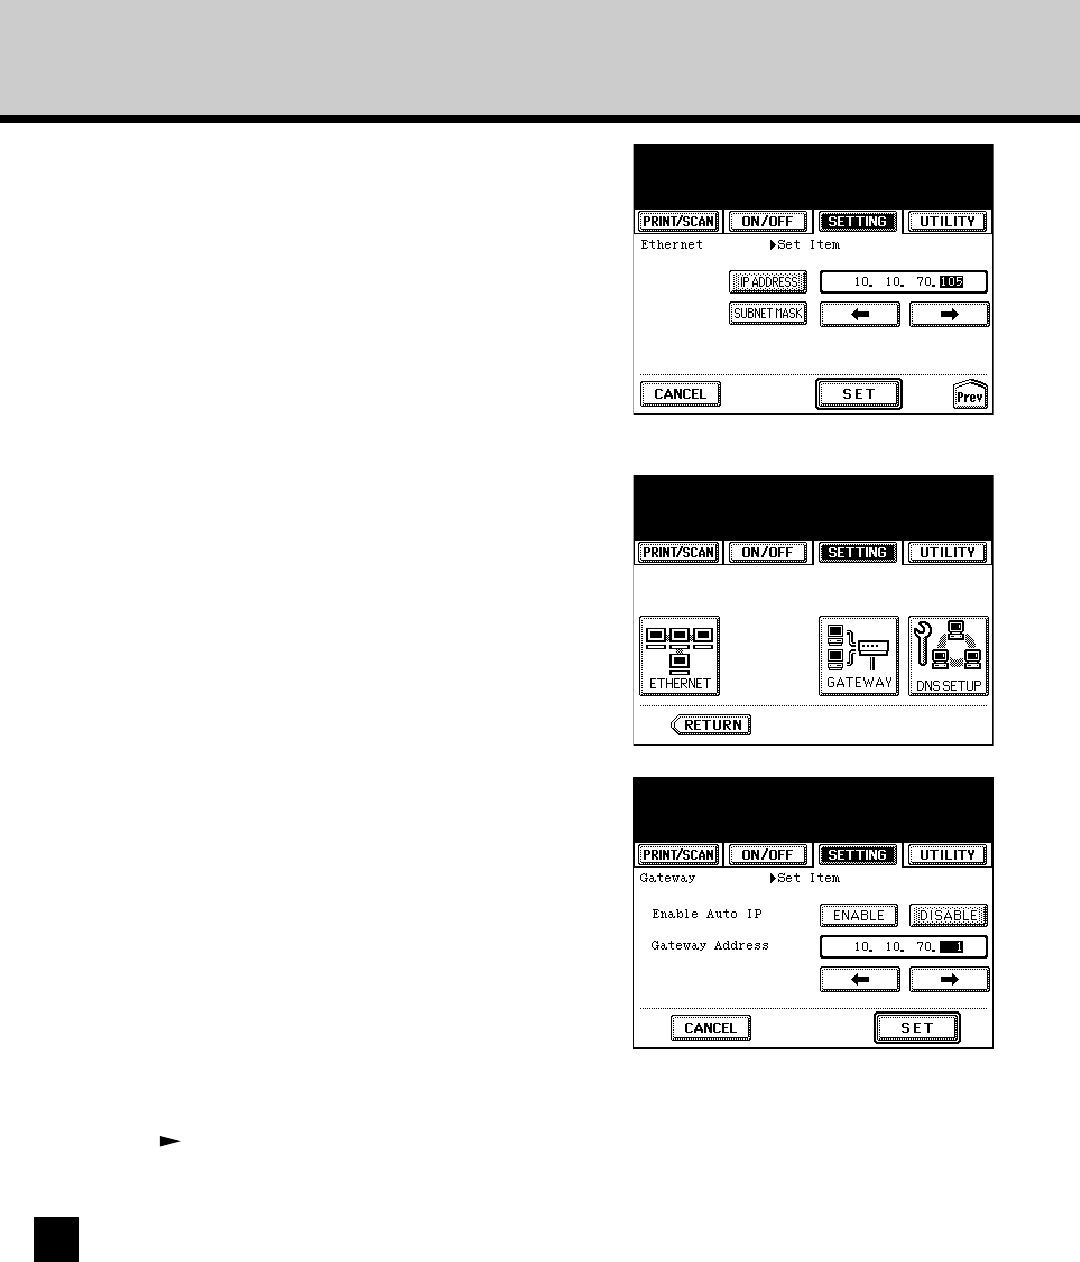
Press [GATEWAY].
• The Gateway options screen is displayed.
• If you do not have to assign the gateway address,
proceed to the step 9.
6
To assign the IP address, press [IP ADDRESS]
and enter the IP address of GA-1140 using the
Digital keys.
To assign the Subnet Mask, press [SUBNET
MASK] and enter the subnet mask using the
Digital keys.
Press [SET] to save settings.
• The screen returns to TCP/IP options menu. Proceed
to step 7.
8
When you assign the gateway address
automatically from DHCP, RARP, or BOOTP
server, press [ENABLE] for “Enable Auto IP”.
When you assign the gateway address
manually, select [DISABLE] for “Enable Auto
IP” and enter the gateway address using the
Digital keys.
Press [SET] to save settings.
• The screen returns to TCP/IP options menu.
9
Perform resetting the GA-1140.
P109 “Resetting the GA-1140”
• The setting changes on the Network options is applied after resetting the printer. If you want to set
other network options, you can also proceed the operation for setup before resetting the printer.


