14
NS-DV1080P 1080p HD Digital Camcorder
www.insigniaproducts.com
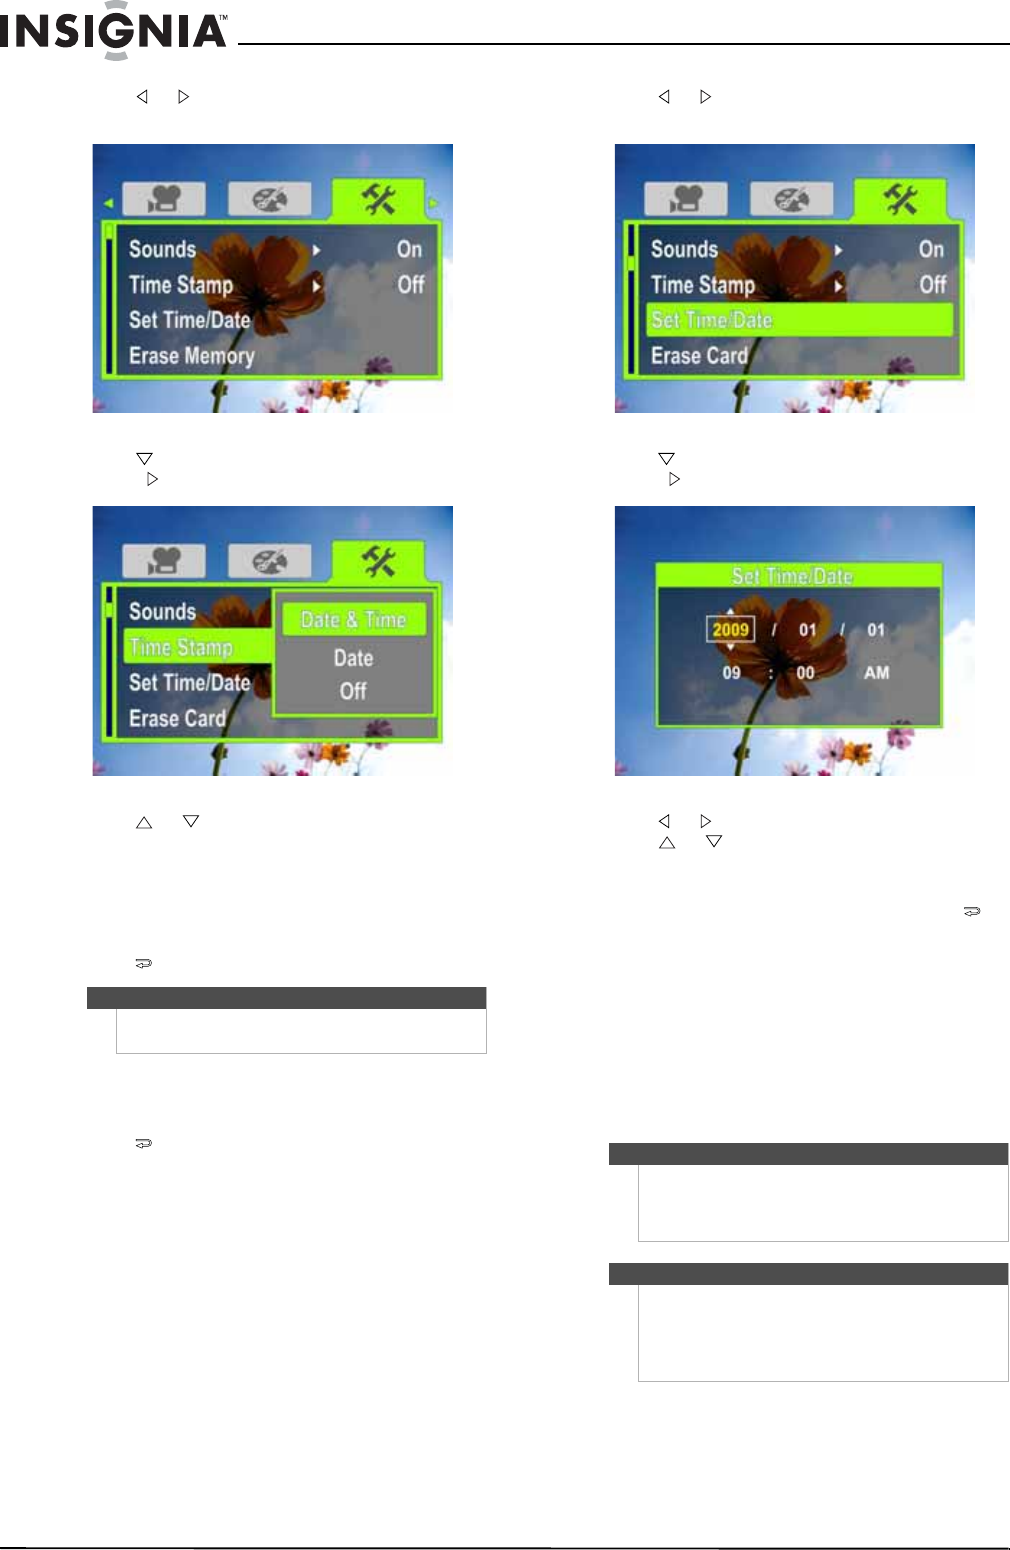
4 Press or to highlight the Settings tab. The
Settings menu opens.
5 Press to highlight Time Stamp, then press
SET or . The Time Stamp screen opens.
6 Press or to highlight an option, then press
SET. You can select:
• Date & Time—Imprints the date and time on
pictures.
• Date—Imprints the date on pictures.
• Off—Turns the time stamp feature off.
7 Press to close the menu.
Setting the date and time
To set the date and time:
1 Press to enter Record mode. The
record/power indicator on the back of your
camcorder lights blue.
2 Press SET. The menu opens.
3 Make sure that Simple Mode is off. See “Turning
Simple Mode off” on page 10.
4 Press or to highlight the Settings tab. The
Settings menu opens.
5 Press to highlight Set Time/Date, then press
SET or . The Set Time/Date screen opens.
6 Press or to move between the fields, then
press or to change the values in the fields.
The formats are YEAR/MONTH/DAY and
HOUR:MINUTES.
7 Press SET to save your settings, then press to
close the menu.
Erasing an SD/SDHC memory card or the
internal memory
If the files on an SD/SDHC memory card do not
display smoothly and the LCD displays the “!”
symbol, the card is formatted for low speed or has
the wrong type of content on it. To correct this
problem, format the card in your camcorder instead
of in a computer.
Note
Once the date or date and time are imprinted on a
picture, they cannot be removed.
Caution
When you use the Erase feature, all files stored on the
card or in internal memory are deleted. Make sure
that you backup any files you want to save to a
computer before you use the Erase feature.
Note
If an SD/SDHC memory card is inserted in your
camcorder, the Erase feature erases and formats the
card.
If no SD/SDHC memory card is inserted, the Erase
feature erases the internal memory.
