Installation and Connection
11
4) Proper battery orientation is indicated in the battery compartment.
5) Replace the battery compartment and screw using a screwdriver to
close the battery compartment cap.
3.2 Battery Precautions
Remove the battery while cleaning the tool.
Remove the battery before storing the tool for a long period of
time to prevent battery leakage from damaging battery
compartment.
When necessary, replace all four (4) batteries with new ones.
Use only the size and type of batteries specified.
Be sure to install the batteries with the correct polarity as
indicated in the battery compartment.
Properly dispose of batteries. Exposure to high temperature can
cause batteries to explode. Do not dispose in the fire.
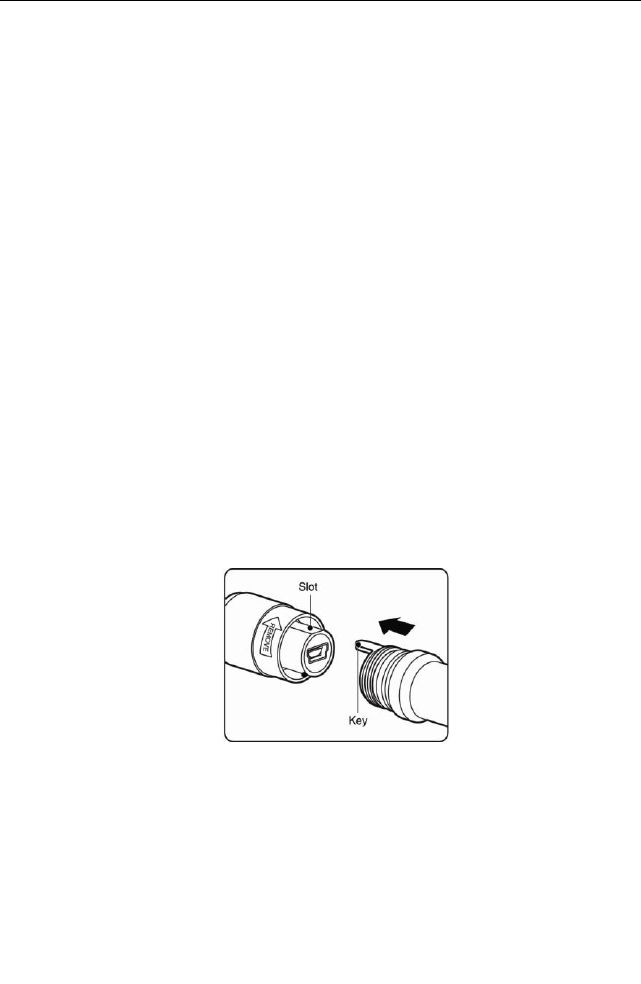
3.3The Imager Head and Cable Installation
To use the tool, the imager head and cable must be connected to the
display unit. To connect the cable to the display unit, make sure the
key and slot (Fig.6) are properly aligned. Once they are aligned,
finger-tighten the knurled knob to hold the connection firmly in place.
Fig. 6
3.4 Accessories Installation
The three accessories include magnet, hook and mirror (Fig. 2). All are
attached to the imager head in the same manner. Hold the accessory
and the imager head as shown in Fig. 7.


