8
Vertical Steam
The Blast of Steam Button can be used in the vertical position to remove wrinkles
from clothes while on the hanger, and to freshen the appearance of hanging curtains
or drapes.
1. When steaming drapes or curtains on the rods, make sure there is adequate
ventilation behind the fabric to prevent moisture build-up and mildew. Always
make sure there is nothing behind the fabric that may be damaged by the steam.
Before steaming clothes, check that pockets, turn-ups, and cuffs are empty.
2. Make sure that the Temperature Control Dial is set to the “max” (RED) setting
before releasing vertical blasts of steam. For maximum results, keep the Water
Tank at least half full.
CAUTION: IF THE IRON IS HOT, DO NOT FILL WITH WATER.
3. Hold the Iron upright so that the Soleplate is 7-15 inches
(18-38 cm) away from the garment or material. Press the
Blast of Steam Button once, then release (see FIGURE 8). It
may be necessary to press the Blast of Steam Button 2-3
times successively to release the initial burst. DO NOT HOLD
THE BLAST OF STEAM BUTTON DOWN.
CAUTION: AVOID COMING IN CONTACT WITH
ESCAPING STEAM.
4. As the Blast of Steam Button is pressed and steam is released, the temperature of
the Iron drops; thus the Water Tank color may cycle down momentarily. Allow at
least 4 seconds between blasts of steam to allow the Iron to regain heat.
NOTE: The red Thermostat Light will continue to cycle off and on during use as
the Iron maintains the desired temperature.
Spray Button
Use the Spray Button for moistening dry, difficult fabrics,
and for handling stubborn wrinkles. The Spray function is
also handy to moisten creases accidentally ironed into
the fabric.
1. Make sure there is water in the Water Tank (see
FILLING THE WATER TANK for detailed instructions).
CAUTION: IF THE IRON IS HOT, DO NOT FILL WITH WATER.
2. Aim the Spray Nozzle at the desired target, and then firmly press the Spray Button
(see FIGURE 9). It may be necessary to press the Spray Button 2-3 times
successively to release the initial spray of water.
NOTE: The Spray function can be used on any heat setting and does not affect the
ironing temperature.
FIGURE 8
Blast of Steam
Button
Spray Nozzle
FIGURE 9
Spray Button
X
1
2
FIGURE 3:
Steam Control Dial
FIGURE 2:
Temperature Control Dial
3
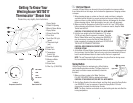
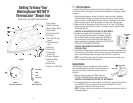
FIGURE 1
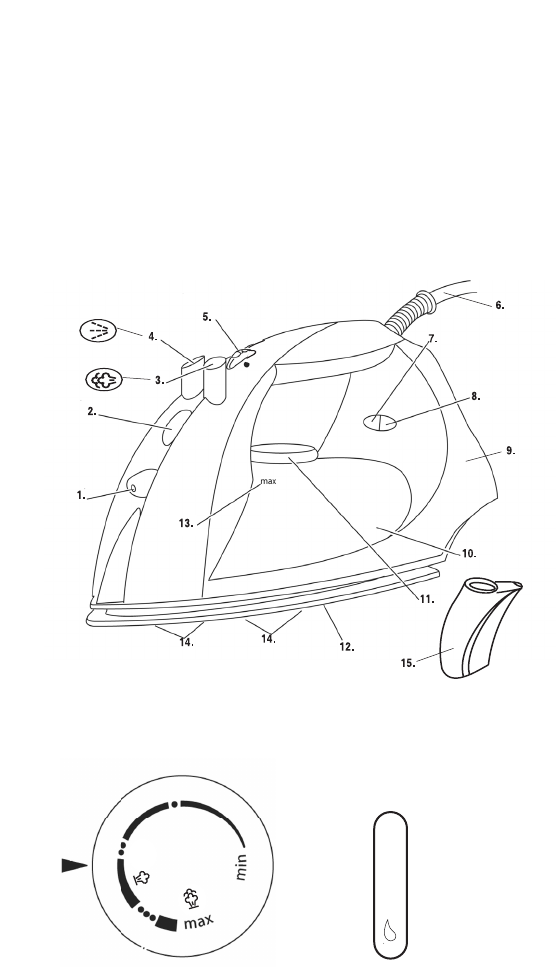
Getting To Know Your
Westinghouse WST5017
Thermocolor
™
Steam Iron
Product may vary slightly from illustrations.
1. Spray Nozzle
2. Water Fill Opening
3. Blast of Steam Button
4. Spray Button
5. Steam Control Dial
6. Pivot Cord
7. Auto Shut-Off Light
(green)
8. Thermostat Light
(red)
9. Heel Rest
10. Water Tank
11. Temperature
Control Dial
12. Ceramic Soleplate
13. Maximum Water
Level Line
14. Steam Vents
15. Filler Cup (P/N 50759)
NO STEAM
LOW
HIGH
Self-Clean


