3
IRONING TIPS
CAUTION: AVOID COMING IN CONTACT WITH ESCAPING STEAM.
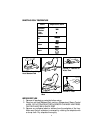
1. Sort clothing according to temperatures shown on sewn-in labels.
2. Iron items needing lowest temperatures first. This saves time waiting for
iron to cool down and heat up each time.
3. If you are unsure of the fiber content of a garment, test a small area
that will not show (a seam or inside hem) before ironing.
4. When in doubt, start with low heat. If wrinkle remains, gradually
increase heat to find the best setting for good results without damaging
the fabric.
5. Avoid ironing over zippers, rivets, etc. as they can scratch the Iron’s
Goldtone Non-Stick Soleplate.
6. When reducing the Temperature/Steam Control for delicate fabrics,
allow approximately 2 minutes for the iron to cool to the new setting.
7. Fabrics such as velour, wool, linen and silk are best ironed with an
ironing cloth to prevent shine marks.
8. Always remove garments from hangers before ironing.
9. We recommend using distilled water or water which has been
demineralized.
1
2
13
14
17
12
11
10
9
15
3
4
5
6
7
8
16
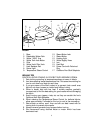
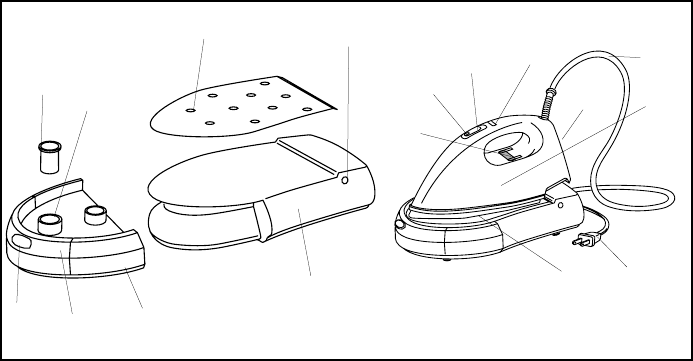
1. Base
2. Detachable Water Tank
3. Water “MAX” Line
4. Water Tank Lock Button
5. Filter
6. Water Hole/Filter Hole
7. Heat Resistant Pad
8. Power Light
9. Temperature/Steam Control
10. Steam Button Lock
11. Steam Button
12. Heating Light
13. Water Supply Hose
14. Iron
15. Heel Rest
16. Power Cord with Polarized
Plug
17. Goldtone Non-Stick Soleplate
FIGURE 1


