


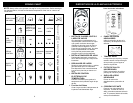
SELECCIÓN DE TEMPERATURA
PARA PLANCHAR
Siempre lea las etiquetas de la ropa y
siga las instrucciones de su fabricante
para plancharlas. Vea la “Guía para
Planchar” en la página 22:
• Temperatura baja para telas de
nylon y otras fibras sintéticas.
• • Temperatura mediana para lanas,
sedas y mezclas de fibras.
• • • Use la graduación alta para telas
de algodón y lino.
1. Asiente la plancha verticalmente
sobre su talón.
2. Enchufe el cordón a un tomacorriente
polarizado de 120 VCA.
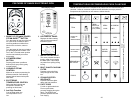
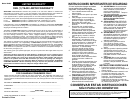
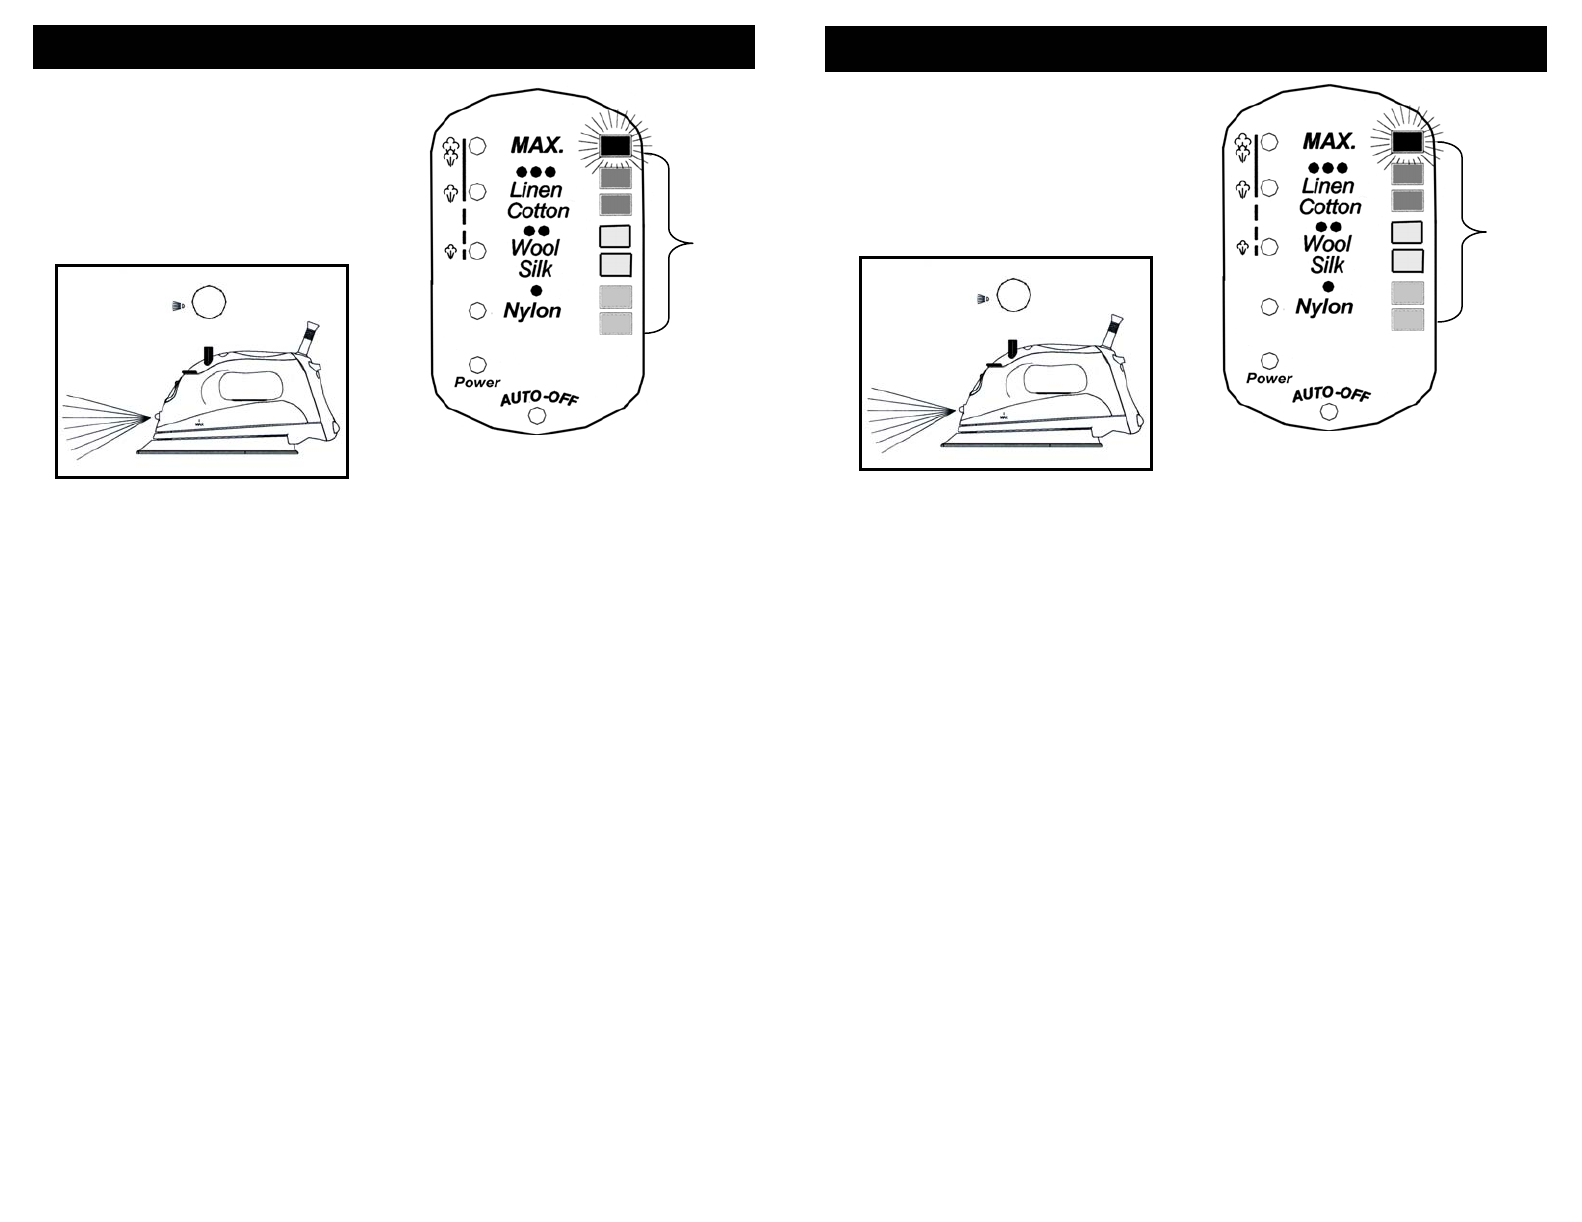
3. Presione el control electrónico de
temperatura para graduarlo de
acuerdo a la tela que va a planchar.
4. La luz en el lado derecho del panel
indicador dejará de destellar cuando
la plancha llegue a la temperatura
seleccionada (Fig. 6).
CONSEJOS PARA PLANCHAR
¡ADVERTENCIA
! Para evitar incendios,
no deje la plancha desatendida cuando
esté enchufada.
• Clasifique las prendas a plancharse de
acuerdo al tipo de tela. Esto reducirá
la necesidad de tener que variar la
temperatura para cada prenda.
• Si no está segura del tipo de fibras de
la prenda por plancharse, haga una
prueba en un área pequeña de una
costura o parte interior de una basta o
dobladillo antes de planchar en un
área visible. Comience a planchar con
una temperatura baja y auméntela
gradualmente hasta encontrar la mejor
graduación.
• Cuando reduzca la temperatura para
telas delicadas, espere Aprox. 2
minutos para que la temperatura de la
plancha baje a la graduación más fría.
• Las telas como el velur, lana, lino y
seda, se planchan mejor con una tela
encima para evitar que le queden
huellas lustrosas.
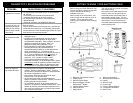
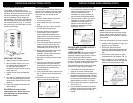
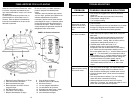
BOQUILLA ATOMIZADORA DE
AGUA
La boquilla atomizadora de agua es útil
para planchar telas con arrugas
rebeldes. Presione el botón atomizador
para disparar un chorro de agua a la tela
que se esté planchando en seco o al
vapor (Fig.5).
Grad. de
Temp.
Fig. 5
Fig. 6
INSTRUCCIONES PARA OPERAR (CONT.)
OPERATING INSTRUCTIONS (CONT.)
SELECTING IRON TEMPERATURES
Always read garment labels and follow
the manufacturer’s ironing instructions.
Refer to the “Ironing Chart” on page 9
for temperature recommendations:
• Use low settings for nylon and other
synthetics.
•• Use moderate settings for wool,
silks, and blends.
••• Use high settings for cottons and
linens.
1. Stand the iron upright on its heel.
2. Plug the cord into a polarized, 120V
AC electrical outlet.
3. Press the electronic temperature
control until you get the desired
fabric/temperature setting.
4. The light on the right side of the LED
display panel will stop flashing when
the desired temperature has been
reached. (Fig. 6)
IRONING HINTS
WARNING!
To prevent fire, do not
leave iron unattended while
connected.
• Sort articles to be ironed according
to the type of fabric. This will reduce
the need to adjust the temperature
for different types of garments.
• If you are not sure of the fiber
content of a garment, test fabric by
ironing a small area such as a seam
or inside hem section before ironing
a visible area. Start with a low
temperature setting and gradually
increase to find the best setting.
• When reducing the temperature to
iron sensitive fabrics, allow
approximately 2 minutes for the iron
to cool to the new temperature
setting.
• Fabrics such as velour, wool, linen
and silk are best ironed with an
ironing cloth to prevent shine marks.
Fig. 5
Fig. 6
Temp.
settings
ATOMIZER SPRAY NOZZLE
The atomizer spray nozzle is useful on
fabrics with stubborn wrinkles. Press the
spray button and a jet of water will spray
onto the fabric being ironed. (Fig. 5) The
water spray can be used with dry or
steam ironing as desired.
6
17