


33
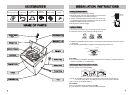
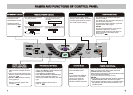
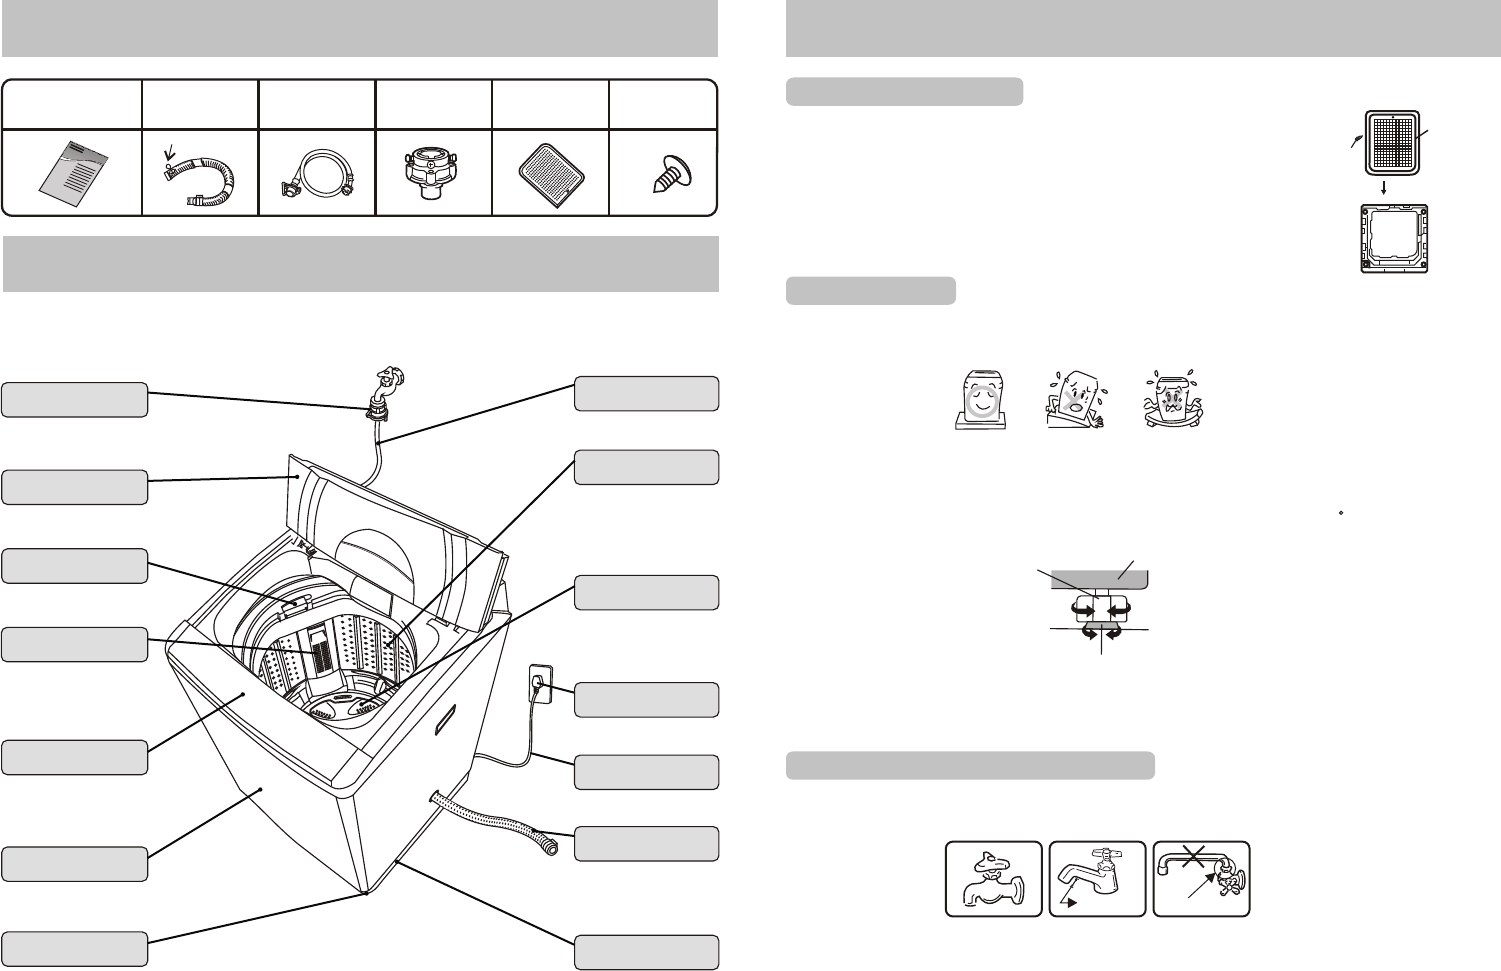
NAME OF PARTSNAME OF PARTS
ACCESSORIESACCESSORIES
Water
Supply Hose
Drain Hose
“Magic"
Hose Joint
Bottom Cover
Screw
Instruction manual
Hose Band
44
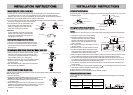
INSTALLATION INSTRUCTIONSINSTALLATION INSTRUCTIONS
1.Unplug the Power Cord of the washer.
2.Gently lay down the front side of washer on a soft mat or
cushion.(Becareful not to dent the Frame.)
3.Insert the attached Bottom Cover into the hooks of Leg
by straightly pushing until it reaches into the front hooks.
4.Fasten the Bottom Cover with a screw.
5.Gently set the washer upright.
Bottom
Cover
Screw
1.Choose a dry location out of sunlight for the washer.
2.Install the washer on a stable and level surface.
Location of WasherLocation of Washer
Inclined floor
Unstable floor
Leg
● Do not block the ventilation openings on the bottom of washer by carpeting when the
washer is installed on a carpeted floor.
Type B
Type C
At least 16mm
Water leak
Type B :
The length of the mouth of the faucet needs to be at least 16mm.
If it is less than16mm, the"Magic"Hose Joint can not be installed.
Type C :It may cause water leaking.
CAUTIONS:
Do not use water which is hotter than 50 .
If your faucet is not suitable, consult your dealer.
●
● please
℃℃
CAUTION:
Attaching the "Magic" Hose Joint to a FaucetAttaching the "Magic" Hose Joint to a Faucet
Type A :is the most suitable
Faucet:
Type A
Lock Nut
Adjustable Leg
Up
Loosen①
②Down
③Tighten
Fundus
Installing the Bottom CoverInstalling the Bottom Cover
Front
Back
3.Adjust the Adjustable Leg of washer if necessary to make the washer level as shown
in the figure.
The maximum permissible inclination of the supporting surface is 2 . ●
“ Magic”Hose
Joint
“ Magic”Hose
Joint
Washer LidWasher Lid
Lint FilterLint Filter
Control PanelControl Panel
Water Supply HoseWater Supply Hose
Wash/Spin TubWash/Spin Tub
LegLeg
Adjustable LegAdjustable Leg
Softener DispenserSoftener Dispenser
FrameFrame
Power PlugPower Plug
Power CordPower Cord
Drain HoseDrain Hose
PulsatorPulsator