8
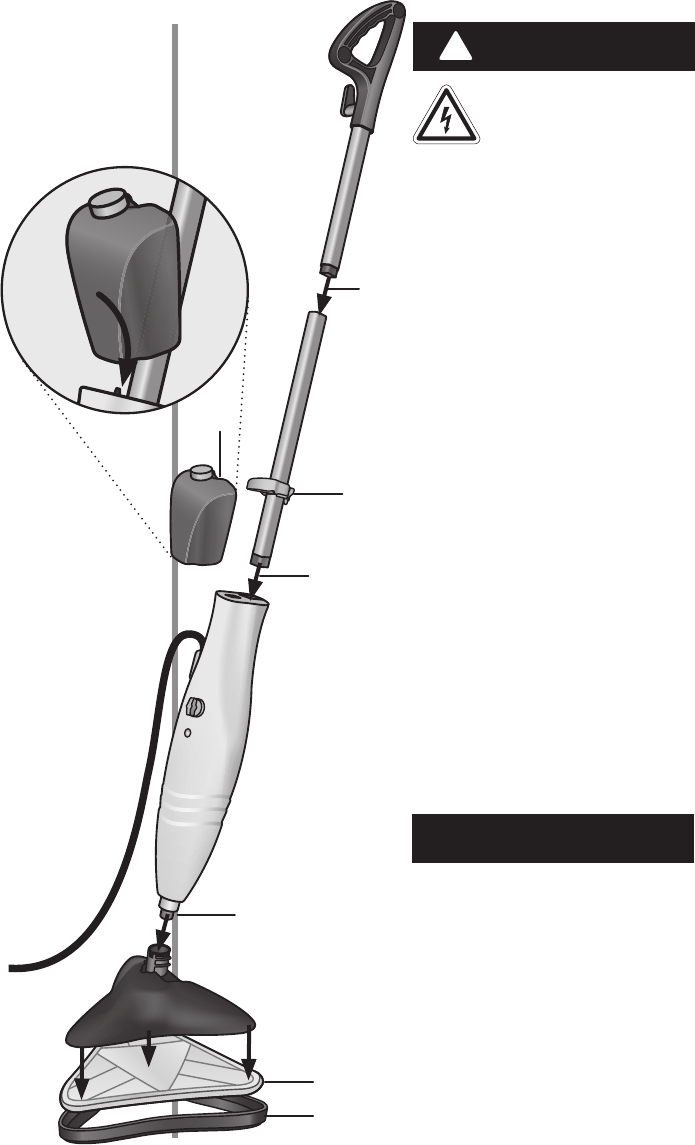
1. Insert the Lower Tube into the
Handle Tube. Be sure the two
handles are securely attached
by pulling on the upper and
lower tubes.
2. Insert the tube assembly into the
Body until it clicks into place.
3. Insert the nozzle on the bottom
of the Body into the Floor Head
until the the nozzle is seated in
the hole of the Floor Head.
4. Place the Water Tank on the tube
assembly. Slide it down until
properly seated into the Body.
5. Slide the tank clamp down over
the top of the Water Tank and
close the lock.
6. Align the Velcro
®
strips on the
pad and oor head. Press the
two together to secure the pad to
the oor head.
7. When refreshing carpet, place
the Carpet Glider on the
Cleaning Pad and Floor Head.
Assembly
WARNING!
!
Do not plug the steam
cleaner into an electrical
outlet during assembly.
NOTICE
• The Steam 50 DOES NOT have
an ON/OFF switch. When the
unit is plugged in it is ON. Steam
will only be produced when unit
is titled back from the upright
position. Always unplug the unit
when not in use!
• Always use the cleaning pad when
cleaning hard oors. Ensure clean-
ing pad is in place and properly
attached to the oor head.
1
2
3
4
5
6
7


