


3
For details of other Morphy Richards products, please see our website:
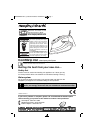
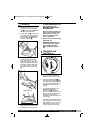
• When ironing is complete,
remove the plug from the
socket, empty any remaining
water from the tank, and allow
to cool before storage.
• If you drop or severely knock
your iron, this could cause
internal damage even if the
outside appears alright. Have it
checked by a qualified
electrician.
• It is recommended that you use
up one tank full of water by
operating your iron’s steam and
shot of steam functions before
ironing any clothes, as some
dripping may occur while your
iron’s steam system is activated.
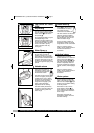
ELECTRICAL
REQUIREMENTS
Check that the voltage on the
rating plate of your appliance
corresponds with your house
electricity supply which must be
A.C. (Alternating Current).
If the socket outlets in your
home are not suitable for the
plug supplied with this
appliance, the plug should be
removed and the appropriate
one fitted.
WARNING: A damaged or
severed mains cable fitted
with a plug should never be
connected to the mains
supply. It must be destroyed,
as a damaged cable becomes
hazardous if connected to a
power socket.
Should the fuse in the 13 amp
plug require changing, a 13 amp
BS1362 fuse must be fitted.
WARNING: This appliance
must be earthed.
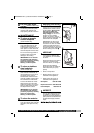
Heat setting markings on the adjustable control dial of all Morphy Richards irons match those of
the International Textile Care Labelling Code.
Symbol
(120°C Max) Cool
(160°C Max) Warm
(210°C Max) Hot
Control knob
positions
Do not iron
at all
Fabric
Silk, Nylon, Acetates
e.g. Acrilan
Courtelle, Orlon
Triacetates, e.g.
Tricel/Polyester
Wool, Polyester
mixtures e.g.
Polyester/Cotton
Cotton, Linen
Rayon, Rayon
mixtures,
e.g. Rayon/Linen
Ironing
Iron on wrong side,
if moisture required
use damp cloth
(Not Acetate)
Fabrics requiring this
setting usually require
steam pressing for heavy
cotton, denim etc.
With water in tank
Dry and spray
Steam/spray/shot of steam
Without water in tank
Dry ironing
INSTRUCTIONS FOR USE
Temperature guide
‘Max’ Setting
RN40854MUK Rev1_Instruction Booklet 15/09/2010 16:20 Page 3