Installation - venting
The moist air from the dryer must be
vented to the outside.
The appliance should not be vented
into a chimney, a wall, a ceiling, or
any concealed spaces of the building.
When installing, try to avoid:
– very long venting systems
– too many bends or angles
– tight corners
otherwise . . .
. . . the drying result will be affected,
. . . drying will take longer and use more
energy.
Materials suitable for venting:
– rigid metal pipe
– flexible metal pipe
Install the venting in such a way that
the expelled air cannot be drawn
into the machine.
Do not vent the dryer into a flue
used by gas or fuel boilers or
heaters.
A vent connector is included as stand-
ard. It should be pressed into the vent
outlet and will enable the connection of
exhaust pipe.
Before installation, disconnect the
tumble dryer from the electrical sup-
ply, (unplug from the wall socket, or
isolate at the main fuse box).
The exhaust connection can
be made:
– at the rear or
– at the left or right side of the machine
Installation at the rear
The machine comes supplied with the
connector installed on the rear exhaust
port.
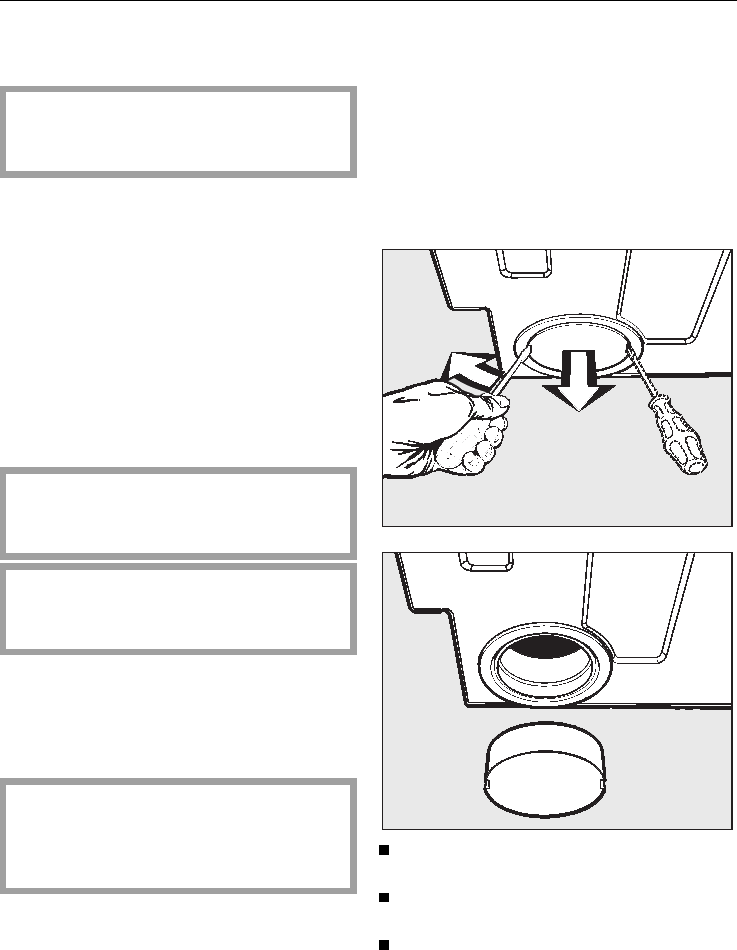
Installation at the left or right side of
the machine
Each side exhaust port has a framed
exhaust cap.
Only the cap should be removed,
and not the frame.
Exchange the rear exhaust connec-
tor for the side cap, and vice versa.
Install the exhaust pipes.
Installation - venting
21


