Installation
3
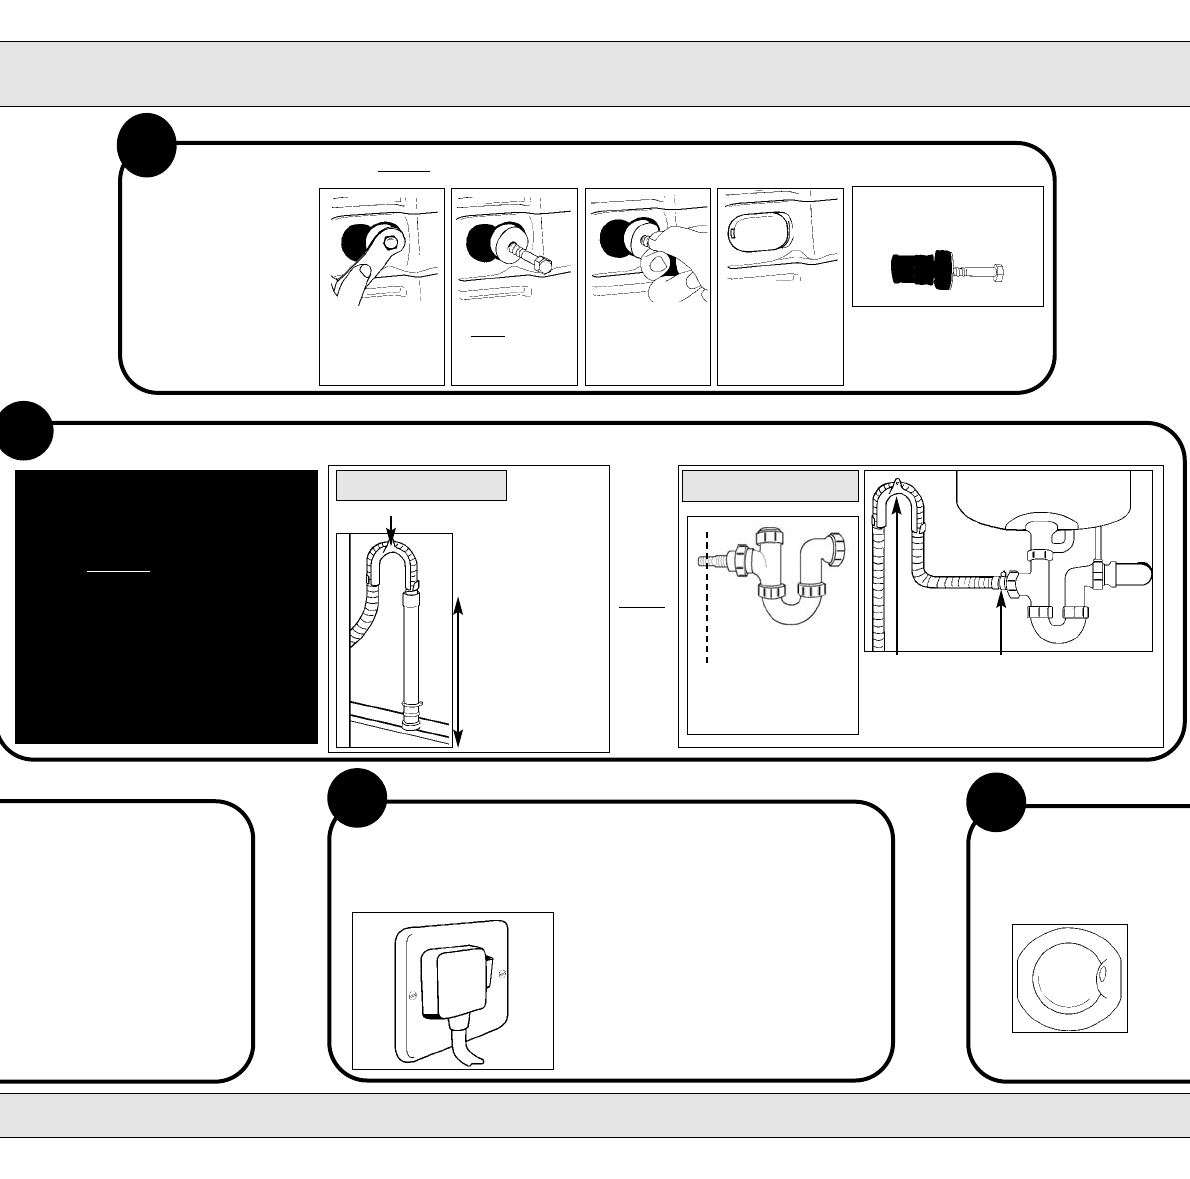
DRAINAGE SYSTEM... we recommend one of the following:
NOTE: ALTHOUGH YOU MAY NEED TO
MOVE THE HOOKED END SUPPORT
ALONG THE GREY DRAINAGE HOSE,
DO NO
T REMOVE IT.
WHICHEVER DRAINAGE METHOD
YOU USE, MAKE SURE THAT THE
HOOKED END SUPPORT IS FIXED
LEVEL TO, OR ABOVE THE ‘PLUMBING
INDICATOR LINE’*
(*see Getting to Know your Appliance)
W
O FRONT FEET ARE NOT
M
AND LEVEL.
1
REMOVE TWO TRANSIT FIXINGS... Follow these instructions to remove the TWO transit fixings.
IMPORTANT:
Situated, one either
side of the rear panel,
BOTH transit bolts
(complete with
spacers) MUST be
removed before use...
Failure to do so may
cause damage to
your machine!
STANDPIPE METHOD
UNDER SINK METHOD
OR
Attach the GREY
drainage hose to the
under sink drainage
unit securely, using a
hose clip.
Fix the hooked
end support at
a minimum
800mm from
the floor.
cut off the blocked
end of the under sink
drainage unit.
6
READY...
TO CHECK ALL PARTS O
F
CLEAN THE INSIDE OF Y
O
RUN PROGRAMME ‘C’
(
5
CONNECT TO THE POWER SUPPLY...
PLUG YOUR MACHINE INTO AN ELECTRICAL SOCKET WHICH IS
EASILY ACCESSIBLE. SWITCH ON.
NOTE: Hotpoint recommend
extension leads are not used.
Move your machine into position,
take care not to trap or kink the
hoses.
WITH
O
W
THIS WILL TAKE APPR
OX
.............................
Standpipe height:
minimum 500mm
from the floor.
Insert drainage hose
approximately 100mm
into the standpipe.
✗
It is important the transit
bolt and spacer come out
intact (see pic).
! Repeat steps to remove
the second transit bolt.
Unscrew the
bolt using a
13mm spanner.
ST
OP when 3
threads can be
seen.
Hold,slide
sideways and
pull to remove.
For safety,insert
one of the
plastic covers
(supplied with
your machine)
over the hole.
800mm
from floor
Hooked End Support
c
k the machine stands level...from
ine into its final location
trap or kink the hoses.
h
front feet anti-clockwise by
e
et cannot be turned any more.
ch foot will stop them coming
t
to ensure that there is adequate


