7
Installation Instructions
EXHAUST (CONT.)
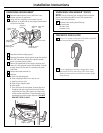
SEALING OF JOINTS
• All joints should be tight to avoid leaks.
NOTE:
The male end of each section of duct must point
away from the dryer.
• Do not assemble ductwork with fasteners that
extend into the duct. They will serve as a collection
point for lint.
• Duct joints can be made air- and moisture-tight by
wrapping the overlapped joints with duct tape.
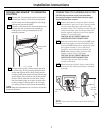
INSULATION
• Ductwork that runs through an unheated area or is
near an air conditioning duct should be insulated to
reduce condensation and lint buildup.
PARTS AVAILABLE FROM LOCAL SERVICE
ORGANIZATIONS
• Rigid Metal Duct Components
WX8X63 4″ x 1′ Duct
WX8X64 4″ x 2′ Duct
WX8X51 4″ Elbow
WX8X59 4″ Aluminum Hood
• Flexible Metal Duct Components
Kit WX8X66—7′ Aluminum duct, 4″ hood and 2 clamps
WX8X65 7′ Aluminum Flexible Duct
WX8X58 4″ Clamps (2)
WX8X59 4″ Aluminum Hood
MOBILE HOME INSTALLATION
• Installation must conform to Manufactured Home
Construction and Safety Standard, Title 24 CFR,
Part 32-80.
• The dryer must be exhausted to the outside with
the termination securely fastened to the mobile
home structure.
• The exhaust MUST NOT be terminated beneath the
mobile home.
• The exhaust duct material MUST NOT support
combustion.
CONSIDERATION MUST BE GIVEN TO PROVIDE ADEQUATE
CLEARANCES FOR INSTALLATION AND SERVICE.
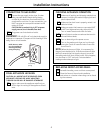
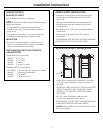
ALCOVE OR CLOSET INSTALLATION
• If your dryer is approved for installation in an alcove
or closet, it will be stated on a label on the back of
the dryer.
• TO PREVENT LARGE AMOUNTS OF LINT AND MOISTURE
FROM ACCUMULATING AND TO MAINTAIN DRYING
EFFICIENCY, THIS MACHINE MUST BE EXHAUSTED
OUTDOORS.
• DO NOT install this appliance with less than
the minimum clearances shown above.
CONSIDERATION MUST BE GIVEN TO PROVIDE ADEQUATE
CLEARANCES FOR INSTALLATION AND SERVICE.
CAUTION: DO NOT INSTALL THIS APPLIANCE IN A CLOSET
WITH A SOLID DOOR.
1″
1″
0″
0″
0″
60 Sq. In.
60 Sq. In.


