Installation
Washer
Instructions
If you have any questions, call 800.GE.CARES (800.432.2737) or visit our Website at: ge.com
BEFORE YOU BEGIN
Read these instructions completely and carefully.
•
IMPORTANT – Save these
instructions for local inspector’s use.
•
IMPORTANT – Observe all
governing codes and ordinances.
• Note to Installer – Be sure to leave these
instructions with the Consumer.
• Note to Consumer – Keep these instructions
for future reference.
• Skill level – Installation of this appliance requires
basic mechanical and electrical skills.
• Completion time – 1-3 hours
• Proper installation is the responsibility of the
installer.
• Product failure due to improper installation is not
covered under the Warranty.
WARNING
• This appliance must be properly grounded and
installed as described in these Installation Instructions.
• Do not install or store appliance in an area where it
will be exposed to water/weather. See Location of Your
Washer section.
• NOTE: This appliance must be properly grounded,
and electrical service to the washer must conform with
local codes and ordinances and the latest edition of
the National Electrical Code, ANSI/NFPA 70.
FOR YOUR SAFETY:
14
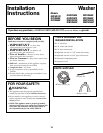
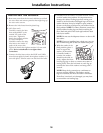
TOOLS REQUIRED FOR
WASHER INSTALLATION
❏ 1/4″ nut driver
❏ 3/8″ socket with ratchet
❏ 3/8″ open-end wrench
❏ Adjustable wrench or 7/16″ socket with ratchet
❏ Adjustable wrench or 9/16″ open-end wrench
❏ Channel-lock adjustable pliers
❏ Carpenter’s level
❏ Water Hoses (2)
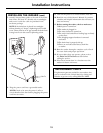
PARTS SUPPLIED
❏ Cable Tie
❏ Hose Guide
Models
GBVH5140
GCVH6260
GCVH6600
GHDVH626
GHDVH670
WBVH5100
WBVH6240
WCVH6260
WCVH6600
WHDVH626
WHDVH660


