OPERATING INSTRUCTIONS (CONT.)
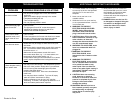
IRONING CHART
Steam irons should be used with tap
water up to 3 mmol/l alkaline earth ions
(check the degree of hardness of your
water with your local water authority) or a
mixture of distilled/demineralized water
with tap water.
If your tap water is very hard, you can
mix 1:1 distilled / demineralized water
with mineral water so that your steam
performance will be good.
Never use water containing additives,
battery top-up water from service
stations, water from household softening
systems or descaling agents.
Distilled/Demineralized Water:
This should normally be mixed 1:1 with
tap water. The use of pure
distilled/demineralized water creates
difficulties with steam production and can
cause water to escape through the
soleplate (formation of drops).
Note: If water escapes through the
soleplate while you are using
distilled/demineralized water,
we recommend you use tap water 3 or 4
times.
Water with Additives:
Starch, conditioner, perfume and fabric
conditioner should never be added to the
water. These result in residues in the
steam chamber which will damage your
iron and stain your laundry. For this
reason, no condensed water (water from
driers may be used, as this can contain
additives (e.g. conditioner).
Descaling the Iron:
Do not use chemical descaling agents as
these can cause damage to the iron and
stain your laundry.
Water From Household Water
Softening Systems:
Do not use water from household water
softening systems because even though
these systems remove calcium from the
water, they add other substances to it.
Therefore this water is not suitable for
steam irons.
5. Return the water tank to its place,
under the iron stand.
Note
: Make sure that the water tank is
pushed back to its place and the lock is
closed. If the water tank is not in its
place, it will not be able to deliver water
from the pump to the iron.
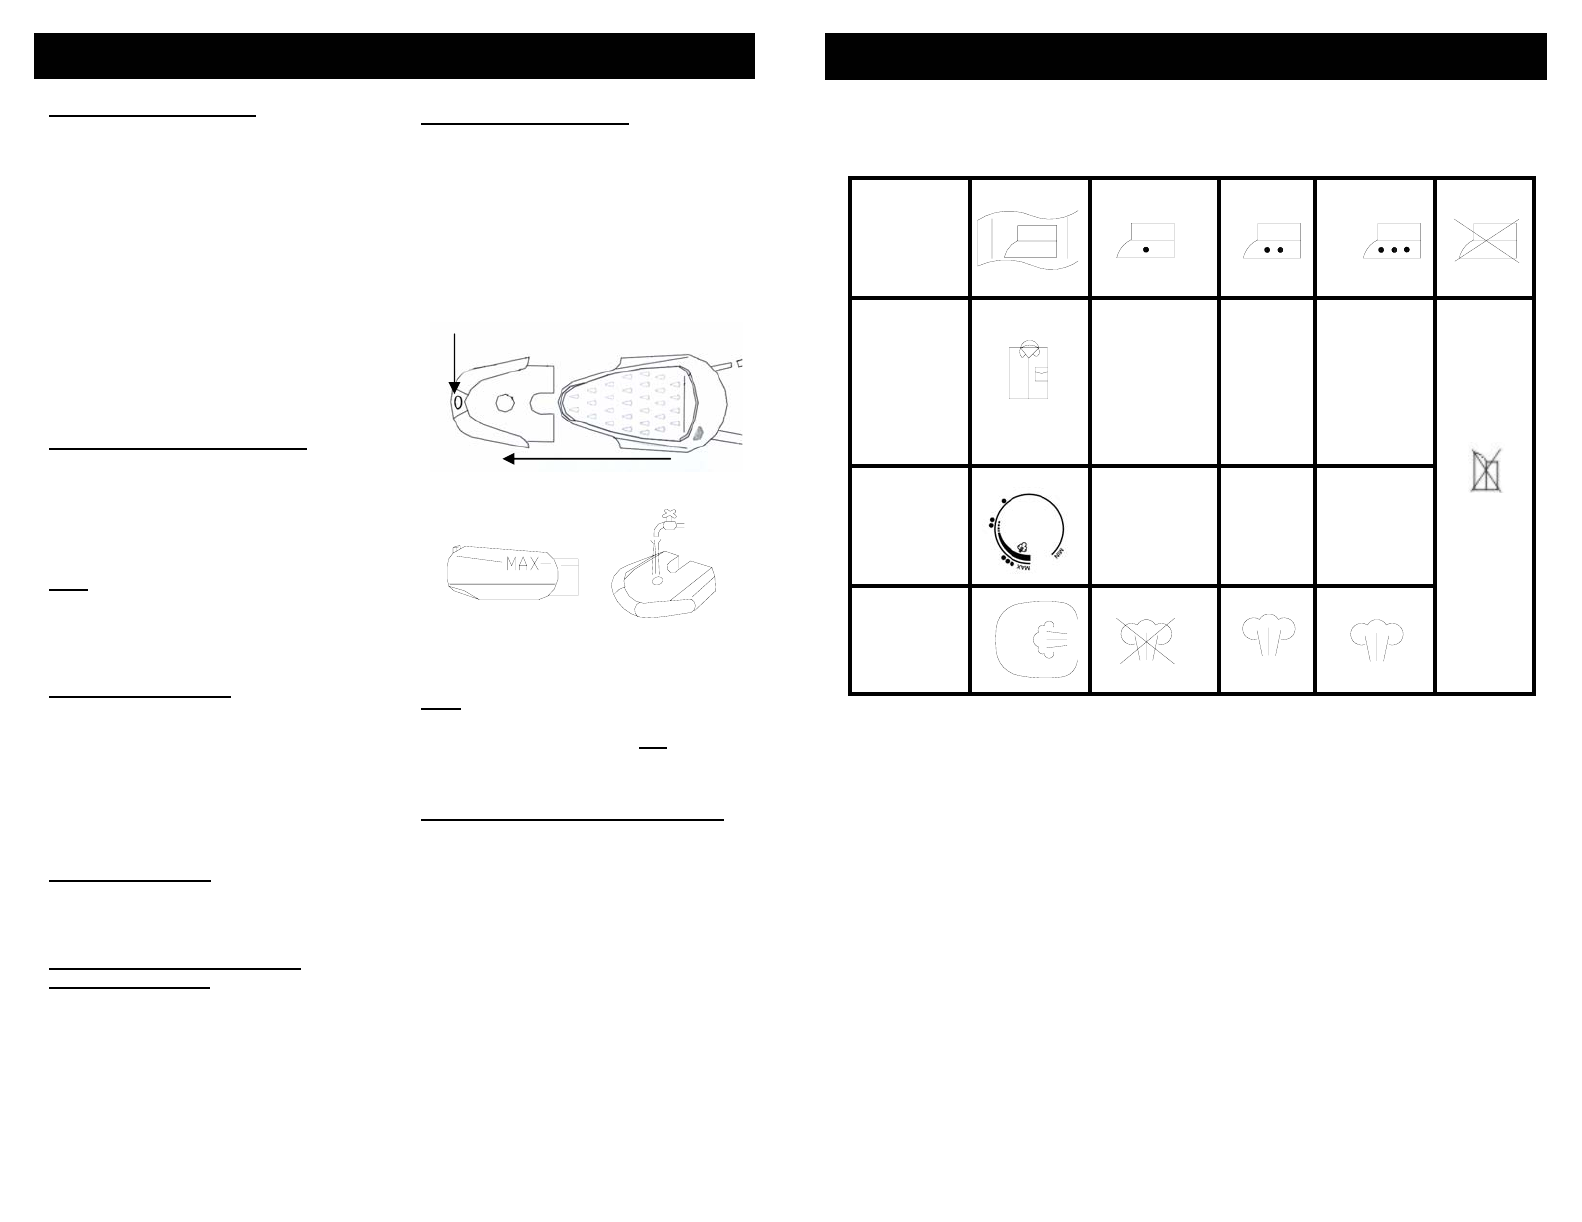
1. Push down the water tank lock.
2. Slide out the water tank from under
the iron stand. (Fig. 2)
3. Rotate slightly the top of the “Anti-
Calc” Cassette and pull it out of the
water tank.
4. Fill the water tank up to the “Max”
mark, as shown below in fig. 3.
Water Tank Lock
Slide Out
Fig. 2
Fig. 3
Setting the Ironing Temperature
• Place the iron on the rubber mat on
the water tank.
• Plug the power cord into the
electrical outlet.
• Select the required temperature
setting on the temperature control
dial using the Ironing Chart
on page 6.
• The temperature pilot light will come
“On” indicating that the iron is
heating up.
• When the temperature pilot light has
gone “Off”, the set temperature has
been reached and the iron is ready
for use.
NOTE: Before starting to iron delicate
fabrics, it is best to first test the
temperature of the iron on a hem or an
inside seam.
To select iron temperature, align
temperature selected on dial with
the indicator on the water tank.
Filling the Water Tank
Filling the Water Tank
DIRECTIONS
ON LABEL
FABRIC
TEMP.
CONTROL
STEAM
BUTTON
P
l
e
a
s
e
n
o
t
e
t
h
a
t
o
n
t
h
e
l
a
b
e
l
m
e
a
n
s
‘
T
H
I
S
A
R
T
I
C
L
E
C
A
N
N
O
T
B
E
I
R
O
N
E
D
!
”
COTTON
LINEN
Synthetic
fibers, e.g.
acryl, viscose,
polyamide
(nylon),
polyester
WOOL
•
••
•• •
MAX
SILK
Ironing Temperature
Always check first to see whether a label with ironing instructions is attached to the article to be
ironed. (See table above.) Follow these ironing instructions in all cases. If ironing instructions
are missing, but you do know the kind of fabric, then see the table. The table is valid for the
materials only and is not applicable to any applied finish, gloss, etc… Fabric to which some
kind of finish has been applied (gloss, wrinkles, relief, etc.) can be ironed at the lowest
temperature such as those made of synthetic fibers. Sort the laundry out according to ironing
temperature first: wool with wool, cotton with cotton, etc…
The iron heats up quicker than it cools down. Therefore, start ironing the articles requiring the
lowest temperature such as those made of synthetic fibers. If the fabric consists of various
kinds of fibers, you must always select the lowest ironing temperature of the composition of
those fibers. (For example: an article consisting of “60% polyester and 40% cotton” should be
ironed at the temperature indicated for polyester (•) and without steam.)
If you do not know what kind(s) of fabric(s) the article has been made of, find a spot which will
be invisible when wearing or using the article. Try out the ironing temperature which is most
suitable there. (Start at a relatively low temperature.) Pure woolen fabrics (100% wool) may be
pressed with the iron set to a steam position. Preferable set the steam control to maximum
position and use a dry pressing cloth. When steam-ironing woolen fabrics, shining of the fabric
may occur. This can be prevented by turning the article inside out and ironing the reverse side.
Velvet and other textures which rapidly acquire shiny spots should be ironed in one direction
only (with the nap) applying light pressure. Always keep the iron moving.
Iron the reverse side of synthetic materials and silk to prevent shining spots. Do not use the
spray button to prevent stains.
5 6


