


INSTALLATION INSTRUCTIONS (CONTD.)
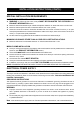
SEALING OF JOINTS
All joints should be tight to avoid leaks. The male end of each section of duct must point away from the
dryer.
Do not assemble the duct work with fasteners that extend into the duct. They will serve as a collection
point for lint.
Duct joints can be made air and moisture-tight by wrapping the overlapped joints with duct tape.
INSULATION
Duct work which runs through an unheated area or is near an air conditioning duct, should be
insulated to reduce condensation and lint build up and be sloped down toward outdoors.
NOTE: Never install screen inside exhaust duct.
WARNING: THE DRYER MUST EXHAUST TO THE OUTDOORS, TO PREVENT LARGE AMOUNTS
OF LINT AND MOISTURE FROM ACCUMULATING AND TO MAINTAIN DRYING EFFICIENCY. THIS
MACHINE MUST BE EXHAUSTED OUTDOORS.
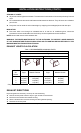
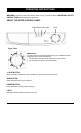
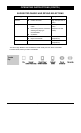
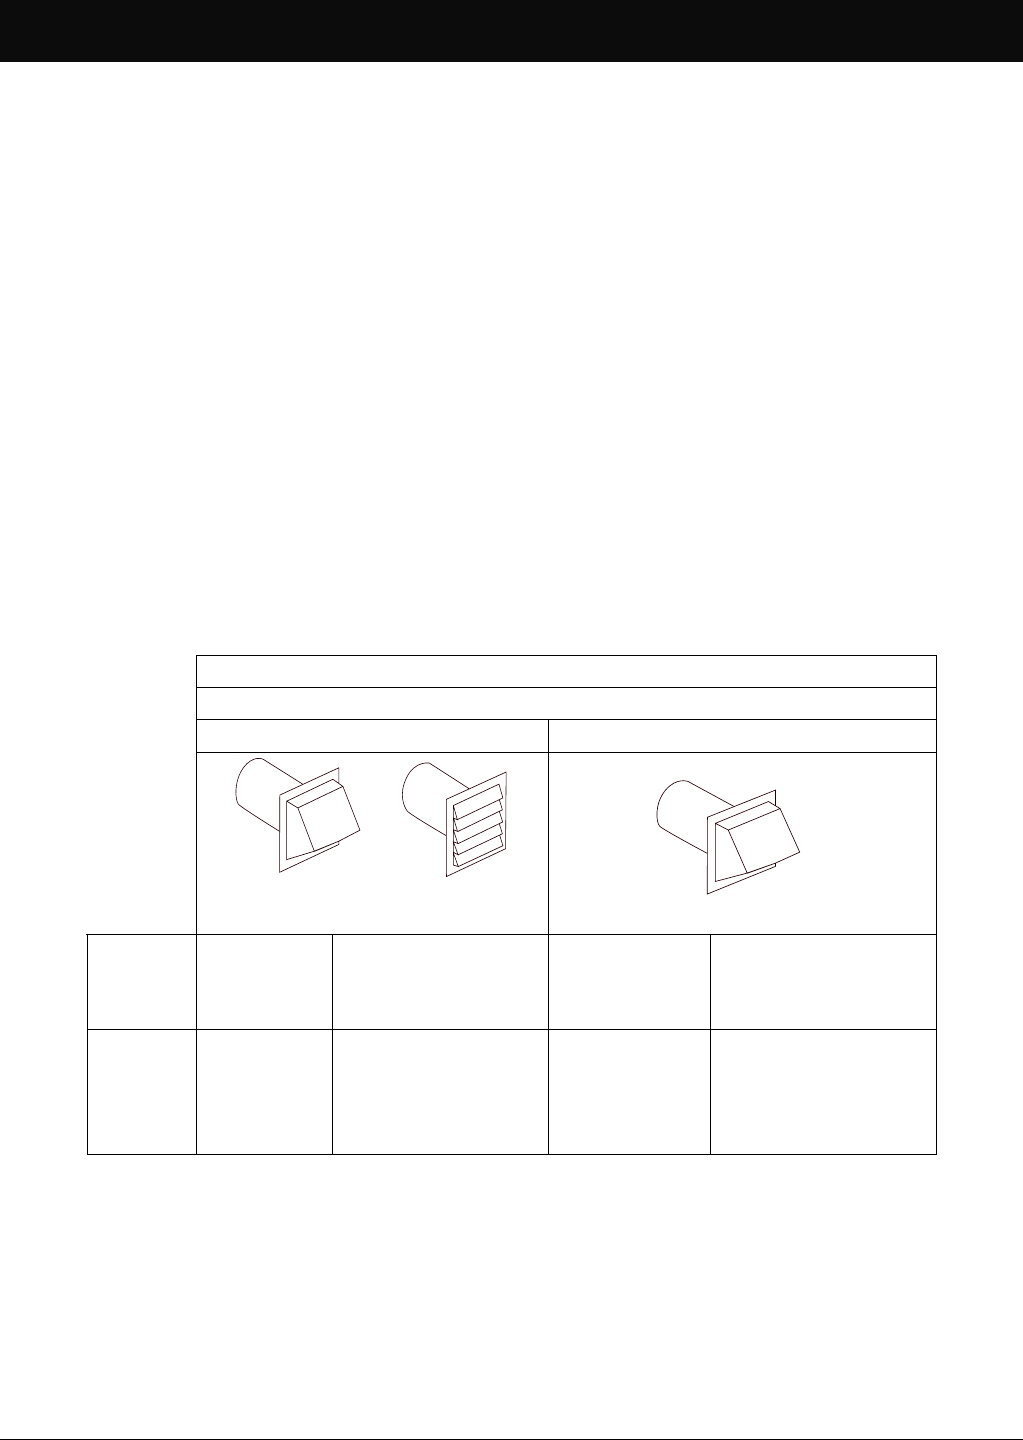
EXHAUST LENGTH CALCULATION
Table 1: RECOMMENDED MAXIMUM LENGTH
9 Electric Dryer Owner’s Manual
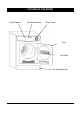
ELECTRIC DRYER
Weather Hood Type
Recommended Use only for short run installation
90°
0
1
2
3
14m(46ft.)
9m(31ft.)
7.5m(25ft.)
11m(38ft.)
6.5m(22ft.)
7m(24ft.)
11m(38ft.)
9m(31ft.)
7m(24ft.)
6m(20ft.)
5m(16ft.)
9m(31ft.)
4.5m(15ft.)
6m(20ft.)
4m(14ft.)
3m(10ft.)
No.of
elbows
Rigid Metallic Flexible Rigid Metallic Flexible
Only use metallic flexible duct.
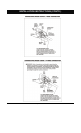
EXHAUST DIRECTIONS
up for rear exhausting.
rnal ducts.
cing desired opening.
Dryers shipped from the factory are set
Remove access panel at back of dryer to gain access to inte
Disconnect duct exhaust from blower housing.
Attach a 90°elbow duct to blower housing and fa
Reinstall rear access panel.