


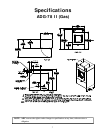
11
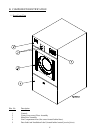
B. UNPACKING/SETTING UP
Remove protective shipping material (i.e., plastic wrap, and/or optional shipping box) from dryer.
IMPORTANT: Dryer must be transported and handled in an upright position at ALL times.
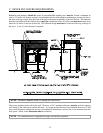
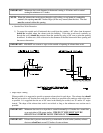
The dryer can be moved to its final location while still attached to the skid or with the skid removed. To un-skid
the dryer, locate and remove the four (4) bolts securing the base of the dryer to the wooden skid. Two (2) are at
the rear base (remove the back panel for access), and two (2) are located in the bottom of the lint chamber. To
remove the two (2) bolts located in the lint chamber area, remove the lint door.
To increase bearing life and improve efficiency, the dryer should be tilted slightly to the rear.
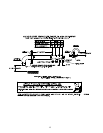
The lint coops of ALL ADG-78 II dryers are supported during shipping by a bracket. REMOVE THIS
BRACKET BEFORE STARTING THE DRYER.
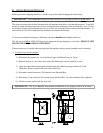
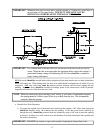
If more headroom is needed when moving dryer into position, the top console (module) may be removed.
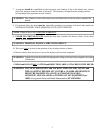
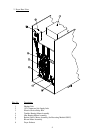
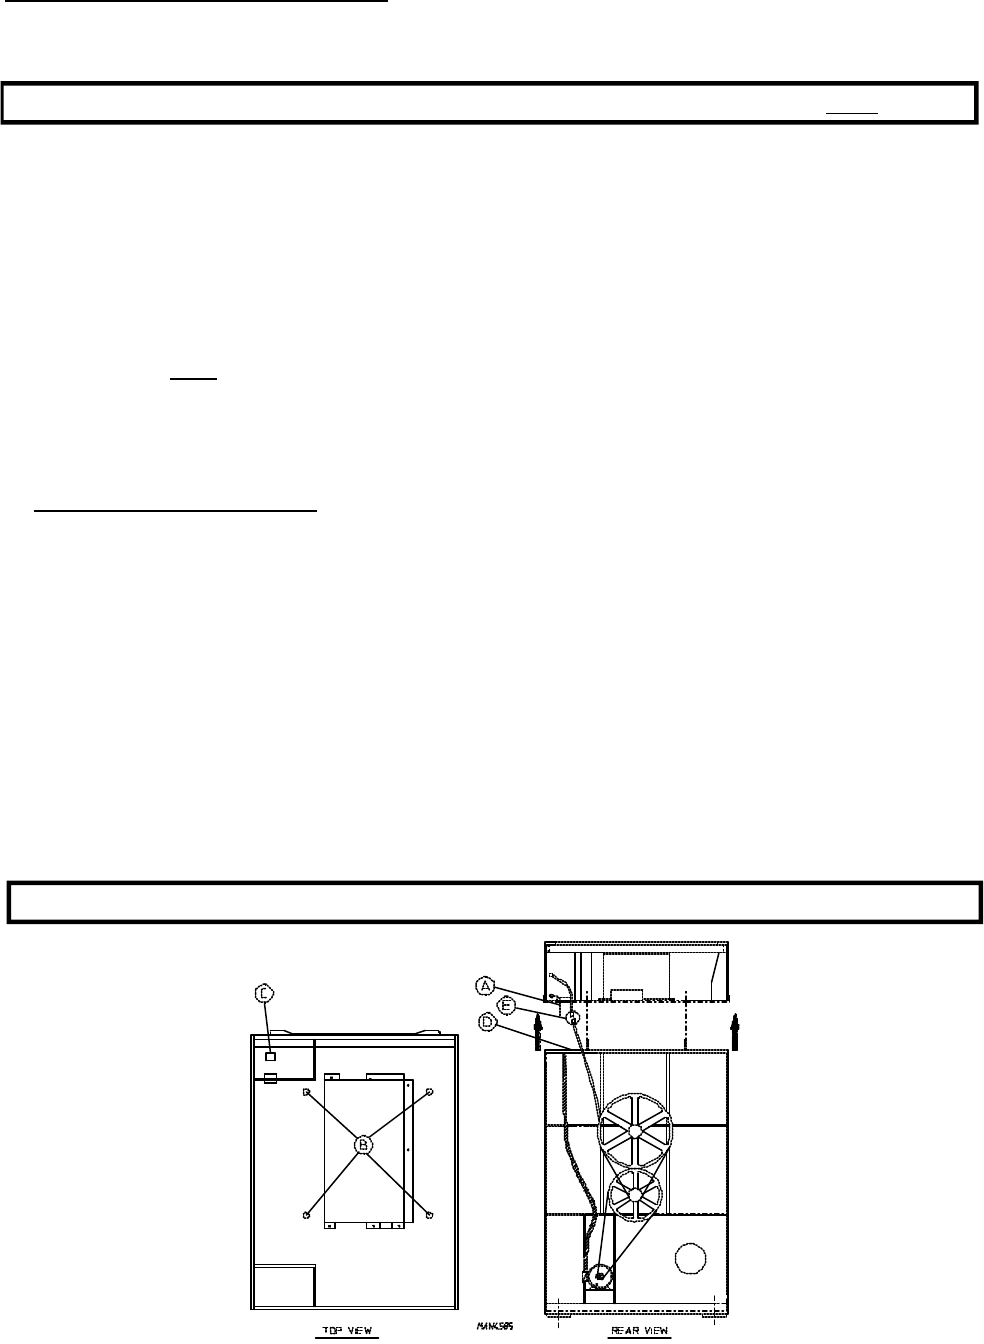
a. To remove top console (module)
1) Disconnect the ground wire (A) at the Rear Upper Left Hand Corner of Dryer.
2) Remove the four (4) set of nuts and washers (B) holding the console (module) to base.
3) Open the control door/control panel and disconnect the white 9-pin plug connector (C in the
illustration below) located in the base of the control box.
4) Disconnect motor harness(es) (D) located in rear Electrical Box.
5) Disconnect (2) pin connector (E) located in rear Electrical Box. (on some machines this is optional)
6) Lift the console (module) off the dryer base.
IMPORTANT: The dryer must be transported and handled in an upright position at all times.