


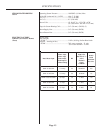

Page 8
UNPACKING/GENERAL INSTALLATION (ALL DRYERS)
UNPACKING
GENERAL
INSTALLATION
(ALL DRYERS)
This dryer is packed in a large wooden crate.
Upon arrival of the equipment, any damage in shipment should be reported to
the carrier immediately.
Upon locating permanent location of a unit, care should be taken in movement
and placement of equipment.
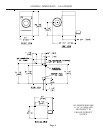
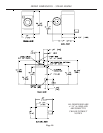
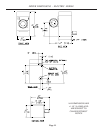
See outline clearance diagrams for correct dimensions.
Remove all packing material such as: tape, manuals, skid, etc.
Leveling: Use spirit level on top of dryer. The use of shims are acceptable for
this procedure.
Check voltage and amperes on rating plate before installing the dryer.
On gear reducer models, remove screw and insert red vent attached to reducer.
The construction of the dryers permits installation side-by-side to save space
or to provide a wall arrangement. Position dryer for the least amount of exhaust
piping and elbows, and allow free access to the rear of dryer for future
servicing of belts, pulleys and motors. Installation clearance from all
combustable material is 12” (305 mm) ceiling clearance, 24” (610 mm) rear
clearance, and 0” side clearance.
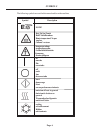
Before operating dryer, open basket door and remove blocking between front
panel and basket. Read the instruction tags, owner's manual, warnings, etc.
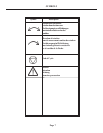
IMPORTANT
Opening the clothes loading door deactivates the door switch to shut off
the motors, fan, gas, steam, or electric element. To restart the dryer,
close the door and press in the push to start button for approximately 2
seconds.
IMPORTANT
This dryer is designed for a capacity maximum load. Overloading it will
result in long drying times and damp spots on some clothes.
IMPORTANT
Maximum operating efficiency is dependent upon proper air circulation.
The lint screen must be kept clean daily to insure proper air circulation
throughout the dryer.
IMPORTANT
Provide adequate clearance for air opening into the combustion chamber.