10 American Dryer Corporation 450412-4
Connect keypad ribbon to the computer.
Reestablish electrical power to the dryer.
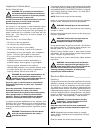
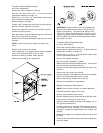
Microprocessor Temperature
Sensor Probe Replacement
Discontinue electrical power to the dryer.
Remove perforated panel from tumbler.
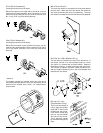
Remove microprocessor sensor bracket assembly from
dryer.
Disconnect sensor bracket harness connector.
Loosen the 2 Phillips head screws, which secure bracket
assembly to dryer and remove bracket from dryer.
NOTE: Do not remove screws.
Disassemble sensor probe from bracket assembly by
removing the top push-on fastener securing the probe from
bracket. Use a small screwdriver to slowly pry the fastener
off.
Disconnect the 2 “orange” wires from the high heat (225º F
[107º C]) thermostat, and remove modular bracket
connector, wires, and probe from bracket assembly.
Install new sensor probe assembly by reversing procedure.
Reestablish electrical power to the dryer.
NOTE: If, when electrical power is reestablished, the
microprocessor computer L.E.D. display reads “TEMP
SENSOR FAIL CHECK TEMP SENSOR FUSE,” check for
a loose connection in the wiring.
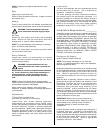
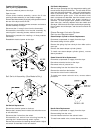
To Replace Spark Ignitor and Flame Probe
Discontinue power to the dryer.
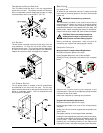
Disconnect high voltage connector and flame-probe
connection from ignitor.
Disassemble ignitor from burner by removing the 2
self-tapping screws.
Reverse procedure for installing the new ignitor probe.
NOTE: Before reestablishing power to the dryer, visually
check the following: (refer to the illustration).
The flame-probe, ignitor probe, and ground rod are all on
the same line of axis.
There should be a 1/8” gap (+/- 1/32) between the ignitor
probe and ground rod.
Do not wrap the red high voltage wire and flame-probe
wire together. (Improper operation may result.) They may
run along side each other.
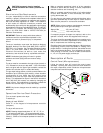
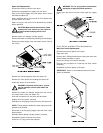
Hot Surface Ignitor
Discontinue electrical power to the dryer.
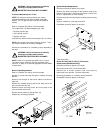
Disconnect the hot surface ignitor wires from S1 and ground
(GND) on the HSI module.
Disassemble hot surface ignitor probe from burner by
removing the one self-tapping screw.
Reverse procedure for installation of new hot surface ignitor.
NOTE: Do not wrap the hot surface ignitor wires and the
flame electrode wire together. Improper operation may
result. They may run alongside each other.
Reestablish electrical power to the dryer.
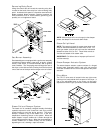
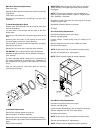
Gas Valve Replacement
(Refer to burner illustration on page 11)
Discontinue electrical power to the dryer.
Close shutoff valves in gas supply line.
Disconnect gas valve wiring.
NOTE: Identify location of each wire for correct
reinstallation.
Break union connection before gas valve.
Loosen and remove 4 screws securing pipe brackets to
burner.
Remove valve and manifold assembly from dryer.
Remove valve mounting bracket, manifold and piping from
gas valve.
Reverse procedure for installing new gas valve.
WARNING: Test all connections for leaks by
brushing on a soapy water solution.
NEVER TEST FOR LEAKS WITH A FLAME!!!
Main Burner Orifices Replacement
Refer to “To Replace Gas Valve” and follow steps.
Unscrew main burner orifices and replace.
NOTE: Use extreme care when removing and replacing
orifices. These orifices are made of brass and are easily
damaged.
Reverse the removal procedure for reinstalling.
!


