5
Before mounting the doorbell on a wall, make sure you test if
the location you install the doorbell is in range, and adjust the
camera angle to best suit your needs.
You may unplug the AC power rst so that you can move around
more conveniently to make the tests.
To test the location for installation:
Hold the doorbell in the location where you want to install the
doorbell, then follow the steps below to test the reception range
and video capture angle.
Press MENU >> Press q or p to Settings >> Press SELECT.
Press q or p to Doorbell setup >> Press SELECT.
Press /DOORBELL to check the video streaming
quality. Press ISO, then press + or - to adjust the video
streaming brightness.
If audio feedback occurs, press on the handset to turn off
the speakerphone.
If the desired location is in good range, the handset
displays .
If the desired location is not in good range, the handset
ashes in red. Press INFO for instructions to relocate your
handset and/or telephone base. When the reception is in
good range, the handset displays . Press OK to return to
the video streaming.
Keep the video streaming on for camera lens adjustment.
When you check for the desirable location to install the doorbell:
Make sure the visitor is standing in a reasonable distance
away from the doorbell.
Avoid mounting it to where it is exposed to direct sunlight.
Avoid mounting it to where reections may be caused by
sunlight, for example, opposite to a white wall.
Avoid placing other cordless devices near the doorbell. They
may cause interference.
1.
2.
3.
•
•
•
4.
•
•
•
•
4
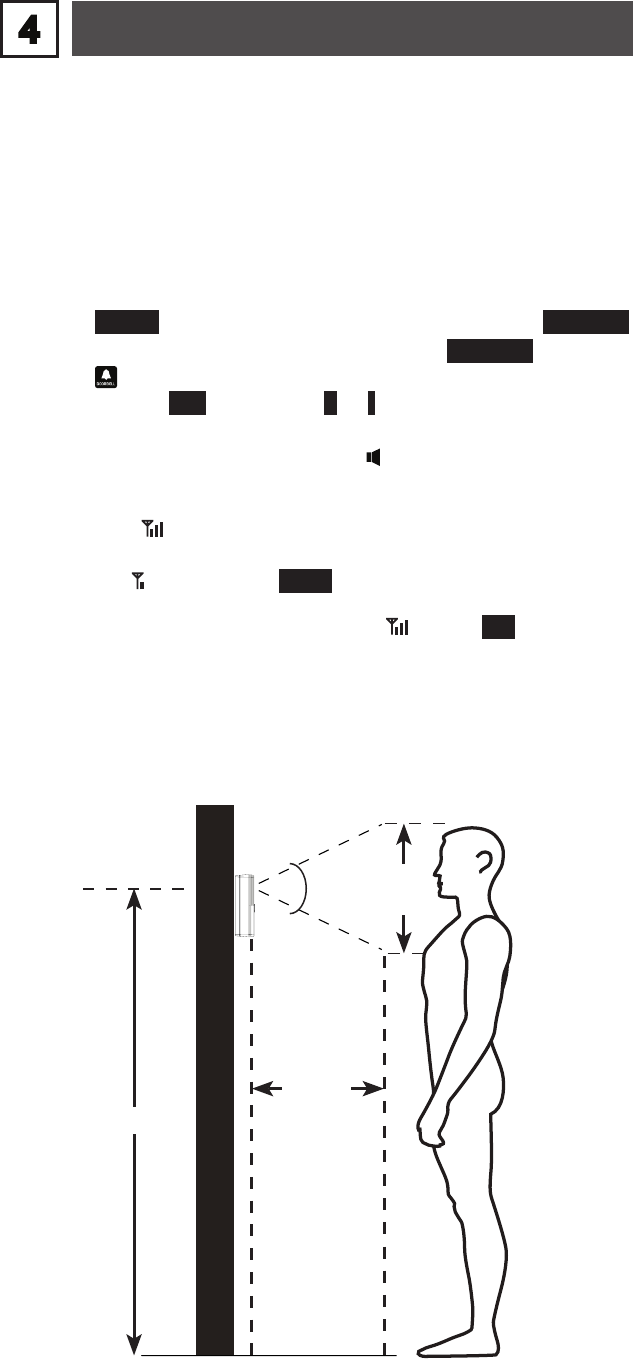
Doorbell location testing
18
inches
50 degrees
63 inches
20
inches
Shooting area


